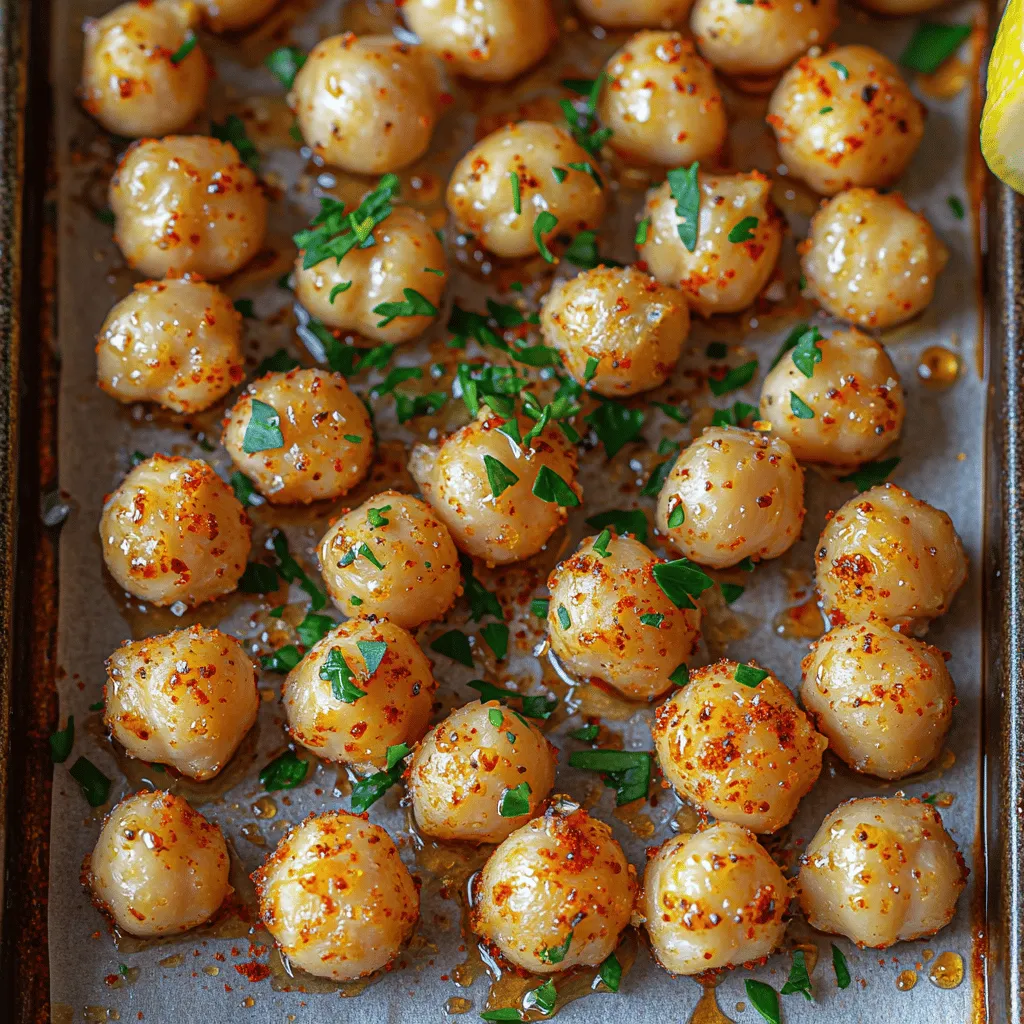
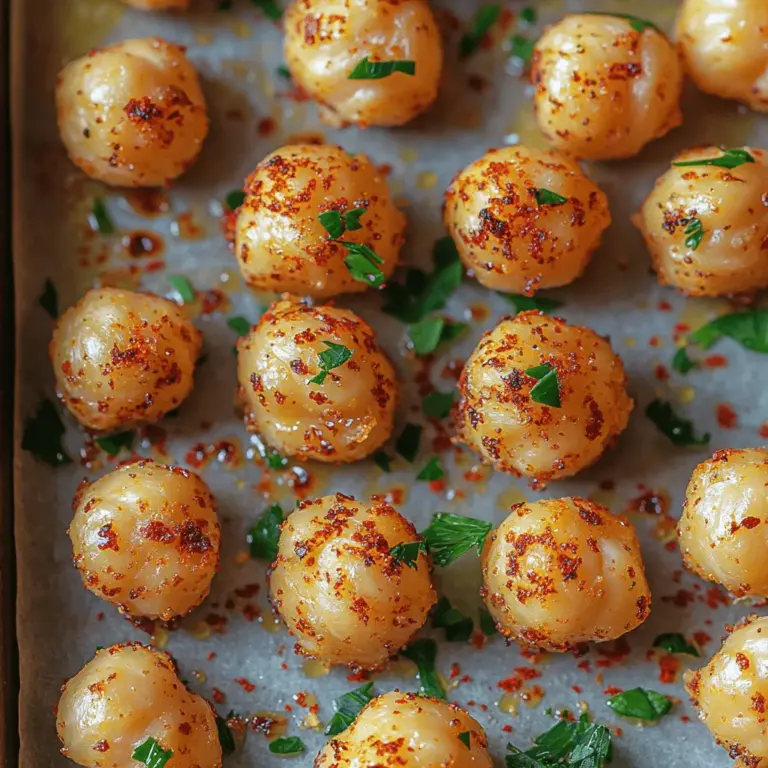
Introduction to Crispy Roasted Garlic Chickpeas
In recent years, the culinary world has embraced healthier snacking options, with crispy roasted garlic chickpeas emerging as a standout choice that tantalizes the taste buds while nourishing the body. These crunchy morsels are not just a snack; they represent a shift towards plant-based eating, making them a favorite among health-conscious individuals and food enthusiasts alike. With their simplicity and minimal ingredient requirements, crispy roasted garlic chickpeas serve as an ideal option for those seeking to indulge in flavor without sacrificing nutrition.
Chickpeas, also known as garbanzo beans, have gained immense popularity in contemporary cooking due to their versatility. Whether tossed in salads, blended into hummus, or roasted to crispy perfection, chickpeas can seamlessly fit into various culinary applications. Their nutty flavor and satisfying texture make them a delightful addition to any meal or snack. As plant-based diets continue to trend upward, incorporating chickpeas into your culinary repertoire offers not only a delicious experience but also a nutritious one.
The allure of crispy roasted garlic chickpeas lies in their wonderful flavor profile. Infused with garlic and a blend of spices, they boast a savory depth that leaves a lasting impression on your palate. This recipe is not only about creating a quick snack but also about elevating the humble chickpea into a gourmet experience that anyone can replicate at home.
Understanding Chickpeas: A Nutritional Powerhouse
Chickpeas are often celebrated as a nutritional powerhouse, boasting an impressive array of health benefits. Rich in both protein and fiber, they are an excellent plant-based alternative for individuals looking to increase their protein intake without relying on meat. Just one cup of cooked chickpeas delivers approximately 15 grams of protein and 12 grams of fiber, making them an ideal addition to a balanced diet.
The fiber content in chickpeas plays a vital role in promoting digestive health. It aids in regular bowel movements and helps maintain a feeling of fullness, which can be beneficial for those managing their weight. Additionally, the protein found in chickpeas supports muscle repair and growth, making them a popular choice among athletes and fitness enthusiasts.
Chickpeas are also associated with several potential health benefits. Research has shown that their consumption may contribute to improved heart health by helping to lower cholesterol levels and regulate blood pressure. Moreover, the antioxidants and vitamins present in chickpeas can support overall health, reducing the risk of chronic diseases.
Beyond their role in snacking, chickpeas can be integrated into various meals, from hearty stews to refreshing salads. They can be roasted, sautéed, or blended, showcasing their incredible versatility in both savory and sweet dishes. As more people seek to incorporate plant-based ingredients into their diets, chickpeas stand out as a staple that can easily be adapted to numerous culinary styles.
Ingredients Breakdown for Crispy Roasted Garlic Chickpeas
To create the perfect crispy roasted garlic chickpeas, understanding the role of each ingredient is essential. This recipe is straightforward, requiring just a handful of ingredients that work harmoniously together to achieve a delightful snack.
Chickpeas: The Base Ingredient
At the heart of this recipe are the chickpeas themselves. You can choose between using canned or dried chickpeas, but for those looking for convenience, canned chickpeas are an excellent option. They are pre-cooked and ready to use, significantly reducing preparation time. If you opt for dried chickpeas, it’s essential to soak and cook them beforehand to achieve the desired texture. Whichever you choose, chickpeas serve as the perfect canvas for the flavors to come.
Olive Oil: Enhancing Flavor and Texture
Olive oil is another critical ingredient in this recipe. Not only does it enhance the flavor of the chickpeas, but it also plays a vital role in achieving that coveted crispy texture. Olive oil is rich in healthy monounsaturated fats and antioxidants, making it a heart-healthy choice. When drizzled over the chickpeas before roasting, it helps them crisp up beautifully in the oven, ensuring a satisfying crunch in every bite.
Garlic: The Flavor Booster
Garlic is the star flavor component of this dish, infusing the chickpeas with its aromatic essence. Known for its pungent taste and numerous health benefits, garlic also adds a savory depth that complements the nuttiness of the chickpeas. Its antioxidant properties may help boost the immune system, making it a revered ingredient in many cuisines worldwide. In this recipe, roasted garlic elevates the flavor profile, making these chickpeas irresistible.
Spices: Adding Depth and Character
To further enhance the flavor of crispy roasted garlic chickpeas, a blend of spices is employed. Smoked paprika adds a subtle smokiness that deepens the flavor, while sea salt and black pepper provide essential seasoning. Cayenne pepper introduces a touch of heat, allowing the chickpeas to have a delightful kick. Each spice contributes to the overall character of the dish, creating a dynamic flavor experience that keeps you reaching for more.
Lemon Juice and Fresh Parsley: The Finishing Touches
Finally, a splash of lemon juice and a sprinkle of fresh parsley bring brightness and freshness to the dish. The acidity of the lemon juice cuts through the richness of the olive oil and garlic, balancing the flavors beautifully. Fresh parsley not only adds a pop of color but also provides additional nutrients and enhances the overall presentation. Together, these finishing touches elevate crispy roasted garlic chickpeas from a simple snack to a gourmet delight.
Step-by-Step Guide to Making Crispy Roasted Garlic Chickpeas
With a clear understanding of the ingredients and their roles, you’re ready to embark on the journey of making crispy roasted garlic chickpeas. The process is straightforward yet requires attention to detail to achieve that perfect crunch.
Preheating the Oven: Setting the Stage for Crispy Perfection
Begin by preheating your oven to 400°F (200°C). This step is crucial, as a properly preheated oven ensures that the chickpeas roast evenly and develop a satisfying crispiness. While the oven heats, you can prepare the chickpeas, allowing for a seamless transition into the roasting process.
As you prepare for this delightful culinary experience, gather your ingredients and equip your kitchen with the necessary tools, including a baking sheet, a mixing bowl, and a spatula. With everything in place, you’re ready to create a snack that not only satisfies your cravings but also supports your health goals.
Stay tuned for the detailed steps in the next section, where we’ll guide you through the preparation and roasting process to ensure your crispy roasted garlic chickpeas turn out perfectly every time.

The Importance of Oven Temperature in Achieving Crispiness
When it comes to roasting chickpeas, the oven temperature plays a pivotal role in achieving that coveted crispy texture. Ideally, preheat your oven to 400°F (200°C). This temperature is hot enough to create the perfect environment for moisture to escape from the chickpeas while simultaneously allowing the outside to crisp up nicely. If the oven is too cool, the chickpeas will roast but remain soft and chewy instead of turning delightfully crunchy. Conversely, if the temperature is too high, they may burn before they have a chance to dry out completely.
Preparing the Chickpeas: The Key to Crunch
The first step in preparing your chickpeas for roasting is ensuring they are thoroughly dried. This is essential for achieving that ultimate crunch. Here are some effective techniques for drying chickpeas effectively:
1. Canned Chickpeas: If you’re using canned chickpeas, start by draining them well and rinsing under cold water to remove excess sodium. Once rinsed, transfer them to a clean kitchen towel or paper towels and pat them dry. This step is critical, as any moisture left on the chickpeas will steam them during roasting, preventing that crunchy finish.
2. Dried Chickpeas: If you prefer to use dried chickpeas, soak them overnight in plenty of water. After soaking, drain and rinse them, then cook them until tender (about 1-1.5 hours). Again, ensure they are completely dried before proceeding to the next step.
The goal here is to remove as much moisture as possible, allowing the oven to work its magic and transform the chickpeas into crunchy bites of goodness.
Mixing Ingredients: Achieving Flavor Harmony
Once your chickpeas are prepped, it’s time to mix them with the flavorings. This stage is crucial for ensuring an even distribution of seasoning, which is essential for a delicious final product. In a large bowl, combine the dried chickpeas with olive oil, minced garlic, salt, and any spices you desire, such as smoked paprika, cumin, or chili powder.
To achieve flavor harmony, toss the chickpeas with your hands or a spatula, ensuring that every chickpea is coated with the oil and spices. This thorough mixing is key; unevenly coated chickpeas can lead to some being bland while others are overly seasoned. Aim for an even coating to ensure every bite is bursting with flavor.
Spreading on the Baking Sheet: Maximizing Roasting Potential
The way you spread the chickpeas on the baking sheet is just as important as how you prepare and season them. To maximize roasting potential, follow these guidelines:
1. Use Parchment Paper: Line your baking sheet with parchment paper. This not only prevents sticking but also promotes even browning. The paper allows air to circulate around the chickpeas while they roast, helping to eliminate any remaining moisture.
2. Space Them Out: Spread the seasoned chickpeas in a single layer, giving them enough space to breathe. Crowding the pan will trap steam, leading to soggy chickpeas instead of the desired crispiness. If necessary, use two baking sheets to ensure each chickpea has its own space.
By following these steps, you’ll ensure that your chickpeas have the best chance to roast evenly and become wonderfully crispy.
Roasting Process: Timing for Perfect Texture
Now that your chickpeas are ready for the oven, it’s time to roast. Place the baking sheet in your preheated oven and set a timer for 20 minutes. After this initial period, give the chickpeas a good shake or stir with a spatula to ensure they cook uniformly.
Continue roasting for an additional 15-20 minutes, checking for doneness. The chickpeas are done when they are golden brown and crunchy. Keep a close eye on them during the last few minutes of roasting; they can go from perfectly crispy to burnt quite quickly.
An important sign of readiness is the sound; they should make a pleasant crunching sound when you shake the pan. Once done, remove them from the oven and allow them to cool slightly before serving.
Finishing Touch: The Importance of Lemon and Parsley
For the final touch, consider how you finish your crispy roasted garlic chickpeas. A drizzle of fresh lemon juice not only enhances the flavor but also adds a refreshing brightness that beautifully complements the roasted garlic. To do this, simply squeeze half a lemon over the warm chickpeas and toss gently to combine.
Additionally, garnishing with fresh parsley adds a burst of color and an aromatic herbaceous element. Chop the parsley finely and sprinkle it over the chickpeas before serving. This finishing touch not only elevates the presentation but also enhances the overall flavor profile, making your roasted chickpeas even more delightful.
Serving Suggestions for Crispy Roasted Garlic Chickpeas
Crispy roasted garlic chickpeas are incredibly versatile and can be enjoyed in numerous ways. Here are some delicious serving suggestions:
As a Standalone Snack
One of the simplest and most satisfying ways to enjoy roasted chickpeas is as a standalone snack. Their crunchy texture and rich flavor make them an excellent alternative to chips or crackers. Serve them warm or at room temperature for the best experience. You can even sprinkle some extra seasoning if you desire a bolder flavor.
Topping for Salads and Grain Bowls
Roasted chickpeas make a fantastic addition to salads and grain bowls, providing a delightful crunch and a boost of protein. Toss them into a fresh garden salad or a hearty grain bowl with quinoa, brown rice, or farro. They pair beautifully with greens, roasted vegetables, and a drizzle of tahini or vinaigrette, creating a well-rounded and satisfying meal.
Incorporation into Meal Prep for Added Protein
If you’re looking to enhance your meal prep routine, roasted chickpeas are an excellent choice. They can be made in bulk and stored for the week, adding a healthy protein source to any meal. Pack them alongside your favorite veggies, grains, and proteins for a balanced lunch or dinner option.
Storage and Shelf Life of Roasted Chickpeas
To maintain the freshness and crunch of your roasted chickpeas, proper storage is crucial. Here are some best practices:
– Containers: Store the cooled chickpeas in an airtight container to prevent moisture from getting in. Glass jars or plastic containers with tight-fitting lids work well for this purpose.
– Conditions: Keep them in a cool, dry place, away from direct sunlight. A pantry or cupboard is ideal.
Shelf Life
When stored properly, roasted chickpeas can last for up to a week. However, for the best texture and flavor, it’s recommended to consume them within a few days. If you find they have lost their crunch, you can re-crisp them by spreading them out on a baking sheet and popping them back in a preheated oven at 350°F (175°C) for about 10 minutes.
Conclusion: Embracing Health and Flavor with Crispy Roasted Garlic Chickpeas
Crispy roasted garlic chickpeas are not just a delicious snack; they embody a perfect balance of health and flavor. By making them at home, you have control over the ingredients, ensuring a wholesome treat that is both satisfying and nutritious. These chickpeas are high in protein, fiber, and essential nutrients, making them an ideal choice for those mindful of their diet.
The versatility of roasted chickpeas allows for endless experimentation with flavors and spices, encouraging creativity in the kitchen. Whether you enjoy them on their own, as a salad topping, or as part of your meal prep, these crispy bites are sure to become a staple in your culinary repertoire. So, gather your ingredients, follow the steps, and enjoy the delightful crunch of homemade crispy roasted garlic chickpeas!

