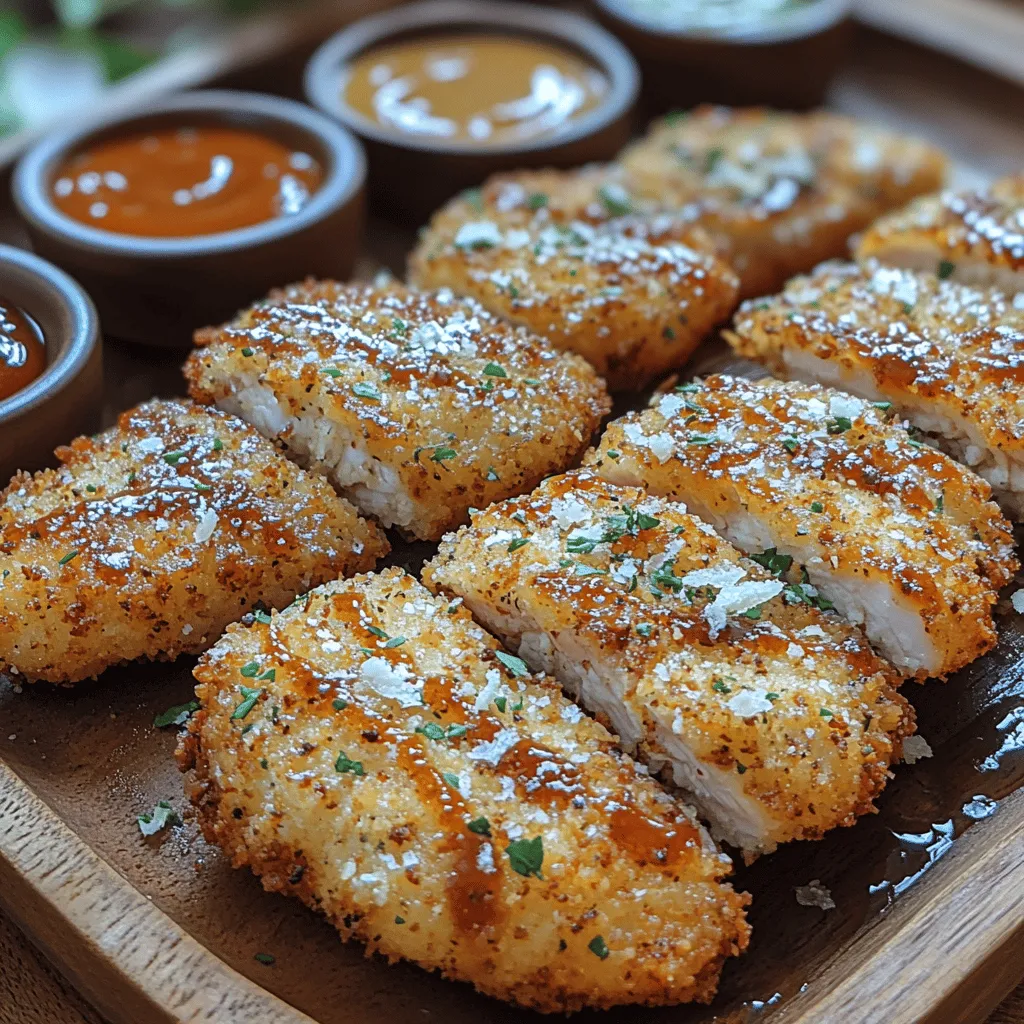
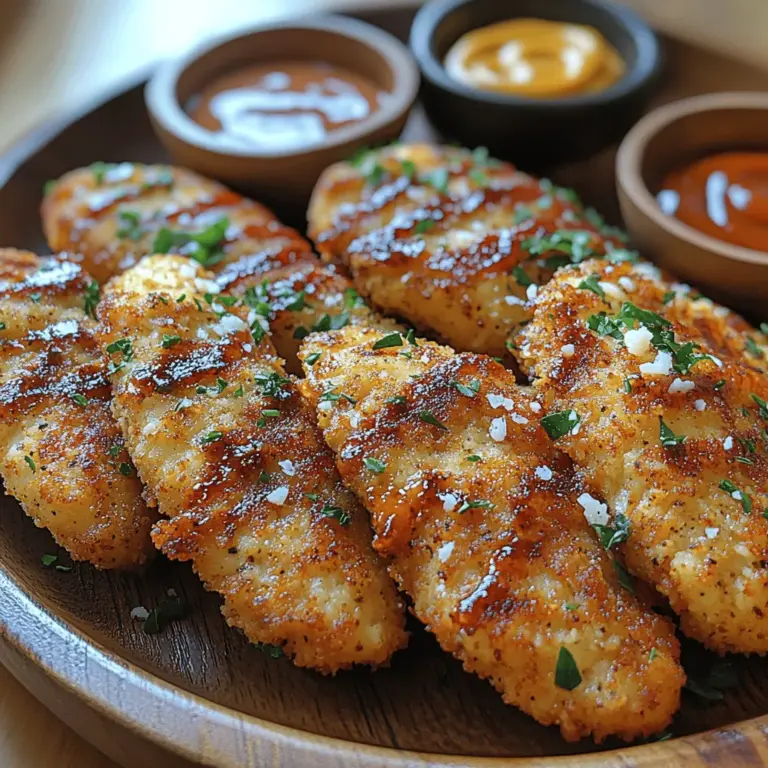
Crunchy Delight Panko Chicken Fingers: A Crispy Comfort Food Favorite
In the realm of comfort food, few dishes can rival the delight of crunchy chicken fingers. The beloved Crunchy Delight Panko Chicken Fingers offer a perfect blend of crispy texture and savory flavor, making them an ideal choice for family meals, game day snacks, or quick weeknight dinners. Whether served alongside a tangy dip or a side of fresh vegetables, these chicken fingers promise to satisfy even the pickiest of eaters. This article not only provides a comprehensive recipe but also explores the nuances of each ingredient and cooking technique, ensuring that your chicken fingers turn out perfectly every time.
The Allure of Panko Breadcrumbs
Understanding Panko Breadcrumbs
Panko breadcrumbs are a Japanese-style breadcrumb that has gained immense popularity in kitchens around the world. Unlike traditional breadcrumbs, which are typically made from finely ground bread, Panko is produced from crustless bread that is coarsely ground into large, airy flakes. This unique texture is what sets Panko apart and contributes to the exceptional crunchiness of dishes like chicken fingers.
The primary difference between traditional breadcrumbs and Panko lies in their composition and texture. Traditional breadcrumbs can be dense and absorbent, leading to a heavier coating that can sometimes become soggy when fried. In contrast, Panko’s light and flaky structure allows for a crispier exterior that perfectly contrasts with the juicy chicken inside. The large surface area of Panko also enables it to hold onto oils and seasonings better, enhancing the overall flavor of the dish.
How Panko Enhances Flavor and Texture
When it comes to achieving that perfect crunch, Panko is the gold standard. The airiness of Panko breadcrumbs allows for greater expansion during cooking, giving your chicken fingers an incredibly crunchy exterior. This unique texture also helps to lock in moisture within the chicken, ensuring that every bite is tender and juicy. The result is a satisfying bite that delivers both crunch and flavor, making these chicken fingers a standout dish.
Ingredients Breakdown
Chicken Breast
The foundation of any great chicken finger recipe is, of course, the chicken itself. For this recipe, using fresh chicken breast is crucial for achieving the best flavor and texture. Fresh chicken breast is not only more flavorful than frozen options, but it also tends to be juicier, resulting in a more enjoyable eating experience. When selecting chicken breasts, look for cuts that are plump and have a pale pink color. Avoid any breasts with discoloration or an off smell, as these can indicate spoilage.
While boneless, skinless chicken breast is the most common choice for chicken fingers, there are alternatives you can consider. Chicken tenders, which are the smaller strips of meat located beneath the breast, are another excellent option. They are naturally more tender and cook quickly, making them ideal for fast meals. If you prefer dark meat, boneless chicken thighs can also work well, offering a richer flavor and juiciness.
Dredging Station Essentials
Creating the perfect chicken finger involves a meticulous dredging process, which is essential for achieving that coveted crunch. The dredging station typically consists of three shallow dishes, each serving a specific purpose in the breading process.
1. Flour: The first dish contains all-purpose flour, which creates a base layer for the chicken. The flour’s primary role is to provide a dry surface that helps the egg adhere to the chicken. When coating chicken, it’s essential to ensure an even layer of flour to create a solid foundation for the subsequent coatings.
2. Eggs: The second dish is filled with beaten eggs. Eggs act as a binding agent, helping the Panko breadcrumbs stick to the chicken. When using eggs for dredging, be sure to whisk them thoroughly so that the mixture is smooth and homogenous. Some recipes even call for adding a splash of milk or water to the eggs to create a lighter texture.
3. Seasoning Mix and Panko Breadcrumbs: The third dish is where the magic happens. This is where you’ll combine Panko breadcrumbs with your choice of seasonings, such as garlic powder, onion powder, paprika, and salt. These seasonings not only enhance the flavor of the chicken fingers but also contribute to the overall crunch. For an extra layer of richness, consider adding grated Parmesan cheese to the breadcrumb mixture. The cheese will melt slightly during cooking, creating a deliciously crispy crust.
The Role of Vegetable Oil in Frying
Frying your chicken fingers is where the transformation into a crunchy delight takes place. Choosing the right type of oil is essential for achieving the best results. Vegetable oil, canola oil, or peanut oil are all excellent choices due to their high smoke points and neutral flavors. These oils can withstand the high temperatures required for frying without burning, allowing for even cooking and a crispy exterior.
Temperature is another crucial factor when frying chicken fingers. For optimal frying, heat the oil to around 350°F (175°C). If the oil is too hot, the coating may burn before the chicken is fully cooked; if it’s not hot enough, the chicken fingers will absorb excess oil, resulting in a greasy texture. Using a thermometer can help ensure that the oil is at the perfect temperature, promoting even frying and a delightful crunch.
Step-by-Step Preparation
Setting Up Your Dredging Stations
With your ingredients ready and your frying oil heated, it’s time to set up your dredging stations. Start by preparing three shallow dishes: one for flour, one for the beaten eggs, and one for the seasoned Panko breadcrumbs. Organize them in a line, creating a streamlined workflow for coating the chicken.
To ensure an even coating on each chicken strip, you’ll want to work in batches. Dredge each piece of chicken in the flour first, shaking off any excess. Next, dip it into the egg mixture, allowing any excess egg to drip off before transferring it to the Panko breadcrumb mixture. Press gently to ensure that the breadcrumbs adhere well, providing a generous coating that will crisp up beautifully during frying.
Coating Techniques for Maximum Crunch
The key to achieving maximum crunch lies in the coating technique. When applying the Panko breadcrumb mixture, don’t rush the process. Take your time to press the breadcrumbs onto the chicken strips, ensuring that each piece is fully coated. This attention to detail will pay off in the end, as a well-coated chicken finger will create a satisfying crunch that contrasts beautifully with the tender chicken inside.
Once all the chicken strips are coated, it’s time to fry them in the hot oil. Carefully lower the chicken fingers into the oil, being cautious not to overcrowd the pan. Frying in small batches allows for even cooking and prevents the oil temperature from dropping too drastically. After a few minutes, the chicken fingers will turn a golden brown, signaling that they are ready to be removed from the oil and placed on a wire rack to cool slightly.
This introduction sets the stage for the delicious Crunchy Delight Panko Chicken Fingers, guiding you through the essential ingredients, techniques, and preparation methods that will ensure your dish is a hit at any gathering or mealtime. Stay tuned for the next part, where we’ll dive deeper into cooking methods, serving suggestions, and tips for storing leftovers.

Detailed Instructions for Coating Chicken Strips
Coating chicken strips properly is a crucial step in achieving that irresistible crunch. Begin by preparing your chicken strips—ensure they are uniform in size for even cooking.
1. Set Up Your Breading Station: Arrange three shallow dishes in a line. In the first dish, place about 1 cup of all-purpose flour seasoned with salt and pepper. In the second dish, whisk 2 large eggs until well combined. In the third dish, spread out 2 cups of Panko breadcrumbs.
2. Coat the Chicken: Take one chicken strip and dredge it in the seasoned flour, ensuring it is thoroughly coated. Shake off any excess flour. This step is crucial as it helps the egg adhere to the chicken, creating a solid base for the breadcrumbs.
3. Dip in Egg: Next, dip the floured chicken strip into the egg mixture, allowing any excess to drip back into the bowl. The egg acts as a binding agent for the Panko.
4. Press into Panko: Here’s where the magic happens—place the egg-coated chicken strip into the Panko breadcrumbs. Press the breadcrumbs onto the chicken firmly, ensuring each strip is well-coated. This pressing technique is vital for adherence and achieving that desired crunch. Repeat the process for all chicken strips.
Mastering the Frying Process
Frying chicken fingers to perfection can be daunting, but with the right techniques, you can achieve golden-brown, crispy results.
Optimal Frying Temperature and Techniques
The ideal frying temperature for chicken fingers is between 350°F and 375°F (175°C to 190°C). Use a thermometer to monitor the oil temperature accurately. If the oil is too cool, the chicken will absorb excess oil and become greasy. Conversely, if it’s too hot, the outside will burn while the inside remains uncooked.
1. Choosing the Right Oil: Select oils with high smoke points such as canola, vegetable, or peanut oil. These oils tolerate high temperatures without burning.
2. Frying Method: Use a deep skillet or a heavy-bottomed pot for frying. Fill it with about 2 inches of oil. Heat the oil slowly, and once it reaches the desired temperature, carefully lower in the chicken strips using a slotted spoon or tongs.
The Importance of Frying in Batches
To maintain the oil temperature, it’s essential to fry the chicken fingers in batches rather than overcrowding the pan. Overcrowding can cause the temperature to drop, resulting in soggy chicken fingers. Frying in batches allows for even cooking and crispiness.
1. Fry for 4-5 Minutes: Cook the chicken fingers for about 4-5 minutes on each side or until they are a deep golden brown.
How to Know When Chicken Fingers Are Perfectly Cooked
To ensure your chicken fingers are cooked through, use a meat thermometer to check the internal temperature. It should reach 165°F (74°C). If you don’t have a thermometer, cut into one of the thicker strips; the meat should be opaque and juices should run clear.
Cooling and Draining
Once your chicken fingers are golden and cooked, it’s essential to drain excess oil properly.
Why Draining Excess Oil is Crucial
Draining excess oil prevents the chicken fingers from becoming greasy. Use a wire rack placed over a baking sheet for draining. This allows air to circulate around the chicken fingers, keeping them crispy.
Tips for Cooling Chicken Fingers Without Losing Crispiness
To keep your chicken fingers crispy during the cooling process, do not cover them with foil or a lid, as this traps steam and makes them soggy. Instead, let them cool on the rack for a few minutes before serving.
Serving Suggestions
Perfect Pairings for Chicken Fingers
Crunchy Delight Panko Chicken Fingers shine when paired with delicious dipping sauces and sides.
Popular Dipping Sauces
1. Honey Mustard: The sweet and tangy flavor of honey mustard complements the crispy chicken perfectly.
2. BBQ Sauce: A classic choice, BBQ sauce adds a smoky sweetness that enhances the chicken’s flavor.
3. Ranch Dressing: Creamy ranch is another favorite, providing a cool contrast to the warm crispy fingers.
Creative Ideas for Serving with Sides
1. French Fries: A classic pairing, serve your chicken fingers alongside hot, crispy fries for a satisfying meal.
2. Coleslaw: The crunch of coleslaw offers a refreshing balance to the crispy chicken.
3. Salads: For a lighter option, serve with a fresh green salad drizzled with a tangy vinaigrette.
Presentation Tips for a Stunning Platter
Creating an appealing presentation can elevate your dish.
1. Arranging Chicken Fingers: Lay the chicken fingers in a fan shape or stack them upright for visual interest.
2. Garnishes: Fresh herbs, such as parsley or cilantro, can brighten your platter. Lemon wedges not only add a pop of color but also complement the dish’s flavors.
Nutritional Insights
Caloric and Nutritional Breakdown
Understanding the nutritional content of your meal helps in making informed choices. A serving of Crunchy Delight Panko Chicken Fingers (approximately 4 fingers) contains about 400-450 calories, depending on the frying oil used.
Nutritional Benefits of Chicken Breast
Chicken breast is a lean source of protein, providing essential amino acids necessary for muscle growth and repair. It’s also low in fat, making it a healthier option compared to other meat cuts.
Balancing Indulgence with Health-Conscious Choices
To balance indulgence, consider pairing chicken fingers with a side of vegetables or a salad. This not only adds nutritional value but also helps you feel fuller with fewer calories.
Variations and Customizations
Gluten-Free Alternatives for the Recipe
For a gluten-free option, substitute regular flour with almond flour or a gluten-free flour blend. Ensure your Panko breadcrumbs are labeled gluten-free as well.
Flavor Variations: Adding Spices or Herbs to the Coating
Experiment with spices and herbs in your flour and Panko mixture to customize flavors. Try adding garlic powder, paprika, or Italian herbs for a unique twist.
Baking vs. Frying: How to Achieve a Healthier Version
For a healthier alternative, you can bake the chicken fingers. Preheat your oven to 425°F (220°C), place the coated chicken on a parchment-lined baking sheet, and spray lightly with cooking oil. Bake for 15-20 minutes, flipping halfway through, until golden and cooked through.
Conclusion
In conclusion, Crunchy Delight Panko Chicken Fingers are not just a meal; they embody the joy of cooking and sharing delicious food with loved ones. By understanding each ingredient and mastering the frying technique, you can create a dish that is sure to impress. With their crispy exterior and juicy interior, these chicken fingers are bound to become a staple in your kitchen. Enjoy the process of making them, and relish in the delightful experience they provide!

