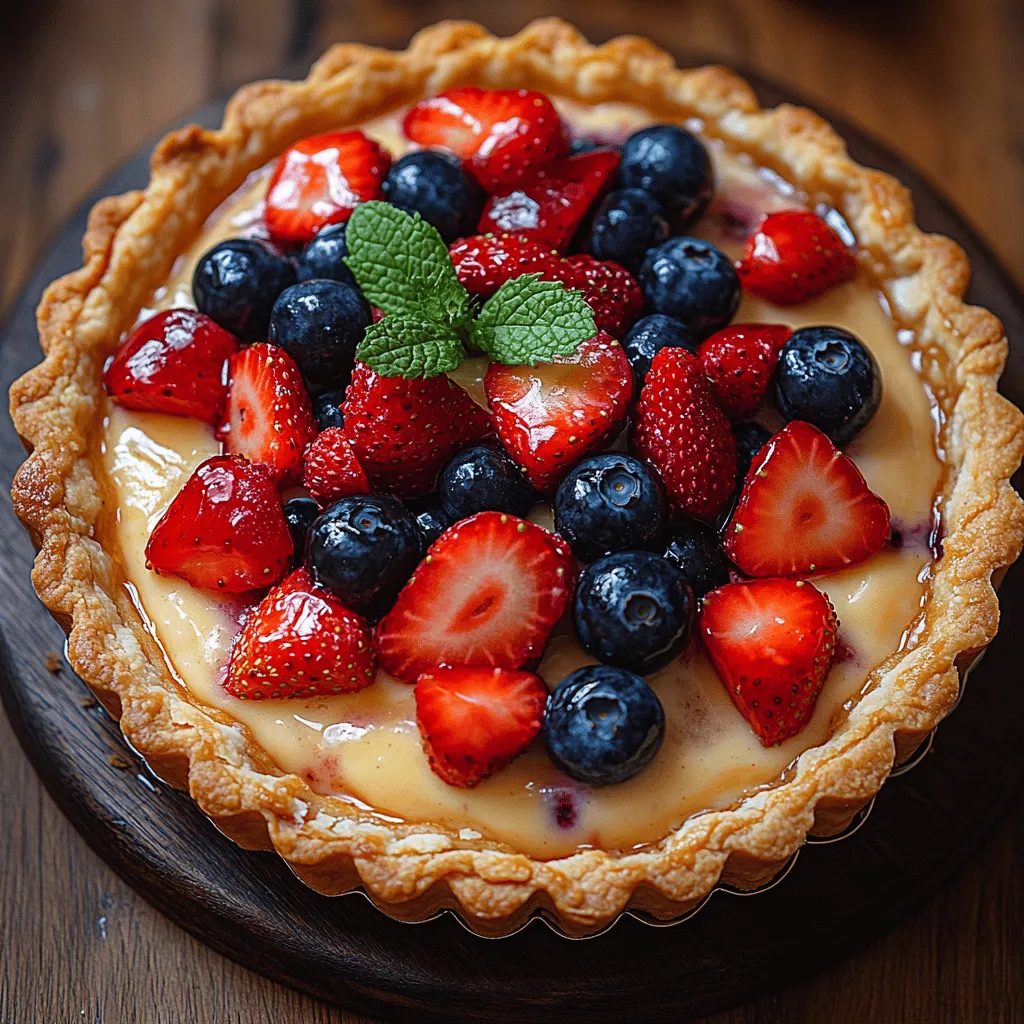
Velvety Vanilla Custard Tart: A Delightful Dessert Recipe
Introduction
The velvety vanilla custard tart stands as a quintessential dessert that combines elegance with simplicity, making it a favored choice for both novice bakers and seasoned pastry chefs alike. This delightful treat not only captivates the palate but also presents beautifully, making it an ideal centerpiece for any gathering or special occasion. Homemade desserts, like this custard tart, offer a sense of accomplishment and satisfaction that store-bought options simply cannot match.
The allure of the velvety vanilla custard tart lies in its harmonious blend of textures and flavors, featuring a flaky, buttery tart shell that encases a rich, creamy custard filling. Each bite reveals the perfect balance between the crispness of the crust and the smoothness of the custard, creating an irresistible dessert experience.
Understanding the Components of the Tart
To master the art of creating a velvety vanilla custard tart, it is crucial to understand the key components that contribute to its delightful taste and texture. The tart consists primarily of two elements: the tart shell and the vanilla custard filling.
The Tart Shell
The tart shell is the foundation of the dessert, and its texture is paramount to the overall experience. The choice of flour and butter is significant; all-purpose flour is commonly used for its balance of structure and tenderness. For the best results, opt for high-quality unsalted butter, as it imparts a rich flavor and aids in achieving that desirable flaky texture.
Egg yolk plays a crucial role in the tart shell as well. It acts as a binding agent, bringing the dough together while also enriching it, resulting in a tender crust that complements the custard filling. The incorporation of cold water helps to hydrate the flour and bind the ingredients without overworking the dough, ensuring a light and flaky finish once baked.
The Vanilla Custard Filling
The custard filling is where the true magic happens. Made from a combination of milk, cream, sugar, and egg yolks, it boasts a creamy consistency that is both luxurious and satisfying. The process of making custard involves gently heating the milk and cream, then tempering the egg yolks with the warm mixture before combining everything together. This method ensures a smooth texture, allowing the custard to set perfectly in the tart shell.
High-quality vanilla extract is essential for flavor enhancement. It is recommended to use pure vanilla extract or, for an even more intense flavor, vanilla bean paste or scraped vanilla beans. The aromatic notes of vanilla not only elevate the custard but also provide a warm, inviting scent that fills the kitchen during the baking process.
Ingredients Breakdown
Tart Shell Ingredients
1. All-Purpose Flour: Provides structure and texture to the crust. The gluten content helps in creating a sturdy shell that can hold the custard filling.
2. Unsalted Butter: Contributes to the flavor and flakiness of the tart shell. Cold butter is key to achieving that tender, crumbly texture.
3. Granulated Sugar: A small amount of sugar adds a hint of sweetness to the crust, balancing the flavors of the custard filling.
4. Egg Yolk: Adds richness and helps bind the ingredients together, resulting in a cohesive dough that is easy to work with.
5. Cold Water: Hydrates the flour without overworking the dough, ensuring the crust remains tender.
Vanilla Custard Filling Ingredients
1. Whole Milk: Forms the base of the custard, providing creaminess and richness.
2. Heavy Cream: Enhances the custard’s texture, making it smooth and luxurious.
3. Granulated Sugar: Sweetens the custard, balancing the richness of the cream and the egg yolks.
4. Egg Yolks: Essential for thickening the custard and adding richness.
5. Vanilla Extract: The star ingredient that imparts the characteristic flavor of the custard. The quality of the vanilla significantly impacts the final taste.
Garnish Ingredients
To elevate the presentation and flavor of your velvety vanilla custard tart, consider garnishing it with:
– Fresh Berries: Raspberries, strawberries, or blueberries add a pop of color and a refreshing tartness.
– Whipped Cream: A dollop of lightly sweetened whipped cream can provide an airy contrast to the rich custard.
– Mint Leaves: Fresh mint adds a touch of color and a hint of freshness that complements the custard beautifully.
Step-by-Step Instructions for Preparing the Tart Shell
Creating the perfect tart shell is essential for a successful custard tart. Follow these steps to ensure a beautifully baked crust.
Preparing the Dough
Start by sifting the all-purpose flour into a mixing bowl. This step helps aerate the flour and removes any lumps, ensuring a smooth dough. Next, cut the cold unsalted butter into small cubes, and add it to the flour. Using a pastry cutter or your fingertips, work the butter into the flour until the mixture resembles coarse crumbs. Be careful not to overwork the dough; the goal is to keep some small pieces of butter intact for a flaky texture.
Once the butter is incorporated, stir in the granulated sugar and egg yolk. Gradually add cold water, one tablespoon at a time, mixing until the dough begins to come together. You want it to be moist but not sticky; adjust the amount of water as necessary. Form the dough into a disk, wrap it in plastic wrap, and refrigerate it for at least 30 minutes. This chilling time allows the gluten to relax, resulting in a tender crust.
Rolling and Shaping
After the dough has chilled, lightly flour a clean surface and roll it out to approximately 1/8-inch thickness. Take care to roll from the center outward to maintain an even thickness. If the dough sticks, add a little more flour to your work surface and rolling pin.
Once rolled out, transfer the dough to your tart pan. To do this, gently roll the dough around the rolling pin and unroll it over the pan. Press the dough into the bottom and sides of the tart pan, ensuring there are no air pockets. Trim any excess dough hanging over the edges with a sharp knife, leaving about 1/4 inch to account for shrinkage during baking.
Blind Baking the Tart Shell
Blind baking is a crucial step to ensure your tart shell remains crisp and prevents any sogginess when the custard is added. Preheat your oven to 375°F (190°C). Line the tart shell with parchment paper or aluminum foil, and fill it with pie weights or dried beans to keep the crust from puffing up during baking.
Place the tart shell in the preheated oven and bake for 15 minutes. Afterward, carefully remove the weights and parchment paper, and return the shell to the oven for an additional 10-15 minutes, or until it is lightly golden. Watch closely to avoid overbaking, as a perfectly baked shell should be golden and crisp but not dark.
Once baked, allow the tart shell to cool completely before adding the velvety vanilla custard filling. This cooling step is essential to maintain the integrity of the custard and ensure that the flavors meld beautifully together, setting the stage for the delightful dessert that awaits.

Crafting the Perfect Vanilla Custard Filling
Heating the Cream and Milk
The foundation of a velvety vanilla custard tart lies in the custard filling, which is primarily made from cream, milk, sugar, vanilla, and eggs. Start by combining equal parts of heavy cream and whole milk in a medium-sized saucepan. Heat the mixture over medium-low heat, stirring gently to ensure even heating.
Temperature control is critical at this stage. You want to bring the mixture to just below boiling, around 180°F (82°C). If the cream and milk boil, the proteins can denature, leading to a grainy texture in your final custard. Instead, watch for small bubbles forming around the edges of the pan, which indicates that the mixture is hot enough without being overly aggressive.
Tempering the Eggs
Once your cream and milk mixture is at the right temperature, it’s time to temper the eggs. In a separate mixing bowl, whisk together the egg yolks and granulated sugar until the mixture becomes pale and slightly thickened. This process is crucial because it helps dissolve the sugar and aerates the yolks, contributing to a smoother texture.
To temper the eggs, gradually pour a small amount of the hot cream mixture into the egg yolks while whisking constantly. This step is important because it raises the temperature of the yolks without cooking them. After about a minute of whisking, continue to add the hot mixture slowly until you’ve incorporated about half of it. Once the eggs are tempered, pour the entire egg mixture back into the saucepan with the remaining cream and milk, whisking to combine.
Cooking the Custard
Now, return the saucepan to the stove over low heat. Stir the custard continuously with a wooden spoon or heat-resistant spatula, making sure to scrape the bottom and sides of the pan. This cautious stirring prevents the custard from sticking and burning.
Knowing when the custard is cooked is key to achieving the correct consistency. You’re looking for it to thicken enough to coat the back of the spoon. A good test is to dip a spoon into the custard and then run your finger across the back; if the line holds, you’ve achieved the perfect consistency. Temperature-wise, you want to reach about 175°F (80°C) for the custard to set properly.
Once cooked, remove the custard from heat and strain it through a fine-mesh sieve into a clean bowl. This step catches any cooked egg bits, ensuring a silky texture. Stir in pure vanilla extract for an added depth of flavor.
Assembling the Velvety Vanilla Custard Tart
Pouring the Custard into the Shell
With your custard now ready, it’s time to assemble your tart. Carefully pour the vanilla custard into the cooled tart shell. To achieve a smooth surface, you might want to pour the custard from a height of around 12 inches. This allows for a more even distribution and minimizes bubbles.
If you notice any bubbles forming on the surface, you can gently tap the tart pan on the counter to release them. A small offset spatula can also be used to smooth out the top if necessary, ensuring a pristine finish to your tart.
Chilling the Tart
Cover the tart with plastic wrap to prevent any skin from forming on the custard as it cools. Refrigerate it for at least four hours, but overnight is preferable. Chilling not only sets the custard, making it easier to slice, but it also enhances the flavors, allowing them to meld beautifully.
Serving Suggestions and Presentation Ideas
How to Remove the Tart from the Pan
When it’s time to serve your custard tart, you’ll want to remove it from the pan without damaging its delicate structure. Start by running a thin knife around the edge of the tart to loosen it from the sides. If you used a springform pan, simply release the sides. For a tart pan, gently push the bottom up to release the tart, being careful to support the edges as you lift it out.
Creative Garnishing Ideas
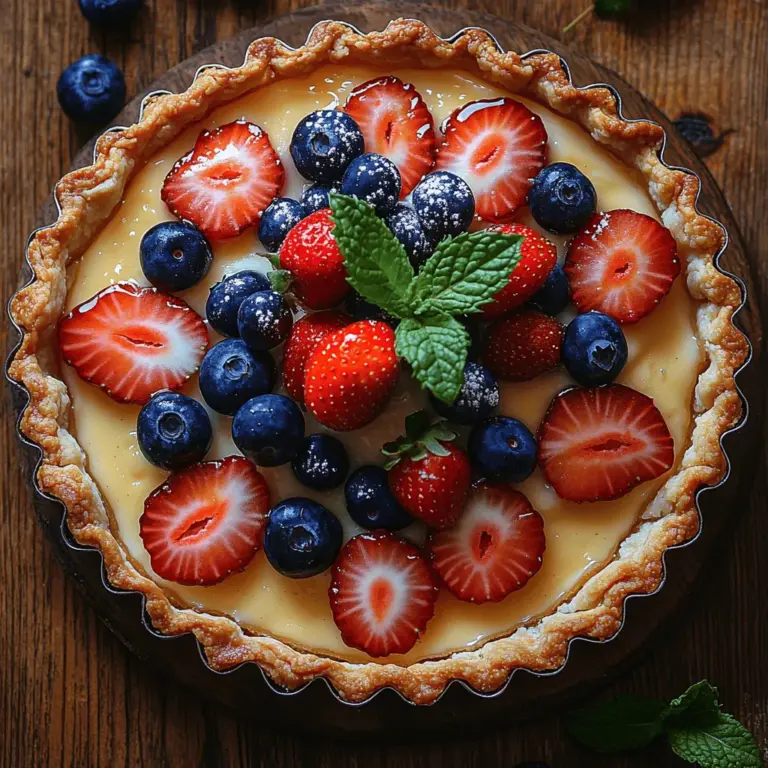
Garnishing your tart can elevate its appearance and flavor. Consider topping your custard tart with fresh seasonal berries, such as raspberries, blueberries, or strawberries. The tartness of the berries offers a delightful contrast to the rich custard.
Adding a few mint leaves not only enhances the visual appeal but also adds a refreshing note. For an extra touch, dust the top of the tart with powdered sugar just before serving for a sophisticated finish.
Suggestions for Pairing the Tart with Beverages
This velvety custard tart pairs beautifully with a variety of beverages. A cup of freshly brewed coffee or a smooth chai tea complements the sweetness of the tart. For a lighter option, consider serving it with a chilled glass of sparkling water or lemonade, which can refresh the palate between bites.
Storage and Shelf Life of the Tart
Best Practices for Storing the Tart
To maintain the freshness of your vanilla custard tart, store it in the refrigerator, covered with plastic wrap or in an airtight container. This will prevent the custard from absorbing odors and maintaining its creamy texture. Avoid leaving the tart at room temperature for extended periods, as the custard can spoil.
Discussing the Shelf Life of the Tart
When stored properly, your custard tart can last in the fridge for about 3-4 days. However, the quality is best enjoyed within the first two days of preparation, as the custard may begin to lose its silkiness over time. If you’ve made any variations or added ingredients, be sure to consider their shelf life as well.
Exploring Variations and Customizations
Suggestions for Flavor Variations
While the classic vanilla custard tart is delightful on its own, feel free to explore flavor variations. For a chocolate twist, incorporate melted dark chocolate into the custard mixture before cooking. This will create a rich chocolate custard that pairs beautifully with a chocolate tart shell.
Alternatively, you can infuse the milk and cream with citrus zest, such as lemon or orange, for a refreshing fruit-flavored custard. Simply add the zest to the cream and milk mixture and strain it out before adding the egg mixture.
Tips for Making the Tart Gluten-Free or Dairy-Free
If you need to accommodate dietary restrictions, making this tart gluten-free is simple. Substitute traditional flour in the tart crust with a gluten-free flour blend. For those who are dairy-free, consider using coconut milk or almond milk in place of the cream and milk. You can also use a dairy-free butter alternative for the crust.
Conclusion
Creating a velvety vanilla custard tart is a rewarding culinary endeavor that brings joy and satisfaction, not just in the baking process but also in sharing it with loved ones. The delicate balance of flavors and textures in this dessert is sure to impress and delight anyone who has the pleasure of enjoying it.
I encourage you to try this recipe at home, experimenting with your personal touches and variations along the way. Homemade desserts like this tart not only satisfy your sweet tooth but also create cherished memories around the table, bringing people together in moments of joy and celebration. Whether it’s a family gathering, a dinner party, or simply a treat for yourself, the velvety vanilla custard tart is sure to be a showstopper. Enjoy the process, and happy baking!

