Indulge in Flavor: Homemade Garlic Parmesan Cheeseburger Bombs Recipe
 Save
Save
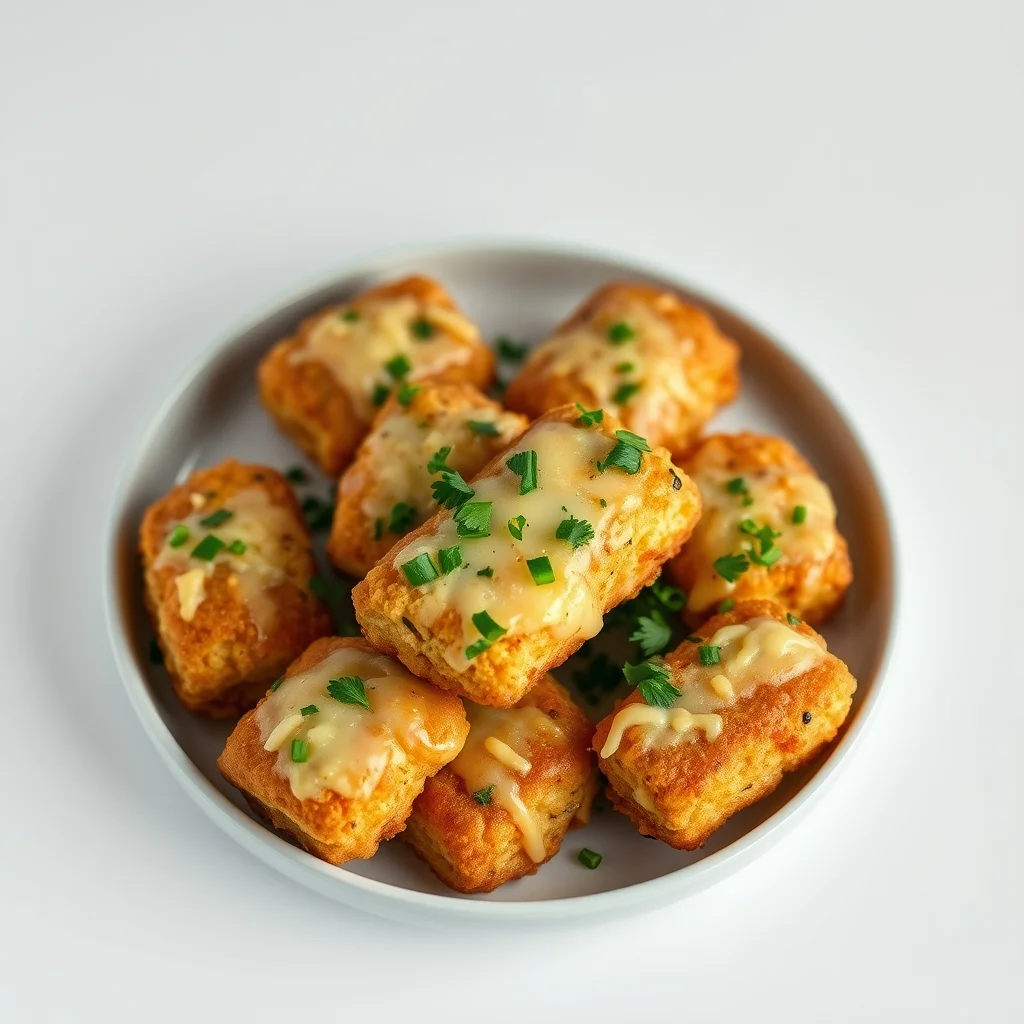
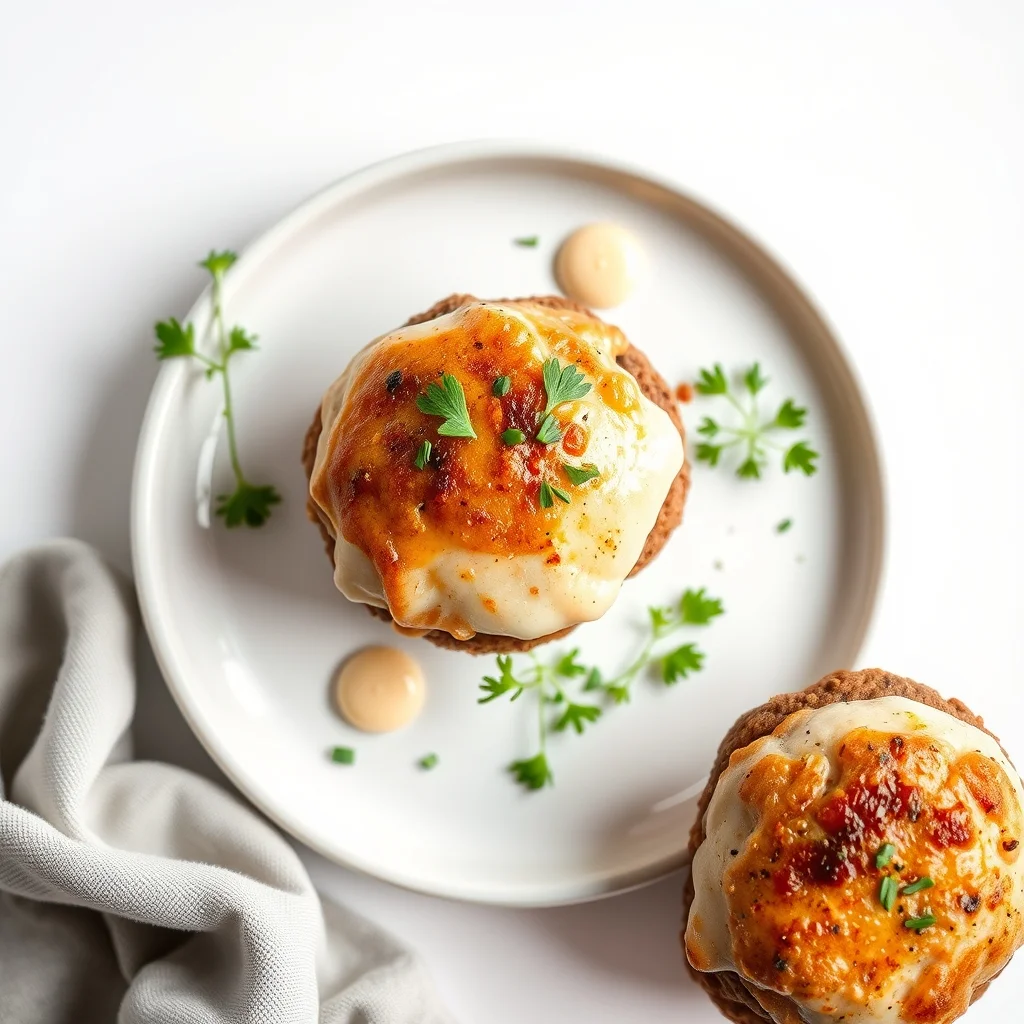
Imagine biting into a juicy cheeseburger that’s been transformed into a handheld, melt‑in‑your‑mouth explosion of flavor. These Garlic Parmesan Cheeseburger Bombs take the classic comfort food you love and turn it into a party‑ready snack that’s both familiar and wildly inventive.
What sets this recipe apart is the marriage of aromatic garlic, sharp Parmesan, and creamy cheddar, all encased in a tender, seasoned beef core. A buttery garlic‑Parmesan glaze gives each bomb a golden, glossy finish that beckons you to the table.
This dish is perfect for game‑day gatherings, casual brunches, or anytime you crave a fun twist on the ordinary burger. Kids, teens, and even the pickiest eaters will be drawn to the cheesy pull and savory aroma.
The process is straightforward: mix, shape, glaze, and bake. In under an hour you’ll have a tray of golden‑brown, cheesy orbs ready to serve hot, fresh, and absolutely unforgettable.
Why You'll Love This Recipe
Irresistible Cheese Pull: Each bite releases a molten blend of cheddar and Parmesan that stretches delightfully, creating that classic burger satisfaction in a bite‑size form.
Garlic‑Parmesan Glaze: A buttery glaze infused with garlic and grated Parmesan adds a savory crunch and glossy finish that elevates the flavor profile beyond ordinary burgers.
Easy Handheld Presentation: No plates, no utensils—just pop a bomb into your mouth. Perfect for parties where guests are mingling and want something mess‑free.
Customizable Core: Swap in your favorite cheese, add jalapeños, or experiment with different herbs, making each batch uniquely yours without extra effort.
Tips & Tricks
Perfecting the Recipe
Keep Meat Cold. Work with chilled ground beef; colder meat holds its shape better and yields a juicier bomb.
Seal the Cheese. Press the meat tightly around the cheese to avoid leaks during baking, ensuring a molten core.
Even Bun Size. Use uniform mini rolls so each bomb bakes at the same rate, preventing some from drying out.
Rest Before Baking. Let the assembled bombs sit for five minutes after shaping; this helps the binder set and reduces cracking.
Flavor Enhancements
Add a splash of hot sauce to the glaze for a subtle kick, or fold finely diced sun‑dried tomatoes into the meat for a burst of umami. A pinch of smoked paprika in the breadcrumb mix introduces a gentle, smoky depth.
Common Mistakes to Avoid
Never over‑mix the meat; it can become dense and tough. Also, avoid using too much glaze—excess butter can make the tops soggy rather than crisp.
Pro Tips
Use a Food Scale. Weigh each portion for consistent size and cooking time.
Invest in a Thermometer. Checking the internal temperature guarantees safe, perfectly cooked meat.
Finish Under Broil. A 2‑minute blast on high broil adds extra caramelization to the glaze.
Serve Immediately. The cheese pull is best when hot; reheating can diminish the stretch.
Variations
Ingredient Swaps
Swap the ground beef for ground turkey or a plant‑based mince for a lighter or vegetarian version. Replace cheddar with pepper jack for extra heat, or use gouda for a creamier melt. Mini brioche buns add a buttery sweetness, while pretzel rolls give a salty crunch.
Dietary Adjustments
For gluten‑free diners, use gluten‑free breadcrumbs and ensure the buns are certified gluten‑free. To make the dish dairy‑free, substitute the cheese blend with dairy‑free cheddar and nutritional yeast, and replace butter with olive oil in the glaze. Keto lovers can omit the breadcrumbs and use almond flour as a binder.
Serving Suggestions
Pair the bombs with sweet potato fries, a crisp coleslaw, or a tangy dill pickle spears. A side of creamy avocado dip or garlic aioli adds richness, while a simple mixed greens salad with a citrus vinaigrette balances the indulgence.
Storage Info
Leftover Storage
Allow any leftovers to cool to room temperature, then place the bombs in an airtight container. Refrigerate for up to 3 days. For longer keeping, wrap each bomb in plastic wrap, then foil, and freeze for up to 2 months. This protects the texture and flavor from freezer burn.
Reheating Instructions
Reheat frozen or refrigerated bombs in a preheated 350°F (175°C) oven for 12‑15 minutes, covered with foil for the first half to retain moisture, then uncovered to re‑crisp the glaze. A microwave works in a pinch—heat 30‑second intervals, adding a splash of broth to keep the interior from drying out.
Frequently Asked Questions
Can I make these bombs ahead of time?
What if I only have regular hamburger buns?
How do I keep the cheese from leaking during baking?
Can I add a spicy element without overpowering the dish?
This Garlic Parmesan Cheeseburger Bomb recipe delivers the comfort of a classic burger wrapped in a portable, cheesy bite that’s perfect for any gathering. By following the detailed steps, using fresh ingredients, and applying the pro tips, you’ll achieve a golden, garlicky crust with a molten, flavorful center every time. Feel free to experiment with swaps and toppings—make it truly your own. Enjoy the burst of flavor and share the fun with friends and family!
Indulge in Flavor: Homemade Garlic Parmesan Cheeseburger Bombs Recipe
Delicious Indulge in Flavor: Homemade Garlic Parmesan Cheeseburger Bombs Recipe
Ingredients
Meat & Binder
- 1 lb ground beef (80/20)
- ½ cup panko breadcrumbs
- 1 large egg, lightly beaten
Cheese Blend
- ½ cup shredded sharp cheddar
- ½ cup grated Parmesan cheese (plus extra for topping)
Garlic‑Parmesan Glaze
- 3 Tbsp unsalted butter, melted
- 2 cloves garlic, minced
- ¼ cup grated Parmesan cheese
- ½ tsp dried Italian herbs
Seasonings & Add‑Ins
- 1 tsp Worcestershire sauce
- ½ tsp onion powder
- ½ tsp garlic powder
- Salt and freshly cracked black pepper, to taste
Buns & Toppings
- 12 mini dinner rolls or slider buns
- Fresh parsley, chopped (for garnish)
Instructions
Baking & Finishing
- Preheat Oven. Set your oven to 375°F (190°C) and line a baking sheet with parchment. This temperature creates a golden crust while keeping the interior juicy.
- Apply Glaze. In a small bowl whisk together melted butter, minced garlic, extra Parmesan, and Italian herbs. Brush each assembled bomb generously; the butter helps the glaze brown and the garlic infuses each bite.
- Bake. Place the glazed bombs on the prepared sheet and bake for 18‑20 minutes, or until the meat reaches an internal temperature of 160°F (71°C) and the tops are lightly browned.
- Finish. Remove from the oven, drizzle any remaining glaze from the pan over the bombs, and sprinkle with a final dusting of grated Parmesan and chopped parsley for color and freshness.
Similar Recipes
 Dinner
Cheesy Veggie Delight Rice Bake
Delicious Cheesy Veggie Delight Rice Bake
 Dinner
Spicy Tex-Mex Chicken Enchilada Bake
Delicious Spicy Tex-Mex Chicken Enchilada Bake
 Dinner
warm citrus and herb roasted chicken with root veg for holiday meals
Make holiday meals shine with zesty citrus-herb roasted chicken and caramelized root vegetables. Easy, flavorful recipe—get…
 Dinner
Smoky BBQ Chickpea Salad Tacos: A Flavorful Plant-Based Delight
Delicious Smoky BBQ Chickpea Salad Tacos: A Flavorful Plant-Based Delight
 Dinner
Hearty Lentil Stew for a Healthy January Reset
Learn how to make delicious Hearty Lentil Stew for a Healthy January Reset. Easy recipe with…
 Dinner
Biscuits and Chorizo Gravy: A Delicious Comfort Food Recipe
Learn how to make delicious Biscuits and Chorizo Gravy: A Delicious Comfort Food Recipe. Easy recipe…
 Dinner
Creamy Garlic Parmesan Zoodles: A Deliciously Healthy Delight
Delicious Creamy Garlic Parmesan Zoodles: A Deliciously Healthy Delight
 Dinner
Cozy Crockpot Turkey and Wild Rice Soup: A Comforting Delight
Delicious Cozy Crockpot Turkey and Wild Rice Soup: A Comforting Delight

Lucy
I cook these recipes at home before they ever land here — simple ingredients, clear steps.