Decadent Molten Lava Chocolate Mug Cakes: A Quick Indulgence
In today’s fast-paced world, the allure of quick desserts has captured the hearts and taste buds of many. Whether you find yourself craving something sweet after a long day or looking for a delightful treat to satisfy your chocolate cravings, desserts that can be whipped up in mere minutes are a culinary blessing. Enter the molten lava chocolate mug cake—a delectable solution that combines the rich, gooey goodness of molten chocolate cake with the convenience of a single-serving recipe.
Imagine this: in just a few minutes, you can transform a handful of ingredients into a warm, indulgent treat that oozes rich chocolate from the center. This recipe not only satisfies your sweet tooth but also offers a delightful experience, making it perfect for a cozy night in or an impromptu gathering with friends.
Understanding the Magic of Mug Cakes
Mug cakes have become a popular phenomenon in the dessert world, particularly among those who appreciate the ease of preparation and the joy of indulgence without the commitment of baking an entire cake. These single-serving desserts are cooked in the microwave, making them an ideal option for anyone looking for a quick sweet fix. The appeal lies in their simplicity—no need for elaborate baking tools or long preparation times.
The versatility of mug cakes also plays a significant role in their popularity. You can easily customize them to fit various occasions, dietary preferences, or cravings. From gluten-free options to vegan adaptations, mug cakes can be tailored to meet your needs, ensuring that anyone can enjoy this delightful treat.
Ingredients Breakdown
To create a perfect molten lava chocolate mug cake, you’ll need a few essential ingredients. Each component plays a crucial role in the overall flavor, texture, and structure of the cake.
– Flour: The backbone of the cake, flour provides the necessary structure. It helps the cake rise and gives it a satisfying texture.
– Sugar: Not only does sugar add sweetness, but it also contributes to the cake’s moisture retention, ensuring that every bite remains tender.
– Cocoa Powder: This is the key ingredient that delivers a rich chocolate flavor. Using high-quality cocoa powder will enhance the overall taste of your mug cake.
– Baking Powder and Salt: Baking powder acts as a leavening agent, creating a light and fluffy texture. A pinch of salt balances the sweetness and elevates the flavor.
– Milk and Vegetable Oil: These wet ingredients introduce moisture and richness to the cake. The oil helps create a tender crumb, while the milk adds creaminess.
– Vanilla Extract: A splash of vanilla enhances the overall flavor profile, providing a warm and inviting aroma that complements the chocolate.
– Chocolate Chips: The star ingredient, chocolate chips, are what make the center of the mug cake gooey and molten. As they melt, they create that irresistible lava effect.
– Optional Ingredients: The beauty of mug cakes lies in their adaptability. You can incorporate various add-ins such as nuts, peanut butter, or seasonal spices to elevate your creation.
Step-by-Step Instructions
Now that you have a good understanding of the ingredients, let’s dive into the step-by-step instructions for making your decadent molten lava chocolate mug cake.
Step 1: Mixing the Dry Ingredients
Begin by selecting a microwave-safe mug, ideally one that holds at least 12 ounces to give the cake room to rise. In your mug, combine the flour, sugar, cocoa powder, baking powder, and a pinch of salt. It’s essential to mix these dry ingredients thoroughly to ensure that the baking powder is evenly distributed; this will help the cake rise uniformly and prevent any clumps of cocoa powder or flour.
Step 2: Adding the Wet Ingredients
Once your dry ingredients are well mixed, it’s time to add the wet ingredients. Pour in the milk and vegetable oil, followed by the vanilla extract. Using a fork or a small whisk, gently stir the mixture until you achieve a smooth batter. Be careful not to overmix, as this can lead to a denser cake. The goal is to combine the ingredients just until there are no dry spots left, resulting in a thick yet pourable batter.
Step 3: Incorporating Chocolate Chips
Now comes the exciting part—adding the chocolate chips. Fold in a generous amount of chocolate chips into the batter, ensuring they’re evenly distributed. For an extra twist, consider using flavored chocolate chips, such as mint or caramel, to elevate the taste even further. The chocolate chips will melt beautifully during cooking, creating that signature molten center that makes this dessert so irresistible.
With these initial steps complete, you’re well on your way to enjoying your decadent molten lava chocolate mug cake. The next phase involves microwaving your creation, which we will delve into in the following section. Stay tuned for the final touches that will transform your batter into a warm, gooey masterpiece!
Microwave Cooking: Best Practices for Timing and Checking Doneness
Cooking molten lava chocolate mug cakes in the microwave is a quick and convenient method, but it does require precision. Timing is crucial when it comes to achieving that gooey center without overcooking the cake. Start by microwaving your mug cake for about 40 to 60 seconds on high. The exact time will depend on the wattage of your microwave; a higher wattage will require less time.
To check for doneness, look for the edges of the cake to be set while the center remains slightly jiggly. If you notice that the center has firmed up, your cake may be overcooked. Remember, the cake continues to cook in the mug for a short time after it’s taken out of the microwave due to residual heat, so it’s better to err on the side of caution.
Letting the Cake Stand: Why Patience Pays Off
Once you’ve removed your mug cake from the microwave, it’s tempting to dive right in. However, letting the cake stand for a minute or two is essential. This brief waiting period allows the internal structure to stabilize, which helps maintain the molten center when you cut into it. Patience pays off, and this small step can make a significant difference in your dessert experience.
Presentation Tips for Serving: Creating an Appealing Dessert
Presentation can elevate your molten lava cake from a simple mug dessert to a show-stopping treat. Here are some tips to make your cake visually appealing:
– Garnish: Dust the top of your cake with powdered sugar or cocoa powder for a professional touch. You can also add a sprig of mint or a few fresh berries to enhance the aesthetic.
– Serving Dish: Consider transferring the cake to a small plate or a dessert bowl if you want to showcase it beautifully. This small change can make a big impression.
– Layering: If you’re serving multiple cakes, stack them or create a tiered display with different flavors or toppings for variety.
Tips for Perfecting Your Molten Lava Cake
Ideal Mug Selection for Microwave Cooking
When selecting a mug for your molten lava cake, choose one that is microwave-safe and can hold at least 8 ounces. Mugs that are too small can overflow, while those that are too large may result in uneven cooking. Opt for ceramic or glass mugs, as they distribute heat evenly.
Common Mistakes to Avoid
– Overcooking: As mentioned, overcooking is one of the most common mistakes. Always start with a shorter cooking time and check for doneness.
– Using Cold Ingredients: For the best results, ensure your eggs and butter are at room temperature. This helps the batter blend smoothly and results in a lighter texture.
– Not Greasing the Mug: Even if your recipe doesn’t call for it, lightly greasing the mug with butter or cooking spray can help the cake release easily.
Suggestions for Adjusting Cooking Times Based on Microwave Wattage
Microwave wattages can vary significantly, so it’s important to adjust cooking times accordingly. If your microwave is lower than 1000 watts, increase the cooking time by 10 to 15 seconds. Conversely, if your microwave exceeds 1200 watts, start checking doneness at around 30 seconds.
Variations in Flavors and Add-ins
Don’t hesitate to get creative with your molten lava cake! Here are some ideas for variations:
– Flavor Extracts: A splash of vanilla or almond extract can enhance the flavor. For a twist, try peppermint extract for a festive touch.
– Nuts: Chopped hazelnuts, walnuts, or pecans can add a delightful crunch.
– Chocolate Variations: Experiment with different types of chocolate, such as dark, milk, or white chocolate, to achieve your desired sweetness and richness.
Serving Suggestions and Pairings
Presentation Ideas for Making the Dessert Visually Appealing
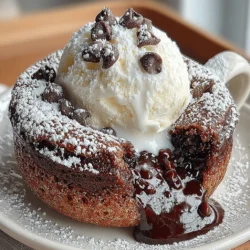
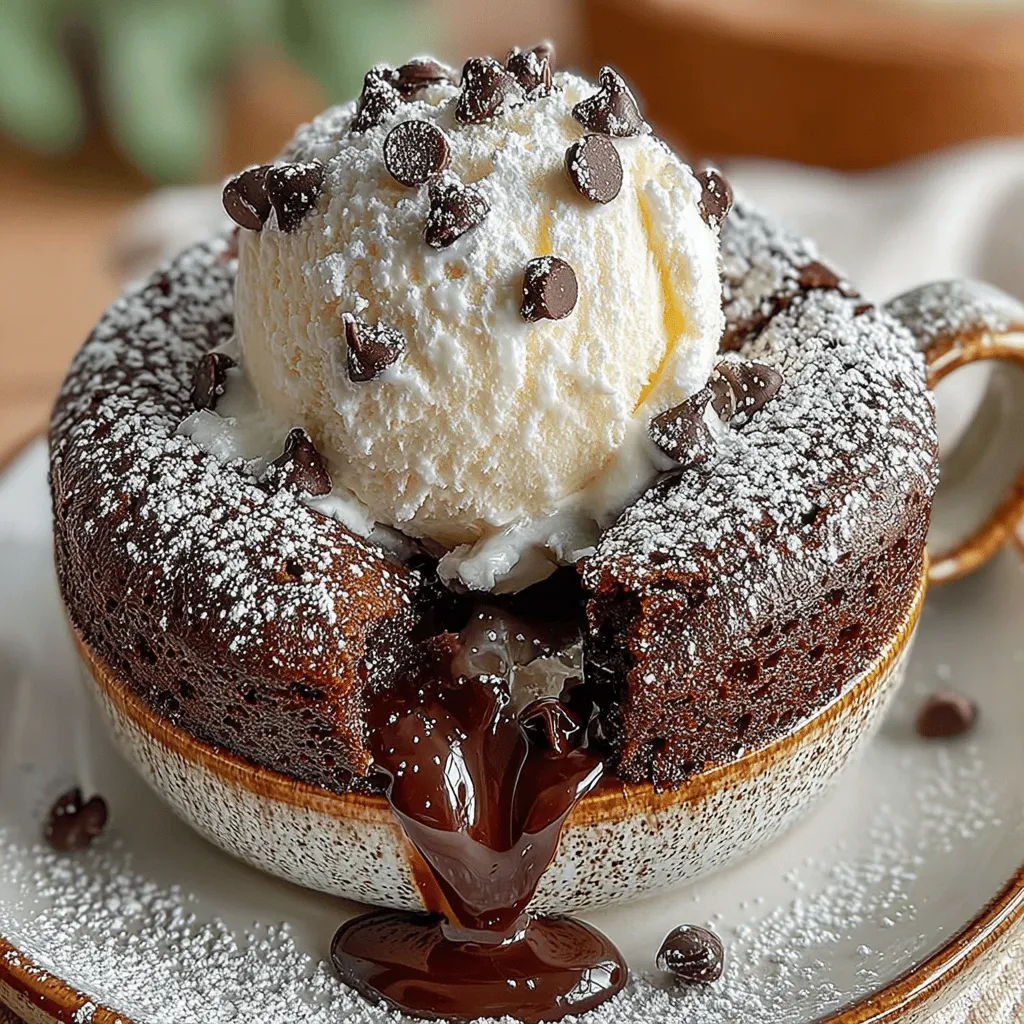
In addition to garnishing, consider serving your molten lava cake with a scoop of ice cream or a dollop of whipped cream on the side. Use a small cookie cutter to create shapes with the ice cream for a playful touch. Drizzling chocolate sauce or caramel over the top adds a luxurious finish.
Recommended Toppings
– Vanilla Ice Cream: A classic pairing that complements the rich chocolate flavor beautifully.
– Whipped Cream: Light and airy, whipped cream balances the decadence of the cake.
– Fresh Berries: Strawberries, raspberries, or blueberries not only add color but also a refreshing tartness to each bite.
Exploring Flavor Pairings with Beverages
Pair your molten lava cake with beverages that enhance its flavor profile. A cup of rich coffee creates a delightful contrast, while a glass of dessert wine can elevate the experience. If you prefer tea, try a robust chai or a smooth Earl Grey for a perfect match.
The Science Behind the Molten Center
Explanation of How the Cooking Process Creates the Signature Molten Center
The magic of molten lava cakes lies in the precise balance of cooking time and temperature. The outer layer of the cake sets quickly due to the high heat of the microwave, while the center remains liquid. This is achieved by using high-fat ingredients, such as butter and chocolate, which have a lower melting point, ensuring the center stays gooey while the exterior firms up.
The Role of Ingredients in Achieving the Gooey Texture
The combination of eggs, sugar, and flour creates a batter that forms a delicate structure. The fat from the chocolate and butter adds richness and moisture, contributing to the signature molten texture. It’s essential to use high-quality chocolate for the best flavor and consistency.
Insights into the Perfect Balance of Cooking Time and Ingredient Ratios
Finding the perfect cooking time is a delicate balancing act. Too little time results in a raw cake, while too much leads to a dry, overcooked center. Stick to the recommended cooking times and adjust based on your microwave to ensure that melty center is achieved every time.
Healthier Alternatives and Modifications
Suggestions for Healthier Ingredient Swaps
If you’re looking to lighten up your molten lava cake, consider these healthier ingredient swaps:
– Whole Wheat Flour: Substitute all-purpose flour with whole wheat flour for added fiber and nutrients.
– Coconut Oil: Replace butter with coconut oil, which provides healthy fats and a subtle coconut flavor.
Gluten-Free Options Using Alternative Flour Choices
For a gluten-free version, use almond flour or a gluten-free all-purpose flour blend. Both options will yield a delicious cake without compromising taste or texture.
Vegan Adaptations for Dairy-Free Readers
To make a vegan molten lava cake, substitute eggs with flax eggs (1 tablespoon of ground flaxseed mixed with 2.5 tablespoons of water per egg) and use dairy-free chocolate and plant-based butter. The result will be just as indulgent and satisfying as the traditional version.
Conclusion
In summary, molten lava chocolate mug cakes offer a quick and decadent dessert option that is both satisfying and simple to make. The joy of creating a deliciously gooey dessert at home is unmatched, and with the tips and tricks outlined in this guide, you can perfect your technique. Don’t be afraid to experiment with flavors, toppings, and healthier modifications to make this recipe your own. Whether you’re indulging after a long day or impressing guests, these mug cakes are sure to delight. So grab your favorite mug, gather your ingredients, and enjoy the pleasure of homemade molten chocolate bliss.