Choco-Kiwi Delight Pops Recipe
 Save
Save
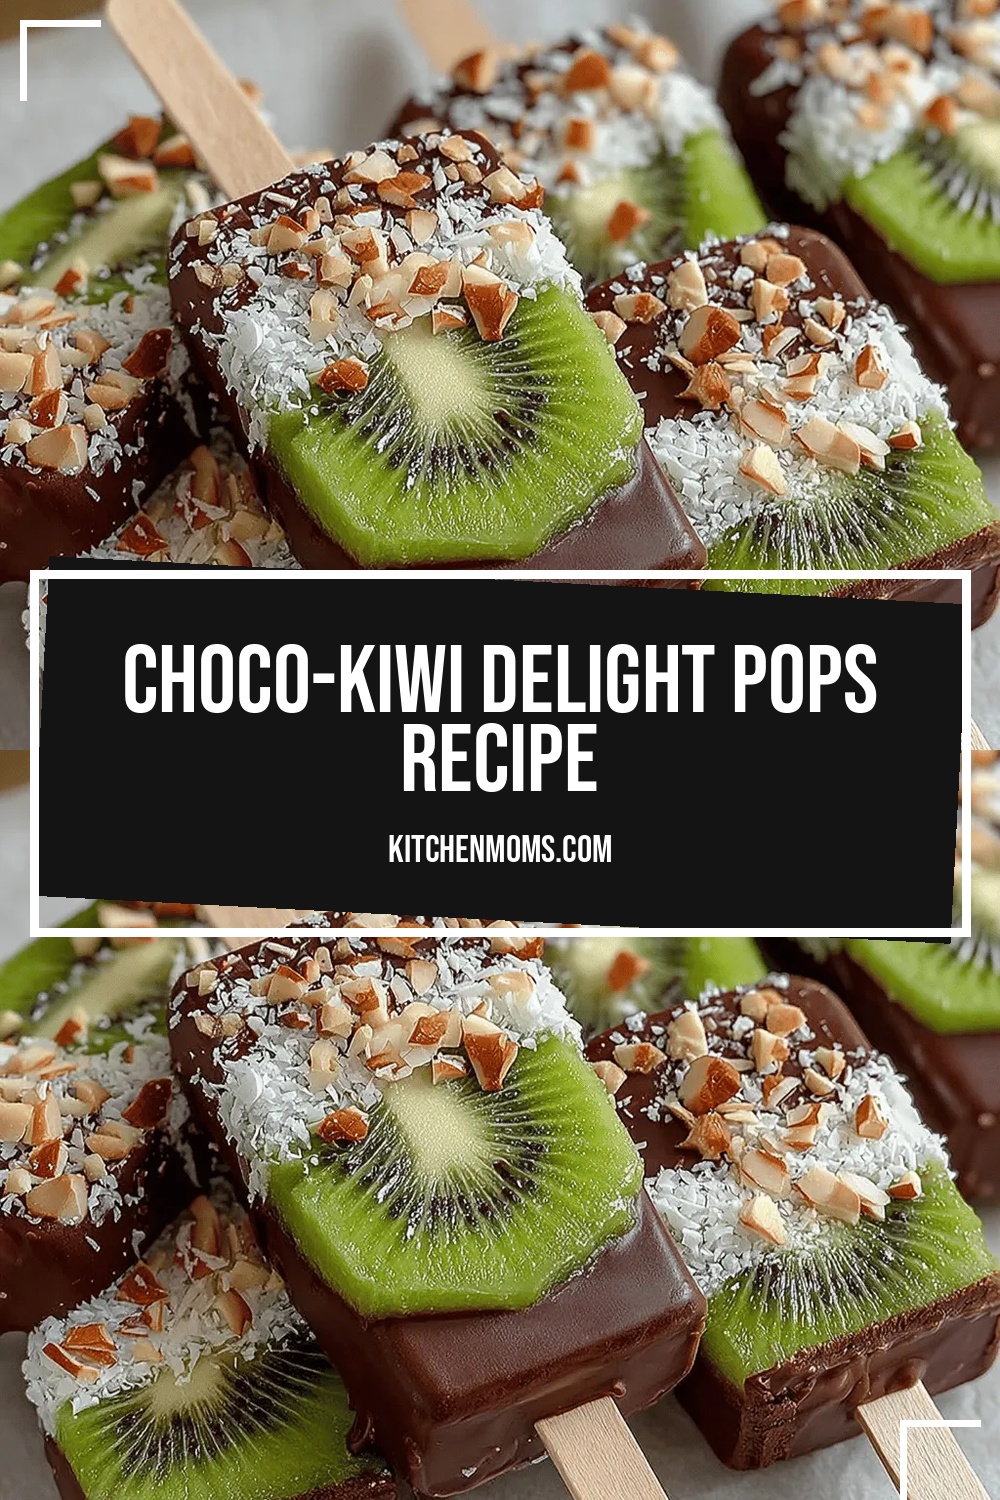
Imagine biting into a cool, creamy chocolate shell that gives way to a burst of tangy kiwi‑sweetness—welcome to the Choco‑Kiwi Delight Pops, a dessert that turns ordinary snack time into a celebration.
What makes this treat truly special is the harmony between rich, dark chocolate and the bright, slightly tart flavor of fresh kiwi, all set on a convenient pop‑stick that’s perfect for parties or a quick indulgence.
Kids, teens, and even the most discerning adults will adore these pops, whether they’re served at a backyard barbecue, a birthday bash, or simply as a refreshing after‑dinner treat on a warm evening.
The recipe is straightforward: melt chocolate, coat sliced kiwi, freeze briefly, then dip again for a double‑layered finish. A few minutes of prep and a short chill in the freezer are all that stand between you and a stunning, bite‑size masterpiece.
Why You'll Love This Recipe
Quick & Easy: From melting chocolate to the final dip, the whole process takes under 30 minutes, making it ideal for spontaneous cravings or last‑minute entertaining.
No Baking Required: Skip the oven entirely—just a stovetop double boiler or microwave, a freezer, and you’ve got a dessert that’s ready to serve.
Visually Stunning: The glossy dark chocolate contrasted with the vivid green kiwi creates a pop of color that looks as good as it tastes, perfect for Instagram‑ready moments.
Customizable Flavor: Swap kiwi for mango, strawberry, or passion fruit, and experiment with white, milk, or flavored chocolate for endless variations.
Tips & Tricks
Perfecting the Recipe
Use fully ripe kiwis. Ripe fruit is naturally sweeter and softer, making it easier to slice and less likely to crumble during dipping.
Pat fruit dry. After freezing, quickly pat the kiwi slices with a paper towel to remove excess moisture, ensuring a clean chocolate bond.
Control chocolate temperature. Keep the melted chocolate between 115‑120°F (46‑49°C); too hot will cause graininess, too cool will thicken prematurely.
Flavor Enhancements
Add a splash of orange zest to the ganache for citrus brightness, or stir in a pinch of finely ground espresso for subtle depth. A drizzle of caramel sauce after the chocolate sets adds a luxurious sweet contrast that pairs beautifully with kiwi’s tartness.
Common Mistakes to Avoid
Avoid dipping warm fruit; it will melt the chocolate and cause a runny coating. Also, don’t skip the second freeze after the first dip—without it, the second layer may slide off, leaving an uneven finish.
Pro Tips
Line the tray with silicone mats. They keep the pops from sticking and make removal effortless once the chocolate hardens.
Store in a single layer. Overcrowding during freezing can cause the pops to fuse together, ruining the individual presentation.
Use a piping bag for drizzle. This gives you precise control over white chocolate patterns, creating a professional‑looking finish.
Variations
Ingredient Swaps
Replace kiwi with mango, pineapple, or passion‑fruit slices for a tropical twist. Swap dark chocolate for milk chocolate for a sweeter profile, or use white chocolate exclusively for a milder, creamy bite. Nuts such as crushed pistachios or almonds can be pressed onto the chocolate before it sets for added crunch.
Dietary Adjustments
For a dairy‑free version, use coconut‑based dark chocolate and substitute heavy cream with full‑fat coconut cream. Vegan participants can enjoy the same recipe using plant‑based chocolate and a pinch of agave syrup for sweetness. Gluten‑free is inherent, as no wheat products are involved.
Serving Suggestions
Arrange the pops on a chilled marble slab for a dramatic presentation. Pair them with a dollop of whipped coconut cream or a scoop of vanilla bean ice cream for an indulgent dessert platter. For a party, serve alongside fresh berry skewers to balance the chocolate richness.
Storage Info
Leftover Storage
Once cooled, place the pops in an airtight container lined with parchment paper to prevent sticking. Store in the refrigerator for up to 3 days. For longer keeping, freeze them in a single‑layer tray, then transfer to a freezer‑safe bag; they’ll maintain quality for up to 2 months.
Reheating Instructions
To enjoy a softer texture, let frozen pops sit at room temperature for 5‑7 minutes before serving. If you prefer a warm chocolate coating, briefly microwave for 10‑15 seconds (watch closely) or place under a preheated broiler for 30 seconds, turning once, until the chocolate glistens.
Frequently Asked Questions
Can I make these pops ahead of time?
What if I don’t have a double boiler?
Can I use frozen kiwi instead of fresh?
What side dishes go well with these pops?
This Choco‑Kiwi Delight Pops recipe delivers a perfect blend of silky chocolate, tangy fruit, and eye‑catching presentation—all without turning on the oven. By following the detailed steps, using quality ingredients, and applying the pro tips, you’ll create a dessert that’s both impressive and approachable. Feel free to experiment with flavors, textures, or dietary tweaks to make it truly yours. Enjoy every bite of this cool, chocolate‑kissed treat!
Choco-Kiwi Delight Pops Recipe
Delicious Choco-Kiwi Delight Pops Recipe
Ingredients
Main Ingredients
- 12 ripe kiwis
- 200 g dark chocolate (70% cacao)
- 100 g white chocolate (optional for drizzle)
Coating & Flavor
- 2 tablespoons heavy cream
- 1 teaspoon pure vanilla extract
- ¼ teaspoon flaky sea salt
Garnish & Extras
- 12 wooden popsicle sticks
- 2 tablespoons toasted coconut flakes (optional)
Instructions
Melting the Chocolate
- Set up a double boiler. Fill a saucepan with 2 inches of water, bring to a gentle simmer, then place a heat‑proof bowl on top. Add the dark chocolate pieces, stirring constantly until smooth and glossy, about 3‑4 minutes. This gentle heat prevents scorching and yields a glossy coating.
- Incorporate cream and vanilla. Remove the bowl from heat and whisk in the heavy cream and vanilla extract. The mixture should thicken slightly, creating a ganache that clings to the kiwi without running off. The cream mellows the chocolate’s bitterness and adds a silky texture.
- Season lightly. Stir in the flaky sea salt; this tiny burst of salt amplifies the chocolate’s depth and balances the kiwi’s natural acidity, creating a harmonious flavor contrast.
Dipping & Freezing
- Dip the frozen kiwi. Holding each stick, submerge the kiwi slice into the chocolate ganache, allowing excess to drip back into the bowl. Aim for an even coat that’s about 2‑mm thick; visual cue: the fruit should appear fully cloaked with a glossy sheen.
- Set and chill. Return the dipped pops to the parchment tray. If you like a double coating, let them chill for 5 minutes, then repeat the dip. Once the final layer is applied, place the tray back in the freezer for at least 20 minutes, or until the chocolate hardens completely.
- Optional drizzle. Melt the white chocolate in a separate bowl using the same double‑boiler method. Drizzle thin lines over the hardened dark chocolate using a spoon or a squeeze bottle. Sprinkle toasted coconut flakes while the white chocolate is still soft for added texture.
Similar Recipes
 Desserts
Frozen Chocolate Banana Cookie Pops Recipe
Delicious Frozen Chocolate Banana Cookie Pops Recipe
 Desserts
Choco-Nutty Frozen Banana Bites: Elevate Your Dessert Game
Delicious Choco-Nutty Frozen Banana Bites: Elevate Your Dessert Game
 Desserts
Frozen Yogurt Banana Churro Slices: A Deliciously Unique Treat
Delicious Frozen Yogurt Banana Churro Slices: A Deliciously Unique Treat
 Desserts
Caramel Pecan Oat Bars
Discover how to make caramel pecan oat bars with a buttery oat base, gooey caramel, and…
 Desserts
Velvety Vanilla Bean Rice Pudding: A Luxurious Dessert Experience
Delicious Velvety Vanilla Bean Rice Pudding: A Luxurious Dessert Experience
 Desserts
Christmas Fudge: Discover the Ultimate Holiday Treat!
Learn how to make delicious Christmas Fudge: Discover the Ultimate Holiday Treat!. Easy recipe with step-by-step…
 Desserts
No‑Bake Chocolate Peanut Butter Cookies
Learn how to make delicious No‑Bake Chocolate Peanut Butter Cookies. Easy recipe with step-by-step instructions.
 Desserts
homemade gingerbread loaf cake with molasses and warm spices for holidays
Learn how to make delicious homemade gingerbread loaf cake with molasses and warm spices for holidays.…

Lucy
I cook these recipes at home before they ever land here — simple ingredients, clear steps.