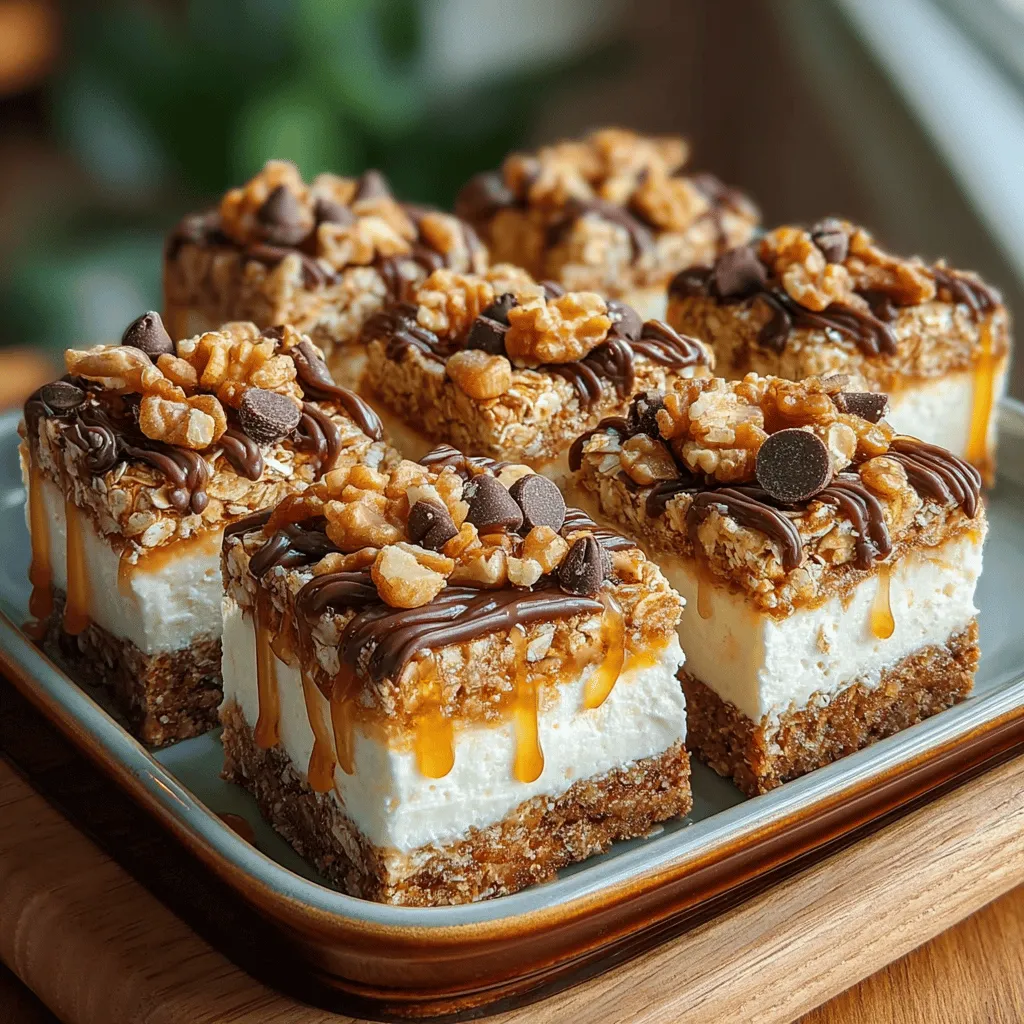
Choco-Oat Dream Bars: A Delicious and Nutritious Snack Option
In a world where healthy eating is becoming increasingly important, snacking can often pose a challenge. Many are torn between the desire for something indulgent and the need for a nutritious option. Enter the Choco-Oat Dream Bars—an innovative solution that perfectly balances flavor with health benefits. These delectable bars not only satisfy sweet cravings but also offer a wholesome mix of ingredients that contribute to overall well-being. As we embrace the growing trend of healthy snacking, it’s essential to incorporate foods that nourish our bodies while still being enjoyable.
Oats, a primary ingredient in these dream bars, have long been celebrated for their numerous health benefits. Packed with dietary fiber, they promote heart health and provide sustained energy, making them an ideal choice for any snack time. When combined with Greek yogurt, which is rich in protein and probiotics, the Choco-Oat Dream Bars become a powerhouse of essential nutrients. Together, these ingredients create a snack that is not only satisfying but also supports a balanced diet.
The Appeal of Choco-Oat Dream Bars
One of the standout features of Choco-Oat Dream Bars is their versatility. They can be enjoyed in various scenarios—whether you’re in need of a quick post-workout refuel, a sweet addition to your child’s lunchbox, or simply a nutritious treat during an afternoon slump. Their balanced profile allows them to cater to different dietary preferences, making them suitable for anyone seeking healthier dessert alternatives without compromising on taste.
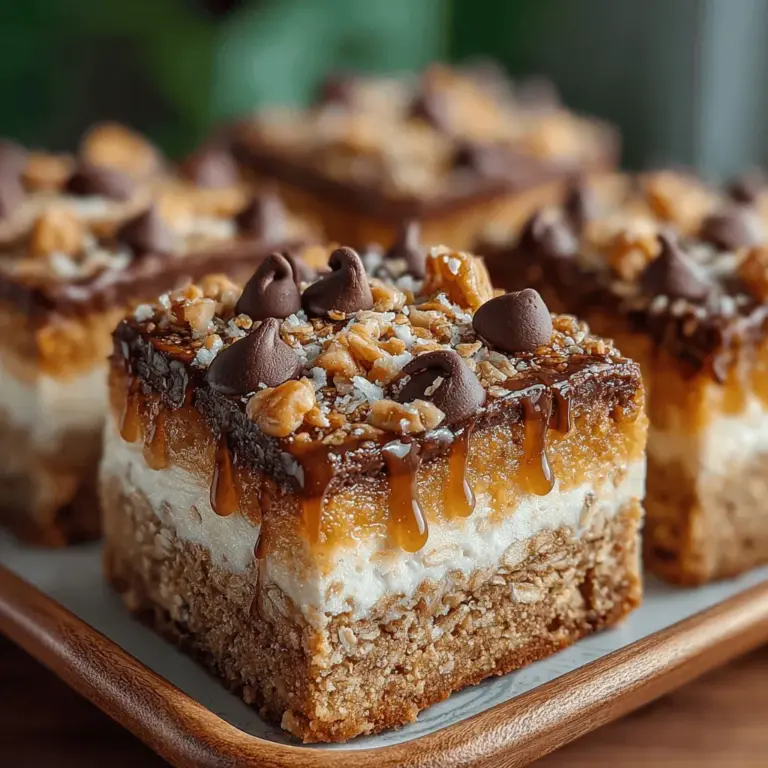
The combination of flavors and textures in Choco-Oat Dream Bars is truly delightful. The creaminess of Greek yogurt and nut butter melds beautifully with the crunchy texture of rolled oats and nuts, while the sweetness of chocolate chips ties everything together. Each bite offers a satisfying experience, making it easy to enjoy these bars guilt-free.
Ingredients Breakdown
To create these Choco-Oat Dream Bars, understanding the role of each ingredient is key. Here’s a detailed breakdown of the ingredients that make these bars not only delicious but also nutritious:
– Rolled Oats: The foundation of our recipe, rolled oats are celebrated for their high fiber content. This soluble fiber is known to help lower cholesterol levels and improve heart health. Additionally, oats provide energy-boosting carbohydrates, making them an excellent choice for sustained energy throughout the day. Their chewy texture also adds a delightful bite to the bars.
– Greek Yogurt: This ingredient is more than just a creamy addition; Greek yogurt is packed with protein, which is essential for muscle repair and satiety. It also contains probiotics that promote gut health, aiding digestion and boosting the immune system. The tangy flavor of Greek yogurt complements the sweetness of the bars, enhancing their overall taste.
– Honey or Maple Syrup: Sweetening these bars naturally can be achieved with either honey or maple syrup. Both options offer a lower glycemic index compared to refined sugars, which means they won’t cause a rapid spike in blood sugar levels. Honey provides a distinct floral sweetness, while maple syrup adds a unique, earthy flavor that pairs beautifully with oats.
– Nut Butter: Whether you choose almond butter, peanut butter, or another variety, nut butter brings healthy fats and additional protein to the mix. These fats are essential for brain health and provide a satisfying richness that enhances the bars’ texture. The creaminess of nut butter also helps bind the ingredients together, ensuring every bite is a treat.
– Chocolate Chips: No dessert bar is complete without a hint of chocolate. Dark chocolate chips are not only delicious but also rich in antioxidants, which can help combat oxidative stress in the body. The presence of chocolate adds a touch of indulgence while also providing mood-boosting compounds, making these bars a delightful treat.
– Optional Ingredients: For those looking to customize their Choco-Oat Dream Bars, adding nuts such as walnuts or pecans can enhance both the flavor and nutritional profile. Nuts are loaded with healthy fats, fiber, and essential vitamins, providing an extra crunch that contrasts beautifully with the smoothness of the yogurt and nut butter.
Step-by-Step Instructions
Now that we’ve explored the delightful ingredients that make up the Choco-Oat Dream Bars, let’s dive into the step-by-step instructions for creating this scrumptious snack. These straightforward directions will guide you through the process, ensuring that even novice bakers can successfully whip up these bars in no time.
1. Gather Your Ingredients: Before you start, make sure to have all your ingredients ready. This includes rolled oats, Greek yogurt, your choice of sweetener (honey or maple syrup), nut butter, chocolate chips, and any optional ingredients you’d like to add.
2. Preheat the Oven: Preheat your oven to 350°F (175°C). This step is crucial for achieving the perfect texture in your bars.
3. Mix the Wet Ingredients: In a large mixing bowl, combine the Greek yogurt, nut butter, and your chosen sweetener. Stir until the mixture is smooth and well-combined.
4. Incorporate the Dry Ingredients: Gradually add the rolled oats and chocolate chips to the wet mixture. If you’re using any optional ingredients, such as nuts, fold them in at this stage. Mix until everything is evenly incorporated.
5. Prepare the Baking Dish: Line an 8×8-inch baking dish with parchment paper, allowing some overhang for easy removal later. This will help prevent sticking and make cleanup a breeze.
6. Spread the Mixture: Pour the Choco-Oat mixture into the prepared baking dish. Use a spatula to spread it evenly, pressing it down firmly to ensure the bars hold their shape during baking.
7. Bake: Place the baking dish in the preheated oven and bake for 20-25 minutes, or until the edges are golden brown and the center is set. Keep an eye on them to avoid overbaking.
8. Cool and Slice: Once baked, remove the dish from the oven and allow it to cool completely in the pan. Once cooled, lift the bars out using the parchment paper and slice them into squares or rectangles as desired.
By following these steps, you’ll soon have a batch of Choco-Oat Dream Bars ready to enjoy. Stay tuned for the next part of this article, where we’ll explore variations, storage tips, and creative ways to serve these delectable treats!

Preparation of Baking Dish
Before diving into the mixing process, it’s essential to prepare your baking dish properly. This step is crucial for ensuring that your Choco-Oat Dream Bars can be easily removed without crumbling. Begin by selecting an 8×8-inch or 9×9-inch baking dish, depending on how thick you want your bars. To prevent sticking, line the bottom and sides of the dish with parchment paper, leaving an overhang on two opposite sides. This overhang will act as handles, allowing you to lift the bars out easily once they have set. Using parchment paper not only makes removal easier but also helps maintain the shape of your bars, ensuring they come out intact and ready for cutting.
Mixing the Base
Now that your baking dish is prepared, it’s time to create the base for your Choco-Oat Dream Bars. In a large mixing bowl, combine rolled oats, almond flour (or your choice of flour), and a pinch of salt. These dry ingredients form the heart of the bars and provide the texture you desire.
In a separate bowl, mix together wet ingredients: creamy nut butter (such as almond or peanut butter), maple syrup (or honey, if not strictly vegan), and vanilla extract. The key to achieving the right texture is to ensure that these wet ingredients are thoroughly combined before adding them to the dry mix. Using a whisk or a sturdy spatula, blend until smooth and creamy, ensuring there are no lumps.
Once both mixtures are ready, pour the wet ingredients into the dry ingredients and mix well. You should aim for a thick, sticky consistency that holds together when pressed. If the mixture seems too dry, you can add a splash of almond milk or water to reach the desired consistency. It’s important to be patient during this step, as fully incorporating the ingredients will help your bars have the perfect texture.
Incorporation of Chocolate and Nuts
The next step in crafting your Choco-Oat Dream Bars involves adding chocolate chips and nuts. This is where the magic happens, as these ingredients will elevate your bars from delicious to extraordinary. Choose semi-sweet chocolate chips for a classic flavor, or opt for dark chocolate for a richer taste.
To evenly distribute the chocolate chips and nuts throughout the mixture, fold them in gently using a spatula. This ensures that every bite will be filled with chocolatey goodness and crunchy texture. If you prefer a more decadent option, consider using chocolate chunks or even drizzling melted chocolate on top of the bars before serving.
If you want to customize the flavor profile, feel free to experiment with different types of nuts such as walnuts, pecans, or even seeds like pumpkin or sunflower seeds. The goal is to create a balanced mixture that encapsulates both texture and flavor, making every bite a delightful experience.
Packing the Mixture
After incorporating the chocolate and nuts, it’s crucial to pack the mixture firmly into the lined baking dish. This step ensures that the bars hold their shape when cut. Use a spatula or your hands to press the mixture down evenly across the bottom of the dish, making sure it’s compact. Aim for a uniform thickness, which will help them bake evenly.
Take your time with this step; the more firmly you pack the mixture, the less likely the bars will crumble when you cut them. An even surface will also help in achieving a nice, clean cut after they’re set. If you notice any loose bits around the edges, simply push them back toward the center while pressing down.
Freezing Process
Once the mixture is packed and ready, it’s time to let it set. Place the baking dish in the freezer for at least 1-2 hours. Freezing is a crucial step for achieving the right consistency and flavor development in your Choco-Oat Dream Bars. This process allows the ingredients to meld together, creating a more cohesive texture.
Additionally, freezing helps to firm up the bars, making them easier to cut into neat squares. If you’re planning to enjoy the bars later, freezing them also extends their shelf life. Once they are fully set, you can store them in an airtight container in the freezer for up to three months.
Cutting and Storing
After the freezing period, it’s finally time to cut your Choco-Oat Dream Bars. Carefully lift the parchment paper out of the baking dish to remove the entire block of bars. Place it on a cutting board and use a sharp knife to cut it into squares or rectangles, depending on your preference. Wipe the knife with a damp cloth between cuts to ensure clean edges.
To store your Choco-Oat Dream Bars effectively, place them in an airtight container. If you prefer to keep them in the freezer, layer parchment paper between the bars to prevent them from sticking together. If stored correctly, they can last in the refrigerator for about a week and in the freezer for up to three months. This makes them an ideal snack to prepare in advance for busy days.
Nutritional Information
When enjoying a treat, it’s always good to know what’s in it. Each serving of your Choco-Oat Dream Bars (assuming you cut them into 16 pieces) will provide approximately:
– Calories: 150
– Protein: 4g
– Carbohydrates: 20g
– Dietary Fiber: 3g
– Sugars: 7g
– Fat: 7g
– Vitamins and Minerals: Rich in magnesium, vitamin E, and fiber.
These bars not only satisfy your sweet cravings but also offer a nutritional boost, making them a smart choice for health-conscious individuals. The combination of oats and nut butter provides sustained energy, while the chocolate adds a delightful touch without overwhelming sugar content.
Creative Variations and Customizations
One of the best aspects of making Choco-Oat Dream Bars at home is the ability to customize them to suit your tastes and dietary needs. Here are a few ideas to inspire you:
Flavor Variations
– Nut Butter Swaps: Try using different nut butters such as cashew or sunflower seed butter for a unique flavor twist.
– Fruity Additions: Consider mixing in dried fruits like cranberries, raisins, or apricots for a burst of sweetness and added nutrients.
– Spice It Up: Add a pinch of cinnamon, nutmeg, or even a dash of sea salt to enhance the flavor profile.
Dietary Adaptations
– Vegan Option: Substitute honey with maple syrup or agave nectar to create a fully vegan-friendly treat.
– Gluten-Free: Ensure you use certified gluten-free oats and flour to cater to gluten sensitivities.
Mix-Ins
– Seeds: Incorporate chia seeds, flax seeds, or hemp seeds to boost the nutritional content and add a satisfying crunch.
– Chocolate Variations: Experiment with white chocolate chips, carob chips, or even cocoa nibs for different chocolate experiences.
Conclusion
Making Choco-Oat Dream Bars at home is not only simple but also allows you the freedom to create a nutritious snack that aligns with your health goals while still satisfying your sweet tooth. From the ease of preparation to the joy of customizing flavors, these bars are perfect for any occasion—whether you need a quick breakfast on the go, a post-workout snack, or a delightful treat to share with friends.
Encourage yourself to experiment with this recipe, trying out various nut butters, mix-ins, and spices to find your perfect combination. The convenience and versatility of these bars make them a staple in any health-conscious kitchen. Enjoy the process, share your results, and relish the satisfaction of creating your very own Choco-Oat Dream Bars!

