Introduction
Chocolate lava cake is a dessert that has captured the hearts and taste buds of chocolate lovers around the globe. With its enticing combination of a rich outer cake and a warm, gooey center, it’s no wonder this indulgent treat is a staple on restaurant menus and a favorite for home bakers alike. The moment you cut into a perfectly baked lava cake, the molten chocolate flows out, creating a luscious pool of decadence that is simply irresistible.
This dessert is remarkably versatile, making it suitable for a wide range of occasions. Whether you’re planning a casual dinner with friends, a romantic date night, or a festive celebration, chocolate lava cake is sure to impress. Its elegant presentation and delightful flavor profile make it a standout choice for those looking to add a touch of luxury to their dessert offerings.
In this article, we will delve into the origins of chocolate lava cake, explore the essential ingredients needed to create this masterpiece, and provide a comprehensive guide on the necessary tools and equipment. We’ll also walk you through the step-by-step instructions to ensure your lava cake turns out perfectly every time.
Understanding Chocolate Lava Cake
Chocolate lava cake, also known as molten chocolate cake, is a dessert that boasts a fascinating history. It is believed to have originated in the United States in the late 1980s, although its exact origins are still a topic of debate among culinary historians. The creation of this dessert is often attributed to chef Jean-Georges Vongerichten, who first introduced it at his restaurant in New York City. Since then, chocolate lava cake has become a beloved indulgence worldwide, celebrated for its unique texture and flavor.
This dessert is characterized by its unique structure: a firm outer layer that encases a rich, molten chocolate center. The genius of chocolate lava cake lies in the delicate balance between the baked exterior and the gooey filling. Achieving this balance is key to creating a successful lava cake. The outer layer should be cooked just enough to hold its shape, while the center remains soft and molten, providing that signature lava-like effect when served.
Ingredients for Chocolate Lava Cake
To create a delectable chocolate lava cake, you’ll need a few essential ingredients that come together to create its rich flavor and indulgent texture. Here’s a list of what you will need:
– High-quality chocolate: The star of the show! Choose a good quality dark chocolate (at least 60% cocoa) for a deep, rich flavor. Chocolate chips can be used, but bar chocolate tends to melt more smoothly.
– Unsalted butter: This adds richness and moisture to the cake. It’s important to use unsalted butter so you can control the salt content.
– Granulated sugar: This sweetens the cake and helps create the desired texture.
– All-purpose flour: This provides structure to the cake while still allowing it to remain soft in the center.
– Eggs: Eggs are crucial for binding the ingredients together and providing structure. They also contribute to the cake’s overall richness.
– Vanilla extract: A touch of vanilla enhances the overall flavor profile of the cake.
Substitutes for Dietary Restrictions
If you have specific dietary restrictions or preferences, there are several alternatives you can consider:
– Gluten-free: Substitute all-purpose flour with a gluten-free flour blend that is designed for baking.
– Vegan: You can make a vegan version by using dairy-free chocolate, coconut oil in place of butter, and flaxseed meal or aquafaba as an egg substitute.
Using high-quality ingredients is essential for achieving the best flavor and texture in your chocolate lava cake. The chocolate and butter are particularly important, as they form the base of the cake’s rich flavor.
Tools and Equipment Required
To successfully prepare your chocolate lava cake, having the right tools and equipment is crucial. Here’s a list of what you will need:
– Oven: Preheating your oven to the correct temperature is essential for baking your lava cake evenly.
– Ramekins or muffin tins: These are ideal for shaping your lava cakes. Ramekins are traditional and provide a lovely presentation, while muffin tins can yield multiple smaller cakes.
– Mixing bowls: You’ll need a few mixing bowls for combining your ingredients.
– Whisk or electric mixer: For mixing the batter smoothly, a whisk can suffice, but an electric mixer can make the job easier, especially for incorporating air into the eggs.
– Spatula: A rubber spatula is perfect for folding ingredients together and scraping the sides of bowls.
– Measuring cups and spoons: Accurate measurements are key to ensuring your cake turns out perfectly.
– Baking spray or butter and cocoa powder: This is essential for greasing your ramekins or muffin tins to prevent sticking.
With the right tools in hand, you will be well-equipped to create a chocolate lava cake that impresses everyone at the table.
Step-by-Step Instructions for Perfect Chocolate Lava Cake
Now that you have an understanding of the ingredients and tools required, it’s time to get started on the step-by-step process to make your chocolate lava cake. Follow these instructions carefully to ensure your cake turns out with a perfect molten center.
Preparing the Baking Molds
1. Grease your ramekins: Start by preheating your oven to 425°F (220°C). While the oven is heating, take your ramekins or muffin tins and generously grease them with baking spray or butter. To ensure easy removal after baking, dust the interiors with cocoa powder, tapping out any excess.
Melting Chocolate and Butter
2. Melt the chocolate and butter: In a heatproof bowl, combine the high-quality chocolate and unsalted butter. You can melt them together using a double boiler method, or you can microwave them in short intervals of 15-20 seconds, stirring in between until smooth. Be cautious not to overheat, as chocolate can easily burn. Once melted, set the mixture aside to cool slightly.
Combining Dry Ingredients
3. Mix the dry ingredients: In a separate bowl, whisk together the all-purpose flour and granulated sugar. This helps to evenly distribute the sugar throughout the batter.
Mixing the Batter
4. Combine the wet and dry ingredients: Once the chocolate and butter mixture has cooled slightly, add the eggs (and vanilla extract if using) to the chocolate mixture, whisking until fully incorporated. Gradually fold in the flour and sugar mixture until just combined. Be careful not to overmix; the batter should be smooth and slightly thick.
Pouring and Baking
5. Fill the molds: Pour the batter evenly into the prepared ramekins or muffin tins, filling them about two-thirds full. This allows room for the cakes to rise without spilling over.
6. Bake the lava cakes: Place the filled molds into the preheated oven and bake for approximately 12-14 minutes. The key is to bake them just until the edges are firm but the centers remain soft. Keep an eye on them as baking times can vary depending on your oven and the size of your molds.
Cooling and Serving
7. Cool briefly: Once baked, remove the lava cakes from the oven and let them cool in the molds for about 1-2 minutes. This brief cooling period allows the cakes to set slightly while still retaining their gooey centers.
8. Serve: Carefully run a knife around the edges of the molds to loosen the cakes, then invert them onto individual plates. Serve immediately while still warm, and enjoy the delightful flow of molten chocolate that awaits inside.
Following these detailed steps will guide you towards creating an irresistible chocolate lava cake that will leave your guests craving more. Stay tuned for the continuation of this article, where we will delve deeper into expert tips for achieving the best results and address common questions about this decadent dessert.

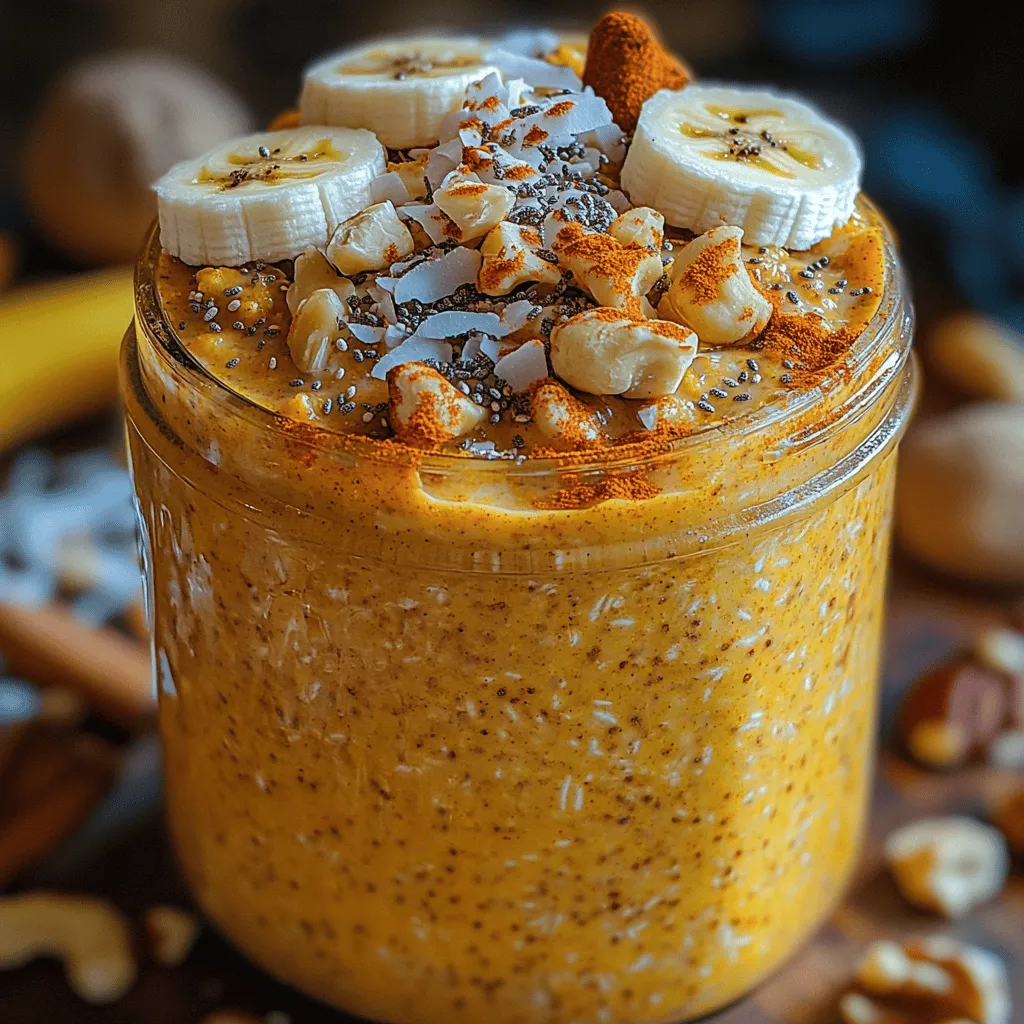
Serving Suggestions for Golden Turmeric Latte Overnight Oats
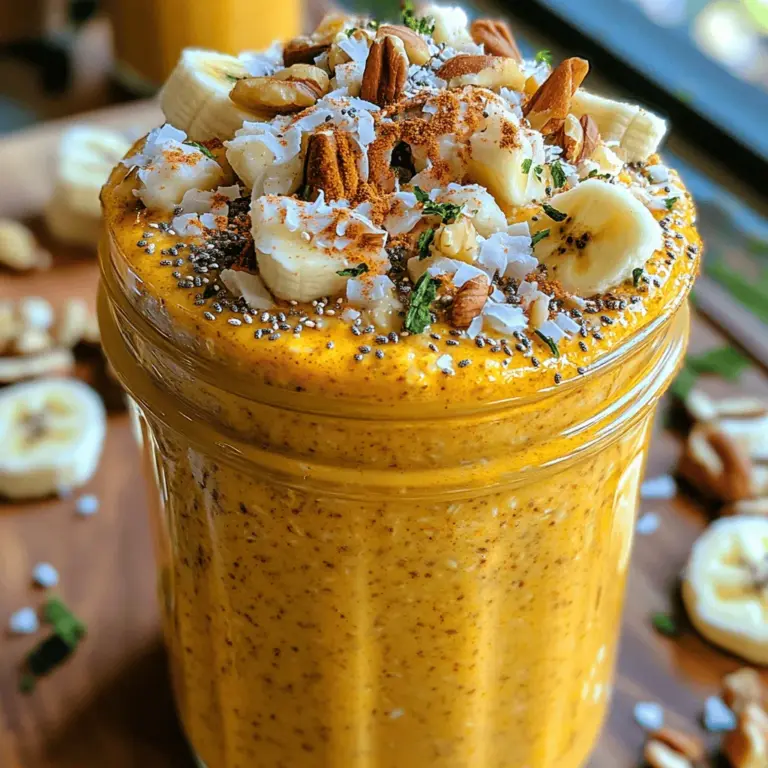
Golden Turmeric Latte Overnight Oats are not only a nutritious breakfast option but also a canvas for creativity when it comes to serving. Here are some ideas to elevate your dish and impress your family or guests:
1. Garnishing Ideas:
– Fresh Fruit: Top your oats with slices of banana, berries (like blueberries or strawberries), or mango for a vibrant and fresh touch. These fruits not only add color but also enhance the nutritional value.
– Nuts and Seeds: Sprinkle a handful of chopped nuts (like almonds or walnuts) or seeds (such as chia or pumpkin seeds) on top for added crunch and healthy fats.
– Coconut Flakes: Toasted coconut flakes can add a delightful tropical flair and a subtle sweetness to your oats.
– Cinnamon or Nutmeg: A light dusting of cinnamon or nutmeg can enhance the flavor profile and add an aromatic touch.
2. Pairing Suggestions:
– Yogurt: A dollop of Greek yogurt can provide creaminess and a protein boost, balancing the oats’ texture.
– Nut Butter: A spoonful of almond or peanut butter can add richness and depth, making your overnight oats even more satisfying.
– Dairy-Free Milk: Serve with an extra splash of almond or oat milk on the side for those who enjoy a creamier consistency.
3. Presentation Tips:
– Layering: Use clear glass jars to layer your oats, fruits, and toppings. This not only looks appealing but also allows you to showcase the beautiful colors of the ingredients.
– Serve in Bowls: For a more casual breakfast, serve your oats in beautiful bowls, garnished with fresh herbs like mint for a pop of color and freshness.
– Add a Drizzle: A drizzle of honey or maple syrup over the top can add sweetness and visual appeal.
Common Mistakes to Avoid
To ensure your Golden Turmeric Latte Overnight Oats turn out perfectly every time, be aware of these common pitfalls:
1. Using Cold Ingredients: One of the most significant mistakes is using cold ingredients straight from the fridge. For the best results, let your yogurt or milk come to room temperature before mixing. This helps the oats absorb the liquid more effectively, leading to a creamier texture.
2. Not Allowing Enough Soaking Time: Overnight oats require adequate soaking time for the oats to soften and absorb the liquid. Allow at least 6-8 hours in the fridge for optimal results. If you’re in a rush, consider soaking for at least 30 minutes, but know that the texture will not be as creamy.
3. Skipping the Flavor Enhancers: Ingredients like vanilla extract, cinnamon, and turmeric are vital for flavor. Skipping or skimping on these can lead to bland oats. Don’t hesitate to experiment with the quantities to find your perfect balance.
4. Inconsistent Oat Types: Not all oats are created equal. Rolled oats are recommended for overnight oats due to their ability to absorb liquid while retaining some texture. Instant oats will become too mushy, while steel-cut oats require longer soaking times and may not be suitable for this recipe.
Storing and Reheating Golden Turmeric Latte Overnight Oats
Proper storage and reheating techniques can maximize the freshness of your Golden Turmeric Latte Overnight Oats:
1. Storing Leftovers: If you have leftover oats, store them in an airtight container in the refrigerator. They can last up to 4-5 days, making them a great option for meal prep.
2. Reheating Tips: While overnight oats are typically enjoyed cold, if you prefer them warm, transfer the desired portion to a microwave-safe bowl and heat for 30 seconds to 1 minute, stirring halfway through. Add a splash of milk if they appear too thick.
3. Freezing Options: Although overnight oats are best fresh, you can freeze them for up to 3 months. Portion them into individual containers and store them in the freezer. When ready to eat, thaw overnight in the refrigerator and enjoy cold or warm.
Variations on the Classic Golden Turmeric Latte Overnight Oats
Once you’ve mastered the basic recipe, feel free to explore these variations for a personalized touch:
1. Flavor Infusions:
– Chai Spice: Add a pinch of ground ginger, cloves, and cardamom to create a chai-inspired flavor.
– Matcha: Incorporate matcha powder for a green tea twist that adds antioxidants and a unique flavor profile.
– Cocoa: For a chocolatey touch, mix in unsweetened cocoa powder or cacao nibs, balancing it with a bit more sweetener.
2. Dietary Adaptations:
– Gluten-Free: Ensure you use certified gluten-free oats to cater to those with gluten intolerance.
– Vegan-Friendly: Substitute regular yogurt with coconut yogurt or another plant-based alternative for a creamy texture without dairy.
3. Textural Additions:
– Fruits and Vegetables: Stir in shredded carrots or beets for added nutrition and a pop of color. You can also top with seasonal fruits according to preference.
– Nut or Seed Butter Swirls: Create swirls of almond or sunflower butter for added creaminess and flavor.
The Science Behind Golden Turmeric Latte Overnight Oats
Understanding the science behind your Golden Turmeric Latte Overnight Oats can enhance your cooking and baking skills. Here are some insights:
1. Oat Absorption: Oats are excellent at absorbing liquids due to their soluble fiber content. This fiber swells when mixed with liquid, resulting in the creamy texture characteristic of overnight oats.
2. Turmeric Benefits: Turmeric contains curcumin, known for its anti-inflammatory properties. When combined with black pepper (which enhances curcumin absorption), it becomes a potent addition to your breakfast.
3. Nutrient Interaction: The combination of oats, nut milk, and spices works synergistically. While oats provide energy and fiber, turmeric offers antioxidants, and nut milk adds healthy fats, ensuring a well-rounded meal.
Conclusion
Golden Turmeric Latte Overnight Oats are a delightful way to start your day, combining health benefits with rich flavors. From the creamy texture that comes from properly soaked oats to the warming notes of turmeric and spices, these oats are not only indulgent but also nourishing.
We encourage you to experiment with the recipe, trying different garnishes, flavors, and textures to make it your own. Whether you’re preparing them for yourself or sharing them with loved ones, there’s a joy in creating a breakfast that is both delicious and good for you. Enjoy the process of crafting your perfect bowl of Golden Turmeric Latte Overnight Oats, and relish the blissful mornings they will bring.

