Introduction
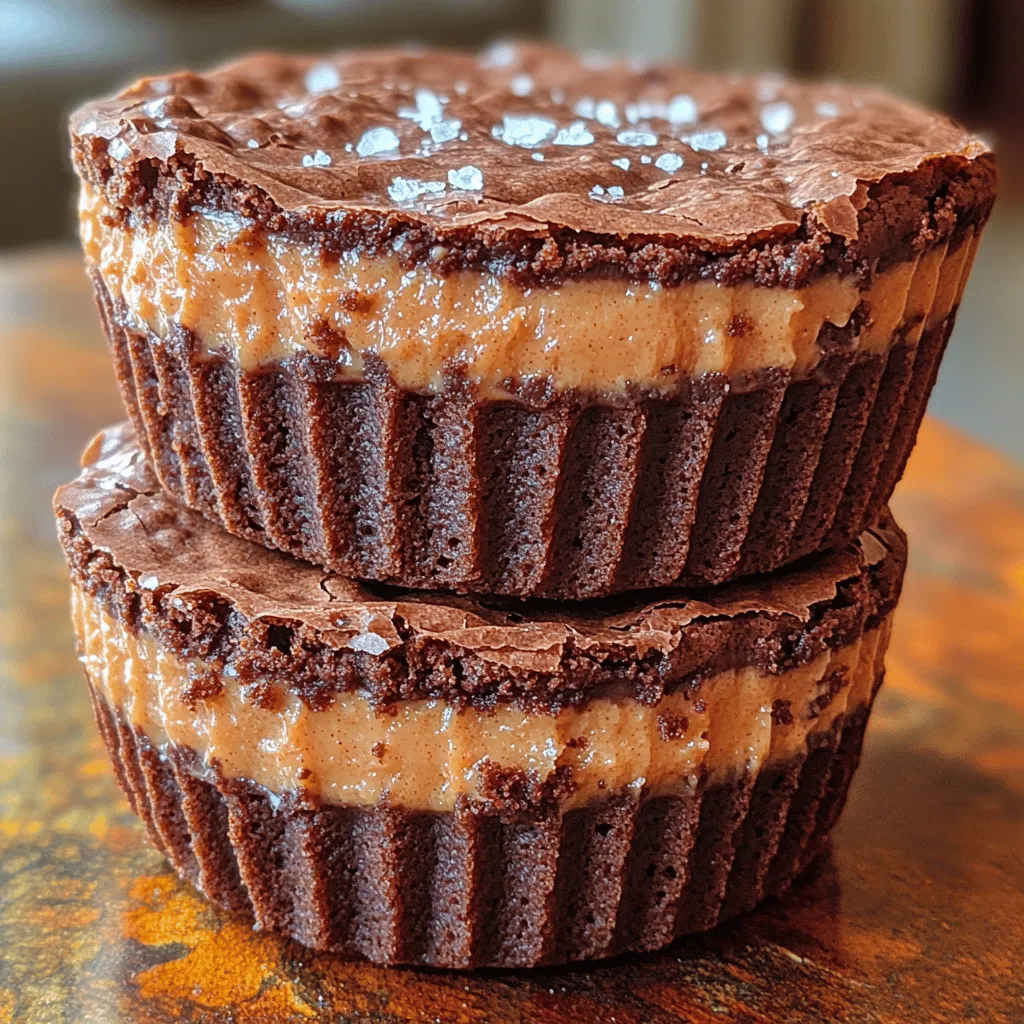
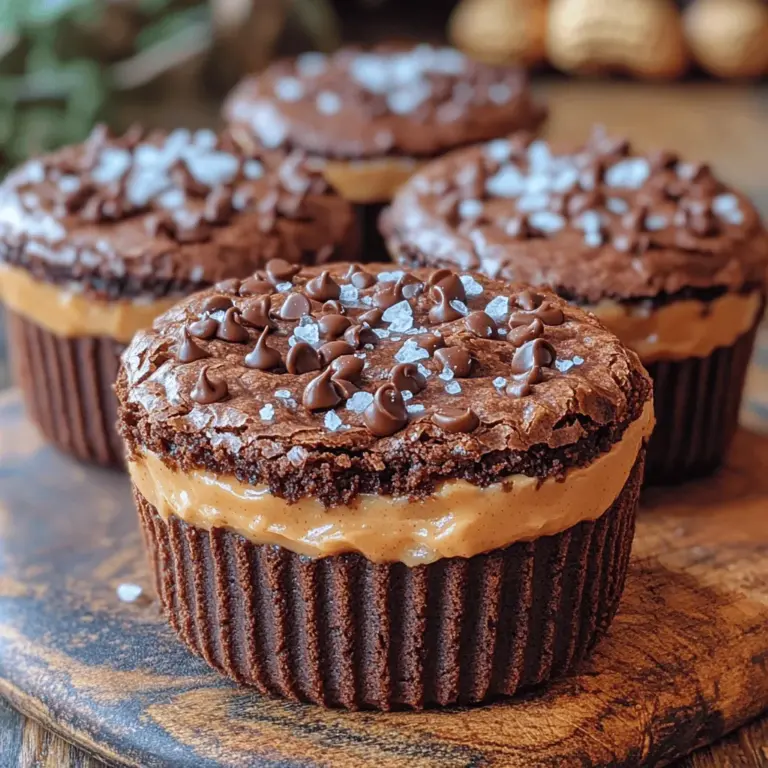
If you are craving a dessert that embodies the perfect balance of rich chocolate and creamy peanut butter, look no further than these decadent peanut butter brownie cups. This delightful treat combines the best of both worlds: the fudgy texture of brownies with the nutty sweetness of peanut butter, all enclosed in a convenient cup form. Not only are they delicious, but they also offer a versatile option for various occasions—be it a family gathering, a potluck, or simply a well-deserved treat after a long day.
One of the standout features of peanut butter brownie cups is their ability to please a wide audience. Whether you are serving them to chocolate lovers, peanut butter enthusiasts, or just anyone with a sweet tooth, these cups are sure to impress. The beauty of this recipe lies in its adaptability; you can easily customize it to suit your preferences or dietary needs, making it a go-to recipe for versatile bakers.
To achieve the best results and bring out the flavors in this delightful dessert, it is essential to use fresh, high-quality ingredients. Fresh ingredients not only contribute to the taste but also to the texture of the brownie cups. When you prioritize quality, you enhance the overall experience of your baked goods, ensuring that each bite is as delicious as the last.
Understanding the Dish
The origins of brownie cups can be traced back to the classic brownie itself, which emerged in the United States in the late 19th century. The brownie is believed to have been invented in the early 1900s, with several stories attributing its creation to different bakers. Regardless of its true origin, the brownie quickly gained popularity and evolved into countless variations, including the delightful peanut butter brownie cups we’re exploring today.
Peanut butter, a key ingredient in this recipe, has its own rich history as well. The use of peanuts in cooking dates back to ancient civilizations in South America. However, peanut butter as we know it began to gain traction in the late 19th century, thanks to innovators who developed the process for grinding peanuts into a paste. Today, peanut butter is a beloved staple in many households around the world, known for its creamy texture and rich flavor.
Culturally, the combination of chocolate and peanut butter has become iconic, especially in American cuisine. This pairing can be found in various desserts, from cookies to cakes, and even candies. The variations of peanut butter brownies also differ across regions, with some incorporating ingredients like crushed pretzels for a salty crunch or drizzled caramel for added sweetness. The flexibility of this dish allows for creativity, making it a favorite among bakers.
From a nutritional standpoint, peanut butter brownie cups offer a unique blend of flavors and benefits. The primary ingredients include dark chocolate, cocoa powder, and peanut butter, each contributing their own nutritional advantages. Dark chocolate is rich in antioxidants and has been associated with heart health, while peanut butter provides protein, healthy fats, and essential vitamins and minerals. Additionally, using whole-grain flour can enhance the fiber content of the brownie cups, making them a more wholesome treat.
Ingredients Overview
To prepare these decadent peanut butter brownie cups, you will need the following primary ingredients:
– Unsweetened cocoa powder
– Dark chocolate (at least 60% cacao)
– Unsalted butter
– Granulated sugar
– Brown sugar
– Eggs
– All-purpose flour
– Peanut butter (creamy or crunchy, depending on your preference)
– Vanilla extract
– Salt
The importance of quality ingredients cannot be overstated. Using high-quality dark chocolate will not only enhance the flavor but also contribute to the desired fudgy texture of the brownie cups. When choosing peanut butter, opt for natural varieties that contain minimal additives and sugars. Fresh eggs and unsalted butter are also essential for achieving the best taste and consistency in your brownies.
Seasonal variations and substitutions can be made to cater to dietary restrictions or personal preferences. For instance, if you’re looking for a gluten-free option, you can substitute all-purpose flour with almond flour or a gluten-free flour blend. If you prefer a vegan version, you can replace eggs with flaxseed meal or applesauce and use dairy-free chocolate and nut butter. The versatility of this recipe allows for creative explorations while maintaining the core elements that make it irresistible.
Preparation Steps
The preparation process for peanut butter brownie cups is straightforward, but careful attention to detail is key to achieving the perfect result. Here is a detailed breakdown of the steps involved:
1. Mise en Place: Before you begin, gather all your ingredients and tools. This includes measuring cups, mixing bowls, a whisk, a spatula, a muffin tin, and cupcake liners. Having everything ready will streamline the cooking process and ensure you don’t overlook any essential steps.
2. Preheat the Oven: Preheat your oven to 350°F (175°C). This step is crucial as it ensures that your brownie cups bake evenly.
3. Melt the Chocolate and Butter: In a heatproof bowl, combine the dark chocolate and unsalted butter. Melt them together using a double boiler or in the microwave in short bursts, stirring until smooth. This creates a glossy mixture that serves as the base for your brownies.
4. Mix the Sugars: In a separate bowl, combine granulated sugar and brown sugar. Mixing these sugars will help to achieve a balanced sweetness in your brownie cups.
5. Incorporate the Eggs: Once the chocolate and butter mixture has cooled slightly, whisk in the eggs one at a time. This helps to create a smooth and homogenous batter.
6. Combine Dry Ingredients: In another bowl, whisk together the all-purpose flour, cocoa powder, and salt. This ensures that the dry ingredients are evenly distributed, preventing clumps in the batter.
7. Fold in the Dry Ingredients: Gradually add the dry ingredients to the wet mixture, folding gently until just combined. Be careful not to overmix, as this can lead to dense brownies.
8. Prepare the Muffin Tin: Line a muffin tin with cupcake liners or grease it lightly to prevent sticking.
9. Spoon in Batter: Using a spoon or ice cream scoop, fill each muffin cup about halfway with brownie batter. This allows enough room for the peanut butter filling.
10. Add Peanut Butter: With a small spoon, dollop a spoonful of peanut butter into each brownie cup. You can swirl it slightly with a toothpick for a marbled effect if desired.
11. Top with Remaining Batter: Cover the peanut butter with more brownie batter until each cup is filled about three-quarters full.
12. Bake: Place the muffin tin in the preheated oven and bake for 18-20 minutes. The brownie cups should be set around the edges but still slightly soft in the center for that perfect fudgy texture.
Timing is crucial when baking these cups. Start checking for doneness around the 18-minute mark, as ovens may vary. You can test for doneness by inserting a toothpick into the center; it should come out with a few moist crumbs attached.
Cooking Methods
The primary cooking method used in this recipe is baking, which is perfect for achieving the desired texture and flavor profile of the brownie cups. Baking allows the heat to circulate evenly, ensuring that the edges become slightly crisp while the center remains gooey and fudgy.
Baking is chosen for this recipe because it helps the flavors meld together beautifully. The combination of chocolate and peanut butter develops a rich taste that can only be achieved through the gradual application of heat. Moreover, baking allows the structure of the brownie cups to form, creating a delightful contrast between the outer crust and the soft, indulgent center.
To achieve the best results, consider the following tips:
– Use Room Temperature Ingredients: Allow your eggs and butter to come to room temperature before mixing. This helps to create a smooth batter that combines more easily.
– Do Not Overbake: The key to fudgy brownie cups is to remove them from the oven when they are still slightly underbaked. They will continue to cook in the residual heat while cooling.
– Let Them Cool: Allow the brownie cups to cool in the muffin tin for a few minutes before transferring them to a wire rack. This helps set their shape and prevents them from breaking apart.
Flavor Profile
The flavor profile of these decadent peanut butter brownie cups is a harmonious blend of rich chocolate and nutty peanut butter. The deep cocoa flavor from the dark chocolate pairs beautifully with the sweetness of the sugars, while the peanut butter adds a creamy texture and a savory contrast.
Key ingredients that enhance the flavor include:
– Cocoa Powder: Adds depth and richness to the brownie batter.
– Dark Chocolate: Provides a luxurious taste and fudgy texture.
– Peanut Butter: Infuses the dessert with a nutty, creamy flavor that complements the chocolate perfectly.
– Vanilla Extract: Enhances the overall sweetness and rounds out the flavors.
In addition to the main ingredients, a pinch of salt is essential for balancing the sweetness and enhancing the flavors of both chocolate and peanut butter. The combination of these elements creates a dessert that is not only delicious but also a true crowd-pleaser.
By following these steps and understanding the components that make up this delightful dessert, you set the stage for creating the perfect batch of decadent peanut butter brownie cups. Whether enjoyed warm from the oven or at room temperature, these treats are bound to become a favorite in your baking repertoire.

Balancing Flavors for Optimal Taste
When preparing decadent peanut butter brownie cups, achieving a harmonious balance of flavors is crucial. The rich, chocolatey goodness of the brownie base pairs beautifully with the creamy, nutty flavor of peanut butter. To enhance this balance, consider the following:
1. Salt Balance: Adding a pinch of salt to both the brownie batter and the peanut butter filling can elevate the overall flavor profile. Salt enhances sweetness and brings out the chocolate and peanut butter’s natural flavors.
2. Sweetness Level: The sweetness of your brownie cups can be adjusted according to personal preference. If you prefer a less sweet dessert, reduce the sugar in the brownie batter slightly, but keep in mind that the peanut butter filling should remain sweet enough to complement the brownies.
3. Vanilla Extract: Incorporating a teaspoon of vanilla extract into both the brownie batter and the peanut butter filling adds depth and complexity to the flavor.
4. Texture Variations: To balance the textures, consider adding chopped nuts or chocolate chips to the brownie batter. This not only adds crunch but also enhances the overall eating experience.
Suggestions for Enhancing the Dish’s Flavor
To elevate your decadent peanut butter brownie cups, think about these enhancements:
– Swirl Technique: For a striking appearance and an infusion of flavor, swirl the peanut butter filling into the brownie batter before baking. This creates beautiful marbled brownie cups with a delightful peanut butter essence.
– Chocolate Drizzle: After baking and cooling, drizzle melted chocolate over the brownie cups for an added layer of richness. This can be done with dark, milk, or even white chocolate, depending on your preference.
– Spices: A dash of cinnamon or espresso powder in the brownie batter can intensify the chocolate flavor. The warmth from cinnamon adds depth, while espresso enhances the chocolate notes without being overtly coffee-flavored.
Serving Suggestions
Ideas for Plating and Presentation
Presentation can elevate your decadent peanut butter brownie cups from simple treats to show-stopping desserts. Here are some creative plating ideas:
– Simple and Elegant: Place two brownie cups on a white plate with a sprig of mint or a dusting of powdered sugar for an elegant touch. The contrast of the dark chocolate and white sugar creates a stunning visual appeal.
– Cupcake Stand: Arrange the brownie cups on a tiered cupcake stand for a festive display, perfect for parties and gatherings. You can also use decorative liners to enhance the aesthetic.
– Garnishes: Top each brownie cup with a dollop of whipped cream, a sprinkle of crushed peanuts, or a few chocolate shavings for an appealing finish.
Complementary Side Dishes and Beverages
To create a complete dessert experience, consider pairing your brownie cups with these:
– Ice Cream: A scoop of vanilla or salted caramel ice cream complements the rich brownie cups beautifully. The cold creaminess of the ice cream contrasts with the warm, fudgy texture of the brownies.
– Coffee or Espresso: The robust flavors of coffee or espresso perfectly balance the sweetness of the brownie cups. A cappuccino or a mocha can enhance the chocolate experience.
– Fruit Accompaniments: Fresh berries, such as strawberries or raspberries, provide a tart contrast to the sweet brownie cups. A side of fruit salad can also lighten the dessert experience.
Tips for Making the Dish Suitable for Various Occasions
These brownie cups are versatile enough for any occasion. Here are some tips for adapting them:
– Parties: Serve them at birthday parties or holiday gatherings by decorating them with festive sprinkles or themed liners.
– Celebrations: For special occasions, such as anniversaries or date nights, make them mini dessert cups and pair them with champagne for a luxurious touch.
– Everyday Treats: For casual get-togethers, serve with coffee or tea, making them a delightful end to any meal.
Storing and Reheating
Best Practices for Storing Leftovers
To keep your decadent peanut butter brownie cups fresh, follow these storage tips:
– Refrigeration: Store the brownie cups in an airtight container in the refrigerator for up to one week. This helps maintain their moisture and texture.
– Freezing: For longer storage, you can freeze the brownie cups. Place them in a single layer on a baking sheet to freeze individually before transferring them to a freezer-safe container. They can last up to three months in the freezer.
How to Reheat Without Losing Flavor or Texture
When reheating, it’s essential to maintain the brownie cups’ texture and flavor:
1. Microwave: Heat individual brownie cups in the microwave for 10-15 seconds. This warms them up while keeping them moist.
2. Oven: For reheating multiple brownie cups, preheat your oven to 350°F (175°C). Place them on a baking sheet and cover them with aluminum foil to prevent drying out. Heat for about 5-10 minutes.
Long-Term Storage Options
If you plan to prepare the brownie cups in advance:
– Batch Cooking: Bake a large batch and freeze them individually for quick access. This way, you always have a treat on hand for unexpected guests or cravings.
– Pre-Made Mix: Consider preparing the dry ingredients for the brownie batter ahead of time and storing them in a jar. When you’re ready to bake, simply add the wet ingredients, saving time on busy days.
Common Mistakes to Avoid
List of Pitfalls When Preparing the Dish
To ensure your brownie cups turn out perfectly, be mindful of the following common mistakes:
1. Overmixing the Batter: When combining wet and dry ingredients, mix just until combined. Overmixing can lead to tough brownies.
2. Incorrect Oven Temperature: Always preheat your oven to the required temperature. An uncalibrated oven may lead to undercooked or overcooked brownies.
3. Not Greasing the Pan: Failing to grease the muffin tin can result in sticking, making it difficult to remove the brownie cups.
Solutions to Common Problems Faced During Cooking
If you encounter issues while making your brownie cups, consider these solutions:
– Dry Brownies: If your brownies turn out dry, check your oven temperature and baking time. Additionally, adding a little extra peanut butter or a touch of milk can help increase moisture.
– Crumbly Texture: If the brownie cups crumble when removed from the pan, they may have been overbaked. Make sure to check for doneness a few minutes before the suggested baking time.
Importance of Patience and Practice
Baking requires patience and practice. Don’t be discouraged by initial failures; each attempt teaches valuable lessons. Adjusting baking times, ingredient ratios, and techniques will help you refine your skills over time.
Variations and Customizations
Suggestions for Dietary Restrictions
If you’re accommodating dietary restrictions, here are some alternatives:
– Vegan: Substitute eggs with flaxseed meal (1 tablespoon flaxseed mixed with 2.5 tablespoons water for each egg) and use dairy-free chocolate. Ensure the peanut butter is also free of additives.
– Gluten-Free: Use a gluten-free flour blend in place of all-purpose flour. Almond flour can also work well for a nutty flavor.
Creative Twists to the Original Recipe
For those wanting to venture beyond the classic brownie cup:
– Nutty Swirls: Add swirls of Nutella, almond butter, or any nut butter of choice into the brownie batter for a flavor twist.
– Stuffed Brownie Cups: Fill the brownie cups with caramel or marshmallow fluff before baking for an indulgent surprise.
Global Adaptations of the Dish
Consider international flavors to give your brownie cups a unique flair:
– Mexican Chocolate: Incorporate spices such as cinnamon and cayenne pepper into the brownie batter for a Mexican-inspired twist.
– S’mores Brownie Cups: Top with mini marshmallows and graham cracker crumbs before baking, giving a nod to the beloved campfire treat.
Conclusion
Decadent peanut butter brownie cups are not only a treat for the taste buds but also a versatile dessert that can be enjoyed in numerous ways. Their rich chocolate flavor combined with creamy peanut butter makes them a crowd-pleaser for any occasion, whether you’re hosting a party or enjoying a quiet evening at home.
Encourage yourself to experiment with this recipe. Try different flavor combinations, adapt it to dietary needs, and share your creations with friends and family. There is immense joy in cooking, especially when it brings loved ones together. The kitchen is a place for creativity, laughter, and cherished memories—so roll up your sleeves, and let the baking begin!

