Introduction to Frozen Fantasy Ice Cream Cake
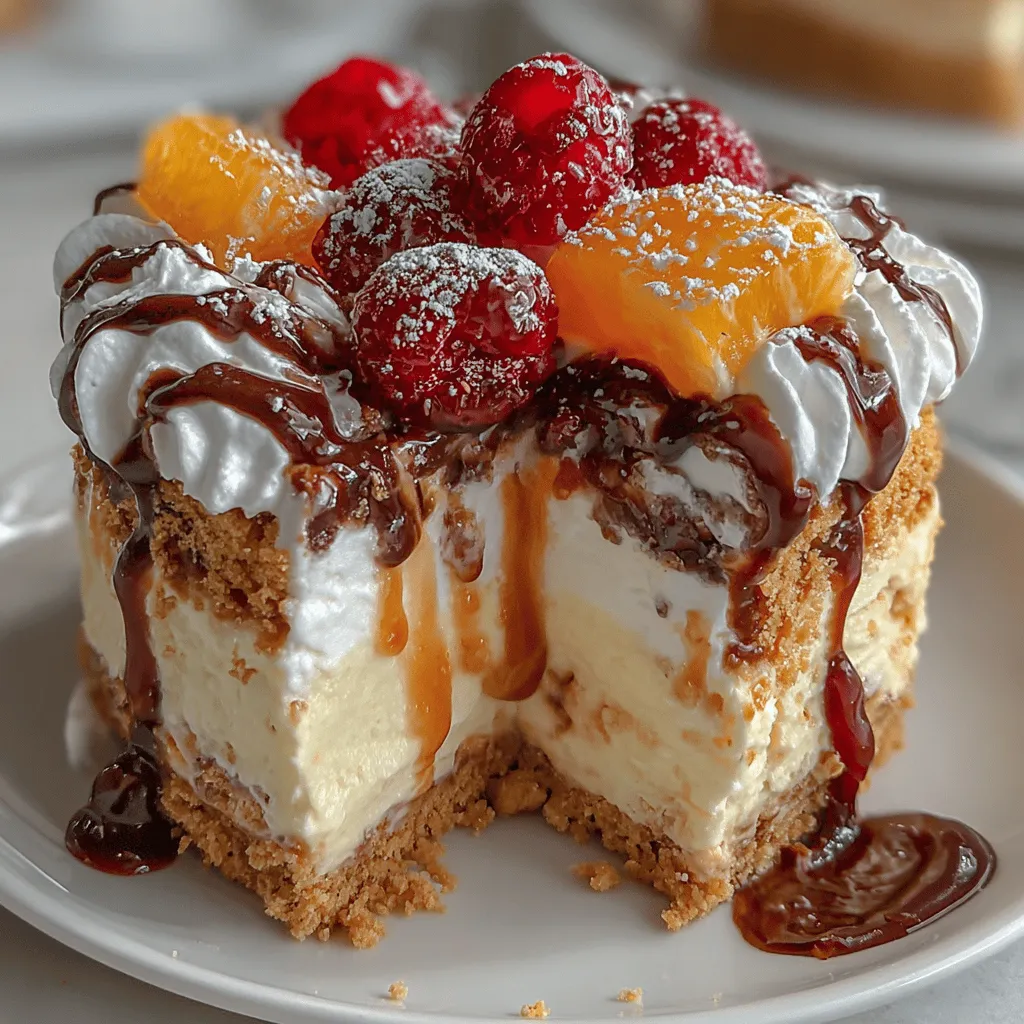
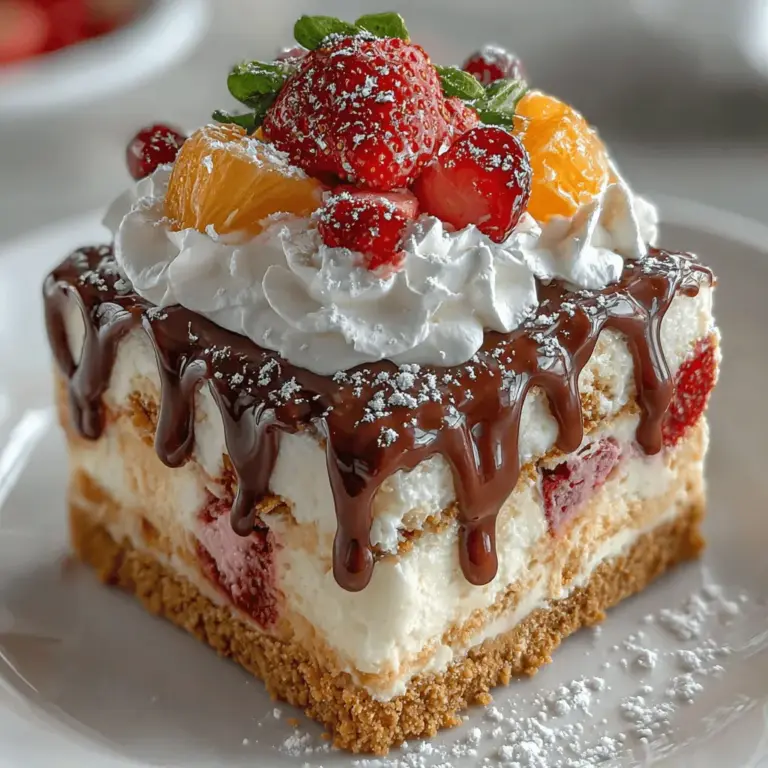
The Frozen Fantasy Ice Cream Cake is the epitome of indulgence, a visually stunning dessert that is as delightful to eat as it is to behold. With its sweet, creamy layers of ice cream and sorbet resting on a buttery graham cracker crust, this cake is a refreshing treat that is perfect for any celebration, from summer barbecues to birthday parties. The combination of flavors and textures creates a symphony of taste that is sure to impress your guests, making it a favorite choice for gatherings of all kinds.
The beauty of the Frozen Fantasy Ice Cream Cake lies not only in its taste but also in its versatility. You can easily customize the flavors to suit your preferences or to match the theme of your event. Whether you prefer classic vanilla and chocolate or more adventurous combinations like mango sorbet and pistachio ice cream, the possibilities are endless. This dessert is not only easy to make but also requires minimal effort once the initial preparation is complete, allowing you to enjoy time with your guests rather than being stuck in the kitchen.
In this article, we will guide you through the step-by-step process of creating this delightful cake, ensuring that each layer is crafted to perfection. From the buttery crust to the smooth ice cream layers and the finishing touches with whipped cream and toppings, we will cover everything you need to know to make your Frozen Fantasy Ice Cream Cake a showstopper. This is not just a recipe; it is an experience that transforms simple ingredients into a masterpiece.
Understanding the Components of Frozen Fantasy Ice Cream Cake
The Graham Cracker Crust
At the foundation of the Frozen Fantasy Ice Cream Cake is the graham cracker crust, which plays a crucial role in providing a sturdy base for the layers above. A well-made crust not only holds the cake together but also adds a delightful texture that complements the creamy fillings. The combination of crushed graham crackers, melted butter, and sugar creates a sweet, buttery flavor that perfectly balances the richness of the ice cream and sorbet.
When preparing the crust, it’s important to achieve the right texture. Too crumbly, and it won’t hold its shape; too dense, and it will overpower the delicate layers above. The goal is to create a crust that is firm enough to support the cake while remaining light and slightly crumbly. Mixing the graham cracker crumbs with melted butter and a touch of sugar ensures that the crust holds together well when pressed into the pan.
Once your mixture is ready, pressing it evenly into the bottom of your cake pan is essential. This step will ensure that every slice of your Frozen Fantasy Ice Cream Cake has that delightful crust, making each bite a perfect harmony of flavors.
Choosing the Right Ice Cream and Sorbet
The choice of ice cream and sorbet is paramount to the success of your Frozen Fantasy Ice Cream Cake. Selecting your favorite flavors allows you to tailor the dessert to your personal taste or to cater to the preferences of your guests. When balancing creaminess and fruitiness, consider how different flavors will complement each other. For instance, a rich chocolate ice cream pairs beautifully with a tangy raspberry sorbet, creating a delightful contrast that excites the palate.
It’s also important to consider the texture of the ice cream you choose. Softer, slightly melted ice cream is easier to spread and layer, but it should not be overly runny. Allowing the ice cream to soften slightly at room temperature for about 10-15 minutes before layering can help achieve the perfect consistency. This step is vital for ensuring that each layer can be spread smoothly over the previous one, resulting in a seamless and visually appealing cake.
Whipped Cream and Toppings for the Final Touch
No ice cream cake is complete without a generous layer of whipped cream and creative toppings. While you can use store-bought whipped cream for convenience, making your own can elevate the flavor and texture of your cake. Homemade whipped cream is often lighter and fluffier, which enhances the overall experience of the dessert.
When it comes to toppings, the options are virtually limitless. Drizzling chocolate syrup or caramel sauce can add a sweet touch, while fresh fruits like strawberries, blueberries, or mango slices can provide a refreshing contrast. Not only do these toppings enhance the visual appeal of your Frozen Fantasy Ice Cream Cake, but they also add extra layers of flavor that can elevate your dessert to new heights.
Step-by-Step Instructions for Crafting Your Frozen Fantasy Ice Cream Cake
Preparing the Crust
To begin your journey toward the perfect Frozen Fantasy Ice Cream Cake, start with the crust. First, gather your ingredients: graham cracker crumbs, melted butter, and granulated sugar. The right ratio is essential for achieving the ideal texture. A common guideline is to use about 1 ½ cups of graham cracker crumbs, ½ cup of melted butter, and ¼ cup of sugar.
1. Mix the Ingredients: In a mixing bowl, combine the graham cracker crumbs and sugar. Slowly drizzle in the melted butter while stirring until the mixture is evenly moistened and resembles wet sand.
2. Pressing the Crust: Transfer the crumb mixture into a 9-inch springform pan or a round cake pan. Using the back of a measuring cup or your fingers, press the mixture firmly and evenly into the bottom of the pan. Make sure to pack it tightly to create a solid base that holds together well.
3. Freezing for Optimal Firmness: Once your crust is pressed into place, place the pan in the freezer for about 30 minutes. This step is crucial as it allows the crust to firm up, making it easier to layer the ice cream and sorbet without disturbing the crust.
Layering the Ice Cream
With your crust ready, it’s time to move on to the fun part—layering the ice cream and sorbet. This step requires a bit of patience and technique to ensure that each layer is smooth and evenly distributed.
1. Softening the Ice Cream: Before you begin layering, allow your chosen ice cream to soften at room temperature for about 10-15 minutes. This will make it easier to spread and help you achieve a smooth layer.
2. Spreading the First Layer: Start with your first flavor of ice cream. Using a spatula, scoop out a generous amount and spread it evenly over the prepared crust. Take your time to ensure that the layer is smooth and level.
3. Freezing Between Layers: After spreading the first layer, return the cake to the freezer for about 20-30 minutes to allow it to firm up before adding the next layer. This is an important step that prevents the flavors from blending too much and helps maintain distinct layers.
Continue the process, alternating between ice cream and sorbet flavors, allowing each layer to freeze before adding the next. As you build your cake, you will see the beautiful layers form, creating an enticing visual effect that promises a delicious treat once sliced.
This initial assembly is just the beginning of crafting your Frozen Fantasy Ice Cream Cake. In the following sections, we will dive deeper into the finishing touches that will elevate your dessert from ordinary to extraordinary.

How to Ensure Clean Layers for a Beautiful Presentation
Adding the Sorbet Layer
Creating a visually stunning Frozen Fantasy Ice Cream Cake starts with careful layering. To achieve clean and distinct layers, it’s essential to pay attention to how you add each component.
Spreading Techniques for Consistency
When adding the sorbet layer, use an offset spatula for a smoother application. Start from the center and spread outwards, ensuring the layer is evenly distributed. For optimal consistency, aim for a thickness of about half an inch. This will not only enhance the cake’s aesthetic but also ensure that each slice reveals those beautiful contrasting colors.
The Benefits of Alternating Flavors in Each Layer
Alternating flavors for each layer not only adds visual interest but also enhances the overall taste experience. For example, pairing a tangy lemon sorbet with a rich chocolate ice cream creates a delightful contrast that excites the palate. Experiment with different combinations to find your favorite mix, but remember that complementary flavors often lead to the most satisfying results.
Why Freezing Is Crucial Before the Next Step
After spreading each layer, it’s important to freeze the cake for at least 30 minutes before adding the next layer. This prevents the flavors from bleeding into one another and helps maintain the integrity of your layers. A well-frozen layer provides a solid base for the next, ensuring your cake remains structurally sound and visually appealing.
Topping with Whipped Cream and Sauces
Once you’ve added all your layers and they’re well-frozen, it’s time to top your cake with whipped cream and sauces for that finishing touch.
Techniques for an Even Whipped Cream Layer
For an even layer of whipped cream, use a clean offset spatula or a large spoon. Start from the center and work your way out towards the edges. Ensure that the whipped cream is slightly chilled to maintain its shape as you spread it over the cake. For a decorative touch, you can pipe the whipped cream using a piping bag fitted with a star-shaped tip, which adds a professional look.
Tips on Drizzling Chocolate Syrup or Caramel Sauce Artistically
To create an eye-catching drizzle of chocolate syrup or caramel sauce, use a squeeze bottle or a spoon. Start from the top of the cake and allow the sauce to cascade down the sides. The randomness of the drizzle creates a beautiful, artistic effect. Additionally, consider warming the sauce slightly to make it easier to drizzle, but be cautious not to heat it too much, as it may melt the whipped cream.
Garnishing with Fruits: How to Choose and Arrange
Fruits not only add flavor but also enhance the cake’s visual appeal. Choose fresh, seasonal fruits like berries, sliced kiwi, or mango for vibrant colors. Arrange the fruits in a circular pattern on top of the whipped cream or create clusters at various points for a more playful look. Make sure to wash and dry the fruits thoroughly to avoid excess moisture that can affect the cake’s texture.
Final Freezing and Presentation
After decorating, the cake needs a final freeze to set everything in place.
Recommended Freezing Times for Best Results
Allow the cake to freeze for at least 2-4 hours, or overnight for the best results. This ensures that all layers are solid and the whipped cream holds its shape. If you’re planning to serve it the next day, cover the cake with plastic wrap to prevent freezer burn.
Tips for Easy Serving and Slicing
When it’s time to serve your Frozen Fantasy Ice Cream Cake, use a sharp, hot knife for clean slices. Dip the knife in hot water and wipe it dry before cutting into the cake. This technique prevents the ice cream from sticking to the knife, ensuring clean, beautiful slices every time.
Creative Ways to Present the Cake for Special Occasions
For special occasions, elevate the presentation by serving the cake on a decorative cake stand. You can also add extra garnishes like edible flowers or a sprinkle of grated chocolate for an upscale touch. Consider serving the cake with a scoop of extra ice cream on the side or a drizzle of sauce on the plate for an added flair.
Nutritional Information and Serving Suggestions
Understanding the Nutritional Value
When enjoying dessert, it’s important to be mindful of the nutritional content. Here’s a breakdown of some key ingredients in the Frozen Fantasy Ice Cream Cake:
– Ice Cream: A source of calcium and protein but can be high in sugars and fats, depending on the brand.
– Sorbet: Generally lower in calories and fat compared to ice cream, and often dairy-free, making it a great option for those with lactose intolerance.
– Whipped Cream: A source of fat; however, you can substitute with a lighter version or coconut cream for a healthier option.
How to Make the Cake Healthier (If Desired)
To make your Frozen Fantasy Ice Cream Cake healthier, consider using low-fat or dairy-free ice cream options. You can also reduce the amount of sugar in the sorbet by using fresh fruit puree instead of store-bought syrups. Additionally, opt for homemade whipped cream using healthier sweeteners like honey or agave.
Portion Control and Serving Sizes
When serving, keep portion sizes in mind. A slice of cake approximately 1/12th of the full cake is a satisfying portion. Accompany your cake with fresh fruit or a small scoop of sorbet to balance out the sweetness and enhance the overall experience.
Pairing Suggestions for the Perfect Dessert Experience
Enhancing your dessert experience goes beyond just the cake itself. Here are some recommendations:
Recommended Beverages to Complement the Cake
Pair your Frozen Fantasy Ice Cream Cake with refreshing beverages like iced tea, lemonade, or a sparkling fruit soda. For adults, a light dessert wine or champagne can beautifully complement the flavors, while coffee lovers may enjoy a robust espresso or cappuccino alongside the sweetness of the cake.
Other Desserts or Snacks That Pair Well with the Cake
If you’re hosting a gathering, consider serving additional desserts alongside the cake, such as cookies, brownies, or fruit tarts. These options provide variety and cater to diverse preferences.
Seasonal Variations and Themes for Serving
For summer gatherings, serve the cake with a tropical theme, incorporating fruits like pineapple and coconut. During the fall, consider flavors like pumpkin or apple, adding spices such as cinnamon and nutmeg to your sorbet or ice cream layers for a seasonal twist.
Conclusion: Savoring the Delight of Frozen Fantasy Ice Cream Cake
In conclusion, the Frozen Fantasy Ice Cream Cake is an exquisite dessert that combines delightful flavors and easy preparation. Whether you’re celebrating a birthday, hosting a summer barbecue, or simply indulging in a sweet treat, this cake is sure to be a hit. With its stunning layers and customizable options, it offers a refreshing twist on traditional cakes, making it a beloved addition to any dessert table.
Enjoy the process of creating this frozen delight and watch as your friends and family relish every bite. The beauty of this recipe lies not only in its taste but in the joy it brings to every gathering, forging sweet memories that last a lifetime. So gather your ingredients, follow the steps, and prepare to impress everyone with your very own Frozen Fantasy Ice Cream Cake!

