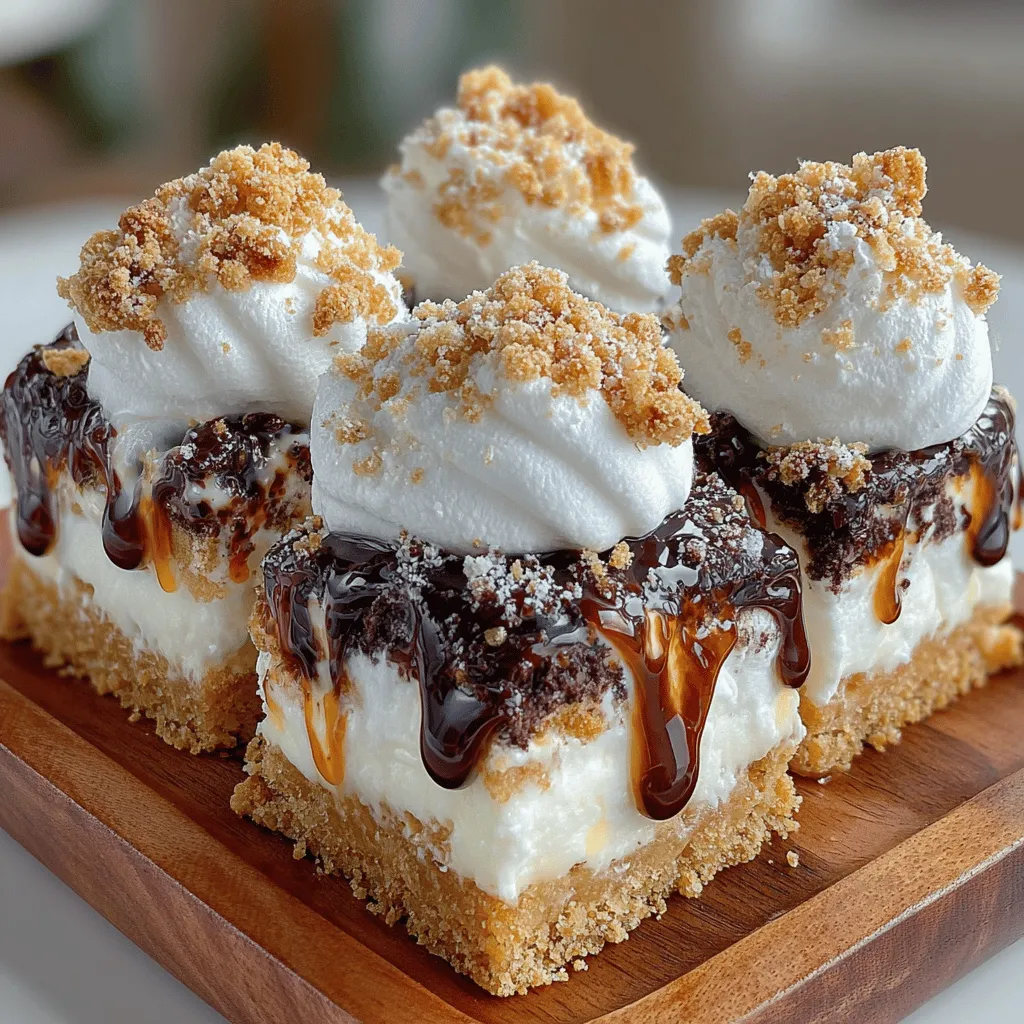
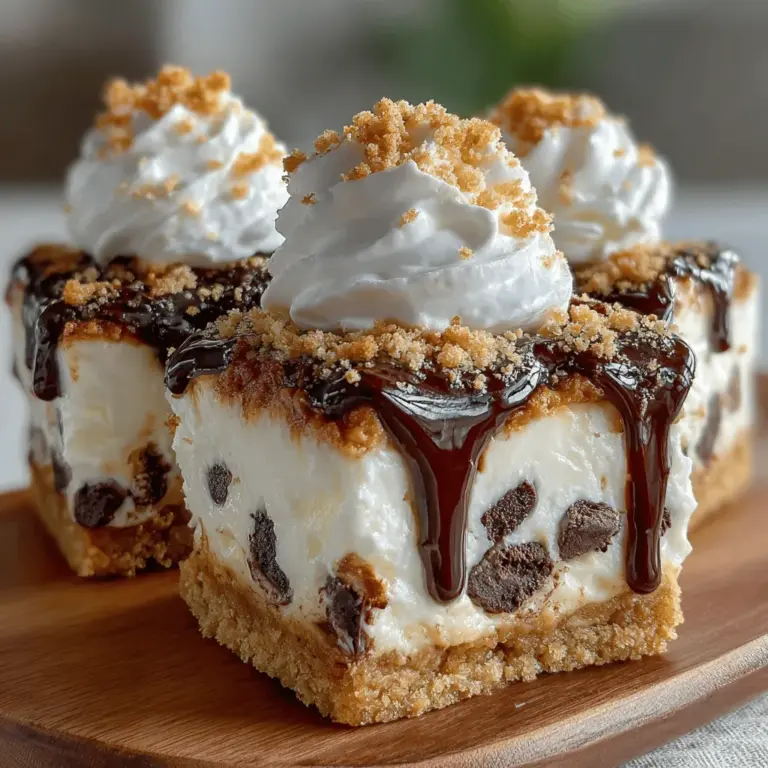
Frozen Yogurt S’mores Cookie Squares Recipe
Introduction
The summer season brings with it a wave of nostalgia, evoking memories of campfires, laughter, and, of course, the beloved s’mores. However, as temperatures rise, the traditional gooey treat can often feel too heavy or messy. Enter the Frozen Yogurt S’mores Cookie Squares—a delightful twist on this classic campfire favorite that allows you to enjoy all the flavors of s’mores in a refreshing, easy-to-eat format. These cookie squares combine the rich, toasted flavors of graham crackers, the gooey sweetness of marshmallows, and the decadent taste of chocolate, all layered with a creamy, frozen yogurt filling.
Perfect for summer gatherings, parties, or an indulgent family dessert, these cookie squares are not only a feast for the taste buds but also a visual delight. The combination of textures—from the crunchy cookie base to the smooth frozen yogurt—ensures that every bite is a satisfying experience. Whether you’re serving them at a backyard barbecue or enjoying them on a warm evening, these Frozen Yogurt S’mores Cookie Squares are sure to impress your guests and bring smiles to faces of all ages.
The Perfect Summer Treat: Why You’ll Love These Cookie Squares
S’mores have long been a staple of summer nights, and while they’re often associated with campfire gatherings, they can be enjoyed in various forms year-round. The Frozen Yogurt S’mores Cookie Squares not only embody the essence of s’mores but also offer a refreshing twist that makes them particularly appealing during the hotter months. With their chilled, creamy center, these squares provide a perfect balance to the warm, toasty flavors of the graham cracker and chocolate.
As the sun blazes and the heat swells, there’s nothing quite like a cold dessert to cool you down. This recipe modernizes the classic s’mores, making it adaptable for a variety of occasions. Whether you’re celebrating a birthday, hosting a summer barbecue, or simply treating your family to a special dessert, these cookie squares are easy to prepare and serve. The nostalgic elements of the traditional s’mores are preserved, while the addition of frozen yogurt elevates the dish to a new level of refreshment, making it a standout choice for any summer dessert table.
Understanding the Ingredients
To create these delectable Frozen Yogurt S’mores Cookie Squares, it’s essential to understand the role each ingredient plays in achieving the perfect flavor and texture.
Graham Cracker Crumbs: The foundation of any good s’mores-inspired treat, graham cracker crumbs provide a sweet, slightly nutty flavor and a delightful crunch. They form the base of the cookie squares, giving them that familiar s’mores essence. If you’re looking for alternatives, crushed digestive biscuits or even gluten-free graham crackers can be used to cater to dietary preferences without sacrificing taste.
Flour and Sugars: All-purpose flour is crucial for binding the ingredients together and creating the right structure in the cookie base. The blend of granulated sugar and brown sugar not only adds sweetness but also enhances the cookie’s texture, ensuring it remains soft and chewy. Brown sugar, in particular, contributes a deeper, caramel-like flavor, which complements the other ingredients beautifully.
Butter, Egg, and Vanilla: These wet ingredients are vital for adding richness and moisture to the cookie squares. Butter lends a rich flavor and helps to create a tender crumb, while the egg acts as a binder, giving the cookie structure. A splash of vanilla extract enhances the overall flavor profile, making each bite even more delightful.
Mini Marshmallows and Chocolate Chips: No s’mores recipe would be complete without these classic ingredients. Mini marshmallows add that iconic gooey sweetness, reminiscent of toasted marshmallows from a campfire. Meanwhile, chocolate chips bring a rich, melty element that harmonizes perfectly with the other flavors, ensuring each bite is a true representation of s’mores.
Vanilla Frozen Yogurt: This is the star of the show when it comes to the frozen aspect of the recipe. Vanilla frozen yogurt adds a creamy, cool layer that balances the sweetness of the cookie base and enhances the overall dessert experience. It’s not just a delicious addition but also a healthier alternative to traditional ice cream, making it a guilt-free treat for warm summer days.
Optional Toppings: To elevate the presentation and flavor of your cookie squares, consider adding a drizzle of chocolate syrup or a sprinkle of extra graham cracker crumbs on top. These optional toppings not only enhance the visual appeal of the dessert but also add extra layers of flavor, making your cookie squares even more irresistible.
Step-by-Step Instructions for Creating Your Cookie Squares
Now that you understand the key components that make these Frozen Yogurt S’mores Cookie Squares so special, it’s time to dive into the preparation process. Follow these detailed steps to create your own batch of these delicious treats:
1. Preheat Your Oven: Start by preheating your oven to 350°F (175°C). This ensures that your cookie base bakes evenly and achieves that perfect golden-brown color.
2. Prepare the Baking Dish: Line an 8×8-inch baking dish with parchment paper, allowing some overhang on the sides. This will make it easier to lift the cookie squares out of the dish once they’re set.
3. Mix the Dry Ingredients: In a large mixing bowl, combine the graham cracker crumbs, all-purpose flour, granulated sugar, brown sugar, and a pinch of salt. Whisk these ingredients together until they are well incorporated.
4. Combine the Wet Ingredients: In a separate bowl, melt the butter and let it cool slightly. Then, add the egg and vanilla extract, whisking until combined. The melted butter should be warm, but not hot, to avoid cooking the egg.
5. Combine Wet and Dry Ingredients: Pour the wet mixture into the dry ingredients, stirring until just combined. Be careful not to overmix, as this can lead to tough cookie squares.
6. Fold in the Mix-Ins: Gently fold in the mini marshmallows and chocolate chips, ensuring they are evenly distributed throughout the cookie dough.
7. Spread the Cookie Dough: Transfer the cookie dough into the prepared baking dish, using a spatula to spread it evenly across the bottom. Press down firmly to create a compact layer that will hold up when cut into squares.
8. Bake the Cookie Base: Place the baking dish in the preheated oven and bake for about 20-25 minutes, or until the edges are golden brown and the center is set. Keep an eye on the baking time, as ovens can vary.
9. Cool the Cookie Base: Once baked, remove the dish from the oven and allow the cookie base to cool completely in the pan. This is an important step, as it allows the flavors to meld and prevents the frozen yogurt from melting when added.
With these steps, you’ve successfully created the cookie base for your Frozen Yogurt S’mores Cookie Squares. Stay tuned for the next part of the recipe, where we will guide you through the process of adding the creamy frozen yogurt layer and finishing touches to complete this delectable dessert.

Preparing the Pan
When it comes to preparing your baking pan for the Frozen Yogurt S’mores Cookie Squares, using parchment paper is not just a suggestion—it’s essential. Parchment paper creates a non-stick surface, making it incredibly easy to remove the cookie squares once they’re baked and frozen. To prepare your pan, take a 9×9-inch baking dish and line it with parchment paper, allowing some overhang on the sides. This overhang will serve as handy handles for lifting the cookie squares out of the pan once they are ready. Additionally, lightly greasing the parchment paper with a bit of cooking spray can help ensure that your dessert comes out in one piece, leaving you with beautifully shaped squares ready for serving.
Making the Cookie Base
The cookie base is the foundation of your Frozen Yogurt S’mores Cookie Squares, and getting the mixing process right is critical to achieving the perfect texture. In a large mixing bowl, combine softened unsalted butter and brown sugar, and cream them together until the mixture is light and fluffy. This step is crucial as it incorporates air into the dough, resulting in a chewy yet tender cookie base.
Next, add in an egg and a splash of vanilla extract, mixing until fully incorporated. In a separate bowl, whisk together all-purpose flour, graham cracker crumbs, baking soda, and a pinch of salt. Slowly add the dry ingredients to the wet mixture, stirring until just combined. Be careful not to overmix; you want your dough to be slightly thick and cohesive but not too dry. The right consistency should be soft enough to spread easily in the pan but firm enough to hold its shape.
Layering Ingredients
Layering is where the magic of flavor distribution happens in this recipe. Start by pressing half of your cookie dough mixture evenly into the bottom of your prepared baking pan. Use your hands or a spatula to ensure an even layer, which will serve as the base of your dessert. Once the cookie base is in place, sprinkle a generous layer of mini marshmallows and chocolate chips over it. This not only adds flavor but also creates a visually appealing contrast when the dessert is baked.
Next, scoop the remaining cookie dough in small dollops over the marshmallow and chocolate layer. Use a spatula to carefully spread it out, ensuring that the chocolate and marshmallows peek through in places. This technique not only enhances the visual appeal but also provides a delightful combination of textures when enjoyed. The goal is to have an even distribution of flavors throughout the dessert, ensuring that every bite is a perfect blend of cookie, chocolate, and marshmallow.
Baking Process
The baking process is crucial for achieving the ideal texture of your cookie squares. Preheat your oven to 350°F (175°C) and place the pan in the oven once it’s hot. Bake for 20 to 25 minutes, but keep a close eye on the squares as they approach the 20-minute mark. You want the edges to be lightly golden while the center remains soft. A toothpick inserted into the center should come out with a few moist crumbs attached, indicating that the cookie base is done but still chewy.
After baking, allow the pan to cool on a wire rack for about 30 minutes. This cooling period is essential as it helps the cookie set further, making it easier to layer the frozen yogurt on top without disturbing the cookie base.
Adding the Frozen Yogurt Layer
Once your cookie base has cooled, it’s time to add the frozen yogurt layer. For this recipe, you can use store-bought frozen yogurt or make your own if you’re feeling adventurous. If you’re using store-bought yogurt, allow it to sit at room temperature for about 10 minutes to slightly soften. This step will make it easier to spread.
Spoon the softened frozen yogurt over the cooled cookie base, using a spatula to spread it evenly and smoothly. The goal is to achieve a flawless top layer that not only looks appealing but also contrasts beautifully with the cookie base beneath. Once the yogurt is spread out evenly, cover the pan with plastic wrap or aluminum foil and place it in the freezer.
Freezing the Dessert
Patience is key during the freezing process. Allow the dessert to freeze for at least 4 hours, or overnight if possible, to achieve the right firmness. This waiting period ensures that the frozen yogurt sets properly, making it easier to cut into squares later. If you attempt to slice the dessert before it’s fully frozen, you risk a messy presentation.
Once the freezing time is complete, remove the pan from the freezer. Lift the dessert out using the parchment paper overhang and place it on a cutting board. Use a sharp knife to slice it into squares, wiping the knife clean between cuts for clean edges. The result should be perfectly layered cookie squares that are ready to be enjoyed.
Serving Suggestions: Presentation and Enjoyment
Presentation can enhance the enjoyment of your Frozen Yogurt S’mores Cookie Squares. To serve, place the squares on a decorative plate or platter. Consider drizzling chocolate syrup over the tops for an extra indulgent touch, and sprinkle some additional graham cracker crumbs for added texture and visual appeal.
For a refreshing twist, serve your squares alongside fresh fruit such as strawberries or raspberries. The tartness of the fruit balances the sweetness of the s’mores cookie squares beautifully. Another delightful option is to offer a scoop of extra frozen yogurt on the side, allowing everyone to customize their dessert experience.
Nutritional Insights
While indulgent, these Frozen Yogurt S’mores Cookie Squares can also provide some nutritional benefits. The use of frozen yogurt instead of traditional ice cream significantly reduces the calorie and fat content, making it a lighter alternative. Yogurt contains probiotics, which can be beneficial for gut health, and using whole ingredients like graham cracker crumbs and dark chocolate can enhance the overall nutritional profile of the dessert.
However, it’s important to note that moderation is key, as the sweetness from the cookie base and added sugars can still contribute to the overall calorie count. Enjoying these squares as an occasional treat rather than a daily dessert can help maintain a balanced diet while still allowing for indulgence.
Conclusion
The Frozen Yogurt S’mores Cookie Squares recipe stands out as a delightful dessert that combines the nostalgic flavors of s’mores with the refreshing creaminess of frozen yogurt. With its meticulously layered components and rich textures, this dessert is sure to impress both children and adults alike, making it perfect for summer gatherings, birthday parties, or simply as a fun family treat.
Whether enjoyed at a barbecue or a cozy night in, these squares bring joy and a sense of nostalgia to any occasion. The process of making them can also serve as a wonderful opportunity for families to bond in the kitchen, creating cherished memories around food. So, gather your ingredients, prepare your pan, and embrace the fun of creating this delicious treat that is bound to become a favorite in your household.

