Introduction
Apple pie is more than just a dessert; it’s a nostalgic symbol of home, warmth, and family gatherings. For many, the scent of freshly baked apple pie wafting through the house transports them back to cherished memories of time spent in the kitchen with loved ones. It’s no wonder that this classic dessert holds a special place in the hearts—and stomachs—of so many. Each slice tells a story, often rooted in family traditions passed down through generations.
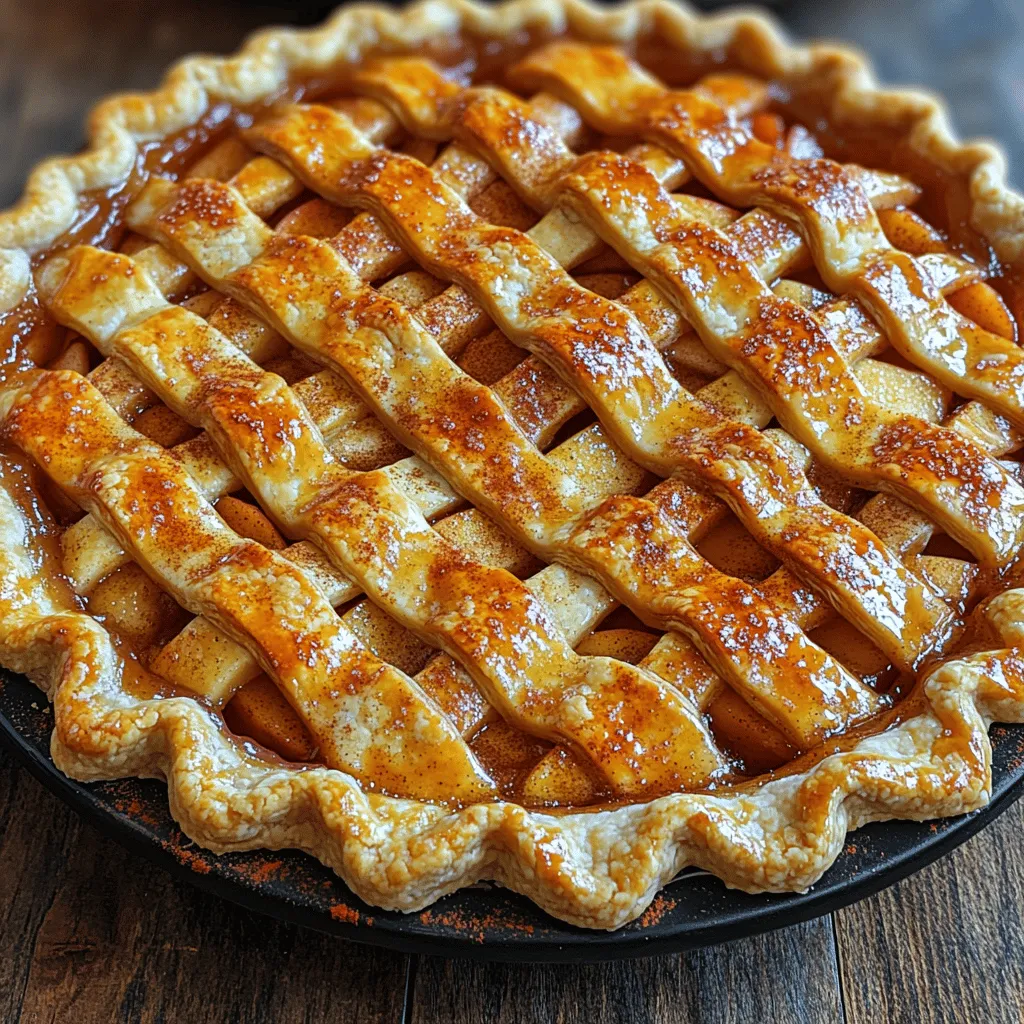
Among the myriad of apple pie recipes, one stands out: Grandma’s Secret Apple Pie. This treasured recipe, steeped in family lore, has been lovingly crafted to achieve that perfect balance of flaky crust and flavorful filling. With each bite, you can taste the love and care that has gone into its preparation. The crust, a delicate layer of buttery goodness, cradles a spiced apple filling that is both sweet and tart, creating a delightful experience that is hard to resist.
In this article, we are excited to share not just the recipe for Grandma’s Secret Apple Pie, but also the techniques and tips that make it truly special. Our journey will begin with an exploration of what makes an apple pie great, the importance of each ingredient, and a step-by-step guide to creating this beloved dessert from scratch.
Understanding the Components of a Great Apple Pie
To appreciate Grandma’s Secret Apple Pie fully, one must first understand the essential components that contribute to its success: the flaky crust and the delicious apple filling.
The Significance of a Flaky Crust
The crust is the foundation of any great apple pie. A flaky crust not only provides a satisfying texture but also serves to enhance the flavors of the filling. When done correctly, it should be tender and crisp, easily breaking apart to reveal the luscious apples nestled inside.
The secret to achieving that perfect flakiness lies in the technique and the ingredients used. A well-made crust is light and airy, thanks to the incorporation of cold butter and minimal mixing. This is where Grandma’s wisdom shines through, ensuring that the crust complements rather than competes with the filling.
Overview of the Ingredients Used in the Crust
For a flaky pie crust, you will need:
– All-Purpose Flour: The backbone of the crust, providing structure.
– Granulated Sugar: A touch of sweetness that enhances flavor.
– Salt: Balances the sweetness and brings out the flavors.
– Unsalted Butter: The key to flakiness, when cut into the flour correctly.
– Ice Water: Helps bind the dough without warming the butter.
Each of these components plays a crucial role in the final texture and taste of the crust. Using high-quality ingredients ensures a superior outcome, so opt for good butter and fresh flour for the best results.
The Role of the Apple Filling
While the crust is vital, the filling is where the heart of the apple pie lies. It’s essential to choose the right apples, as their variety significantly impacts the pie’s flavor and texture. Apples like Granny Smith provide a tartness that contrasts beautifully with sweetness, while Honeycrisp offers a crisp bite. A combination of different apple varieties often yields the best results, creating a complex flavor profile.
Importance of Apple Variety for Flavor and Texture
When selecting apples for your pie, consider the following options:
– Granny Smith: Tart and firm, holds its shape well during baking.
– Honeycrisp: Sweet, juicy, and maintains a great texture.
– Golden Delicious: Mildly sweet and softens nicely, adding sweetness.
– Braeburn: A perfect balance of sweet and tart, with a firm texture.
Using a blend of these apples can elevate your pie, creating a depth of flavor that is simply unbeatable.
Overview of Spices and Sweeteners That Enhance the Filling
In addition to apples, the spices and sweeteners you choose are crucial in crafting the perfect filling. Common additions include:
– Brown Sugar: Adds a hint of molasses flavor and contributes to a rich depth.
– Granulated Sugar: Balances the tartness of the apples.
– Ground Cinnamon: A classic spice that complements the apples beautifully.
– Nutmeg: Offers warmth and enhances the overall flavor.
– Lemon Juice: Brightens the filling and helps prevent browning.
– Vanilla Extract: Adds a layer of sweetness and complexity.
These ingredients work together to create a filling that is both comforting and delicious, ensuring each bite is packed with flavor.
Gathering Your Ingredients
Now that we’ve discussed the foundational elements of Grandma’s Secret Apple Pie, it’s time to gather our ingredients. This step is crucial, as using high-quality components can make a significant difference in the outcome of your pie. Below is a detailed list of what you’ll need for both the crust and the filling.
Ingredients for the Flaky Crust
– 2 ½ cups all-purpose flour: For structure and stability.
– 2 tablespoons granulated sugar: To balance the flavors.
– 1 teaspoon salt: To enhance the taste of the crust.
– 1 cup unsalted butter, cold and cut into cubes: The key to a flaky texture.
– 6-8 tablespoons ice water: To bind the dough without warming it.
Ingredients for the Apple Filling
– 6 cups apples, mixed varieties: A combination of Granny Smith, Honeycrisp, and Golden Delicious is recommended.
– ¾ cup brown sugar: For depth and richness.
– ¼ cup granulated sugar: To balance the tartness of the apples.
– 2 tablespoons all-purpose flour: To thicken the filling.
– 1 teaspoon ground cinnamon: A must-have for classic apple pie flavor.
– ¼ teaspoon ground nutmeg: For warmth and complexity.
– 1 tablespoon lemon juice: To brighten the filling.
– 1 teaspoon vanilla extract: To enhance the overall flavor.
In addition to these ingredients, ensure you have the necessary kitchen tools on hand, including a mixing bowl, rolling pin, pie dish, and a sharp knife for preparing the apples.
Step-by-Step Guide to Making Grandma’s Secret Apple Pie
Now that we have all our ingredients, it’s time to dive into the step-by-step process of making Grandma’s Secret Apple Pie. This section will cover the preparation of the flaky crust and the delicious apple filling, setting the stage for a perfect pie.
Preparing the Flaky Crust
1. Whisking and Combining Dry Ingredients: In a large mixing bowl, whisk together the all-purpose flour, granulated sugar, and salt. This step ensures that the dry ingredients are evenly distributed, which is crucial for the texture of the crust.
2. Proper Technique for Mixing in Butter: Add the cold, cubed unsalted butter to the flour mixture. Using a pastry cutter or your fingertips, work the butter into the flour until the mixture resembles coarse crumbs. Be careful not to overwork the mixture; you want to maintain small bits of butter, as these will create the flakiness in the crust.
3. Importance of Chilling the Dough: Once the butter is incorporated, add the ice water, one tablespoon at a time, mixing gently until the dough starts to come together. Form the dough into a ball, flatten it into a disk, and wrap it in plastic wrap. Refrigerate for at least one hour. Chilling the dough allows the gluten to relax and the butter to firm up, which is essential for achieving a flaky crust.
Creating the Apple Filling
1. Preparing Apples: While the crust chills, it’s time to focus on the filling. Start by peeling, coring, and slicing the apples into thin wedges. Aim for even slices to ensure uniform cooking.
2. Mixing the Filling Ingredients: In a large mixing bowl, combine the sliced apples with the brown sugar, granulated sugar, flour, ground cinnamon, ground nutmeg, lemon juice, and vanilla extract. Toss the apples until they are well coated with the mixture. Allow the filling to sit for about 15-20 minutes; this will help the flavors meld and create a syrupy consistency.
Stay tuned as we move forward with perfecting the assembly of the pie in the next section, where we’ll roll out the crust and bring together the elements of Grandma’s Secret Apple Pie!

Tips for Achieving the Right Thickness
When making Grandma’s Secret Apple Pie, getting the filling just right is crucial for that perfect slice. A well-balanced thickness not only enhances the flavor but also ensures that the pie slices hold together beautifully once cut. Here are some tips to achieve that ideal consistency:
1. Use the Right Apples: Choose a combination of apples like Granny Smith for tartness and Honeycrisp for sweetness. These varieties have the right moisture content and texture that maintain their shape when baked, preventing a soggy filling.
2. Toss with Thickener: As you prepare the apple filling, toss the sliced apples with a thickening agent such as all-purpose flour, cornstarch, or tapioca. This not only helps to absorb excess moisture but also contributes to a glossy finish.
3. Let the Filling Sit: After mixing the apples with sugar and the thickener, let the mixture sit for about 15-20 minutes. This allows the apples to release some of their juices, which can then be incorporated into the filling and help create a thicker consistency.
Proper Placement in the Pie Dish
When it comes to assembling your pie, proper placement of the crust in the pie dish is essential. Here’s how to do it right:
1. Roll Out the Dough: After chilling your dough, roll it out on a floured surface to about 1/8-inch thick. Ensure that it’s large enough to cover the base and the sides of the pie dish.
2. Transfer with Care: Gently lift the rolled-out dough and place it over your pie dish. You can use a rolling pin to help transfer it without tearing.
3. Press and Trim: Once in place, gently press the dough into the dish, ensuring there are no air pockets. Trim any excess dough hanging over the edges, leaving about 1 inch for crimping.
Filling the Pie
Filling the pie is an art in itself. Here’s how to do it evenly and effectively:
1. Layer the Apples: Begin by adding a layer of your apple mixture. Instead of dumping all the apples in at once, layer them. This helps in managing the distribution and ensures even cooking.
2. Add Flavor Enhancements: You can sprinkle some cinnamon, nutmeg, and a squeeze of lemon juice over the first layer of apples before adding the next. This not only enhances flavor but also helps with moisture control.
3. Build Up: Continue layering until you’ve used all the apple filling. Make sure to pack the apples slightly to avoid gaps.
Techniques for Evenly Distributing the Apple Filling
Even distribution of the filling is key to an evenly baked pie. Here are some techniques:
1. Use a Spoon or Spatula: As you add each layer of apples, use a spoon or spatula to gently spread them out. Avoid mounding the apples in the center, as this can lead to uneven baking.
2. Shake the Dish: After filling, gently shake the pie dish side to side. This can help settle the apples and fill any air pockets, leading to a more even surface.
3. Top with Butter: Dotting butter over the apple filling before adding the top crust helps distribute moisture and flavor as it bakes.
Options for Crust Top: Lattice vs. Whole Top
When it comes to the crust, you have options that can dramatically change the look and texture of your pie:
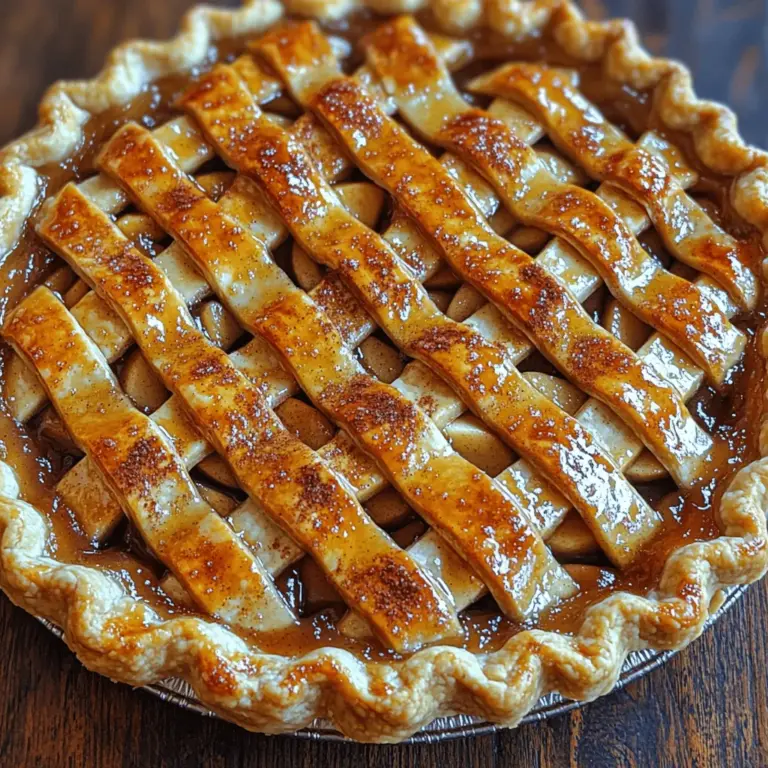
1. Lattice Crust: A lattice crust offers a beautiful presentation and allows steam to escape, which can help prevent a soggy bottom. To create a lattice, cut the rolled-out dough into strips and weave them over the filled pie.
2. Whole Crust: A whole top crust gives a traditional look and a soft bite. If you choose this option, be sure to cut several slits in the top to allow steam to escape.
Finishing Touches on the Pie
The finishing touches can elevate your pie from good to great:
1. Trimming and Crimping the Edges: After placing your top crust, trim the excess dough to about 1/2 inch beyond the edge of the pie dish. Fold the edges under and crimp them with your fingers or a fork for an attractive finish.
2. Preparing the Egg Wash: For a beautiful, golden crust, whisk together one egg with a tablespoon of milk or cream. Brush this mixture over the crust before baking. This not only gives it a lovely sheen but also helps the crust to brown evenly.
Baking Your Apple Pie to Perfection
Baking is where all your hard work pays off. Here’s how to ensure your pie bakes to perfection:
1. Preheating the Oven: Why It Matters: Preheating your oven to the correct temperature is crucial. It ensures that your pie crust begins to set immediately, creating a flaky texture.
2. Understanding Baking Temperatures and Times: Typically, you’ll want to start baking at a high temperature (around 425°F) for the first 20 minutes. This initial heat helps to set the crust.
3. Lower Temperature for Even Cooking of Filling: After the crust is set, reduce the temperature to 350°F and continue to bake for an additional 30-40 minutes. This allows the filling to cook evenly without burning the crust.
4. Indicators of Doneness: Look for a beautifully golden-brown crust and check the filling. The apples should be tender but not mushy. You can test the filling by inserting a knife; it should slide in with slight resistance.
Cooling and Serving the Pie
Once your pie is out of the oven, patience is key. Here’s how to serve it perfectly:
1. Importance of Cooling Time for Setting the Filling: Allow your pie to cool for at least 2 hours before slicing. This cooling period helps the filling set, ensuring clean slices.
2. Best Serving Suggestions: Grandma’s Secret Apple Pie is delightful on its own, but it can also be paired with vanilla ice cream or whipped cream for a rich dessert experience.
3. Serving Warm vs. at Room Temperature: While some prefer their pie warm, others enjoy it at room temperature. Either way, it’s delicious!
Exploring Variations and Customizations
Don’t hesitate to make this recipe your own. Here are some ideas for personal touches:
1. Adding Personal Touches to Grandma’s Recipe: Consider adding a splash of bourbon or a sprinkle of cardamom for a unique flavor twist.
2. Alternative Sweeteners and Spices: For a healthier option, try using maple syrup or honey instead of sugar, and experiment with spices like ginger or allspice.
3. Incorporating Other Fruits or Flavors: Mix in other fruits such as pears or cranberries for added depth. Their flavors can complement the apples beautifully.
4. Gluten-Free Crust Options: If you or your guests have dietary restrictions, there are plenty of gluten-free pie crusts available at stores or you can make your own using almond flour or gluten-free blends.
Conclusion
Baking Grandma’s Secret Apple Pie is more than just a culinary task; it’s an experience filled with nostalgia and love. As you mix, roll, and bake, you’re not just creating a dessert; you’re crafting memories that can be cherished for generations. The timeless appeal of sharing homemade desserts resonates deeply, bringing family and friends together around the table.
So gather your ingredients, embrace the process, and try your hand at this beloved recipe. Each pie you bake not only honors Grandma’s tradition but also creates new stories and joy that can be passed down through time. Happy baking!

