No-Bake Cookie Dough Cups Recipe
In recent years, no-bake desserts have surged in popularity, captivating the hearts and taste buds of dessert lovers everywhere. These treats offer the perfect solution for those who crave something sweet but want to avoid the hassle of baking. Among the myriad of no-bake options available, no-bake cookie dough cups stand out as a particularly enticing choice. They are not only simple to prepare but also deliver a delightful combination of flavors and textures that can satisfy any sweet tooth.
No-bake cookie dough cups are the ideal quick dessert solution for busy weeknights, casual gatherings, or even special occasions. With minimal equipment and a short preparation time, you can whip up these delicious treats in no time. They are perfect for those who want to enjoy the nostalgic taste of cookie dough without the need to turn on the oven. Plus, their customizable nature allows you to experiment with different flavors and toppings, making them suitable for any palate.
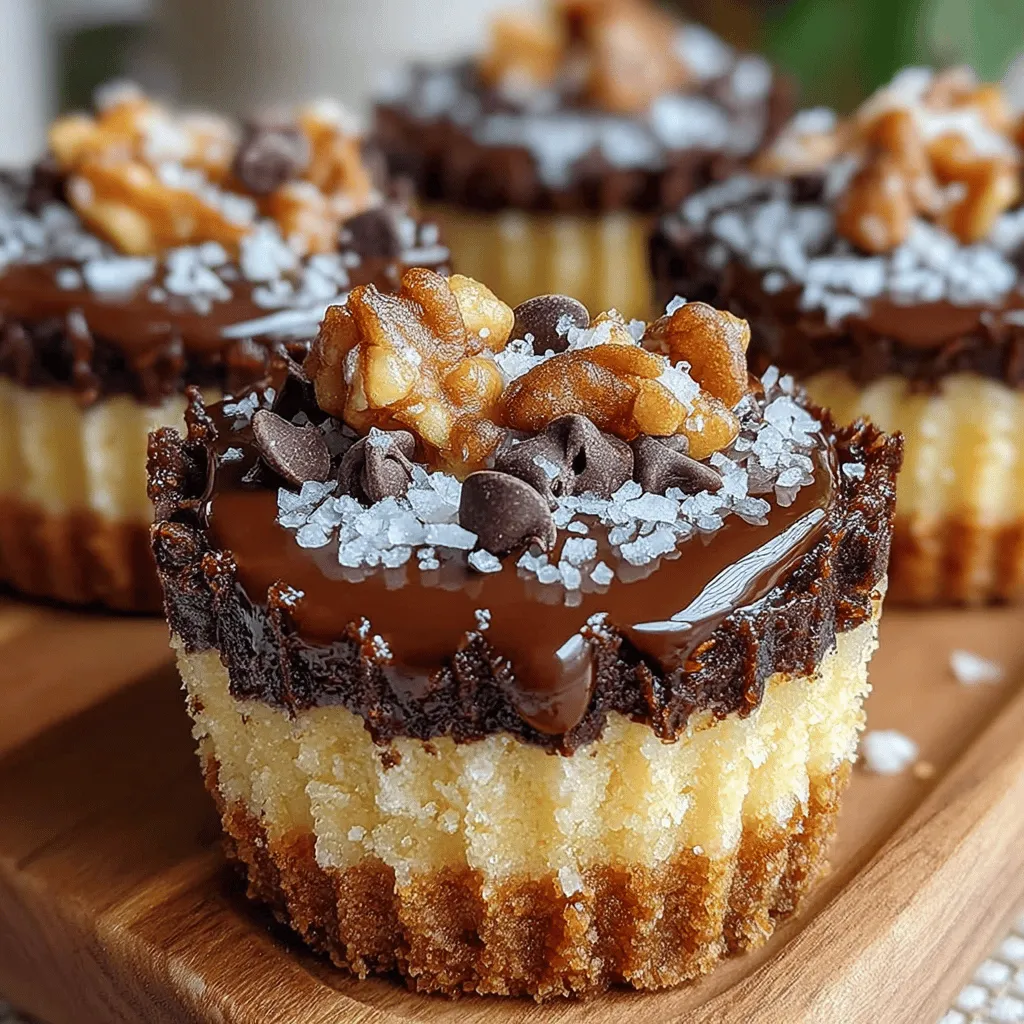
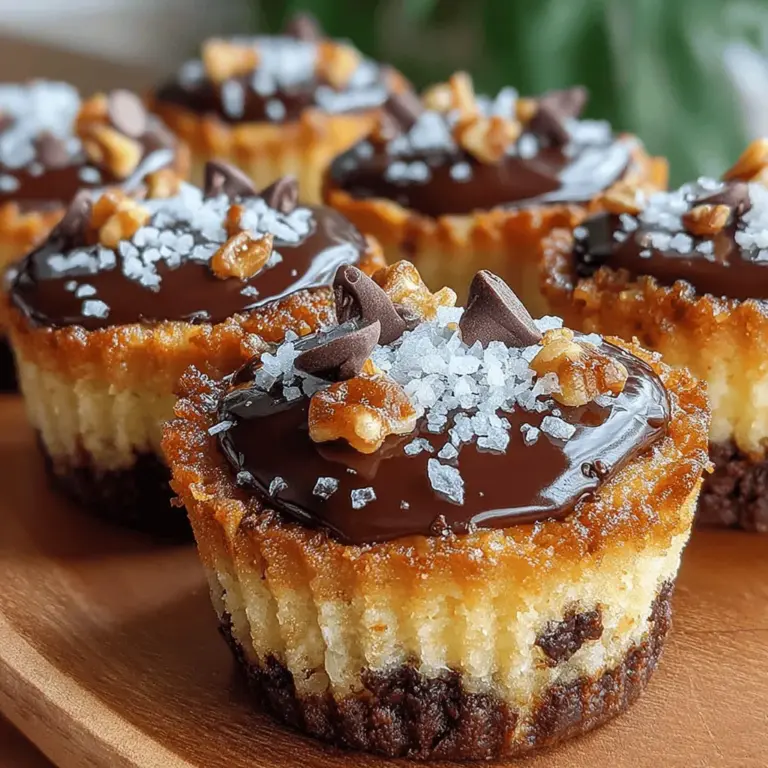
The balance of flavors and textures in these cookie dough cups is what truly makes them irresistible. The creamy, sweet cookie dough is enveloped in a luscious chocolate coating, creating a delightful contrast with each bite. Whether you’re indulging on your own or sharing with friends, these no-bake cookie dough cups are sure to impress and satisfy.
Understanding the Ingredients
To create the perfect no-bake cookie dough cups, it’s essential to understand the role of each ingredient in the recipe. This not only enhances your baking experience but also allows you to make informed substitutions if necessary.
1. Almond Flour and Coconut Flour: These flours serve as the base for the cookie dough, providing a gluten-free alternative to traditional wheat flour. Almond flour contributes a nutty flavor and moist texture, while coconut flour helps absorb moisture and adds a subtle sweetness. Together, they create a rich and satisfying cookie dough that’s safe for gluten-sensitive individuals.
2. Natural Sweeteners: Sweeteners like maple syrup or agave syrup are key to achieving the right level of sweetness in your cookie dough cups. Unlike refined sugars, these natural alternatives offer additional nutrients and a lower glycemic index, making them a healthier choice for those looking to indulge without the guilt.
3. Coconut Oil: This ingredient plays a crucial role in creating a rich, velvety texture in the cookie dough. When melted, coconut oil adds moisture and helps bind the ingredients together, resulting in a creamy consistency that is characteristic of cookie dough.
4. Chocolate Chips: The choice of chocolate chips is vital in enhancing the flavor of your cookie dough cups. Semi-sweet or dark chocolate chips provide a satisfying contrast to the sweetness of the dough, while milk chocolate offers a creamier taste. You can also opt for vegan chocolate chips or even white chocolate, depending on your preference.
5. Optional Toppings: Toppings such as crushed nuts, sprinkles, or additional chocolate drizzle not only elevate the visual appeal of your cookie dough cups but also add an extra layer of flavor and texture. You can customize your cups to suit different themes or occasions, making them a versatile dessert option.
Step-by-Step Instructions for No-Bake Cookie Dough Cups
Now that you understand the ingredients, it’s time to dive into the preparation of your no-bake cookie dough cups. Follow these detailed steps to ensure success in creating these delightful treats.
Preparing the Cookie Dough
1. Combine the Dry Ingredients: Start by mixing the almond flour and coconut flour in a medium-sized bowl. This ensures that the flours are evenly distributed, which is essential for achieving a consistent dough texture.
2. Mix in the Sweetener: Add your chosen natural sweetener to the dry ingredients. Stir well to combine, making sure the sweetener is fully integrated into the flour mixture. This step is crucial for ensuring the sweetness is evenly dispersed throughout the dough.
3. Incorporate Coconut Oil: Melt the coconut oil in a microwave or on the stovetop until it is fully liquid. Allow it to cool slightly before adding it to the mixture. This prevents the heat from affecting the other ingredients and helps maintain the right consistency. Mix until the dough starts to come together.
4. Achieving the Right Dough Consistency: At this stage, the dough may appear crumbly. If it doesn’t hold together, add a little more coconut oil or sweetener until you reach a consistency that holds together when pressed.
Folding in Chocolate Chips
Once your cookie dough is prepared, it’s time to fold in the chocolate chips. This step adds bursts of chocolate flavor throughout the cups.
1. Add the Chocolate Chips: Gently fold in your chocolate chips, being careful not to over-mix. This ensures that the chips are evenly distributed without breaking apart or melting from the heat of your hands.
2. Technique for Folding: Use a spatula or wooden spoon to scoop underneath the dough and lift it over the chocolate chips. Rotate the bowl as you do this to ensure even incorporation without overworking the dough.
Molding the Cups
Creating the perfect shapes for your cookie dough cups is crucial for both presentation and enjoyment.
1. Prepare the Cup Molds: Use silicone muffin cups or a mini muffin tin lined with paper liners. If using a muffin tin, lightly grease the liners to prevent sticking.
2. Distributing the Dough: Take portions of the cookie dough and press them into the bottom and sides of the molds to create a cavity for the filling. Aim for an even distribution, ensuring that the walls of each cup are thick enough to hold their shape.
3. Cavity Size: Make sure to leave enough space in the center for any fillings or toppings you might want to add later. A depth of about half an inch should suffice, but feel free to adjust based on your preferences.
Melting Chocolate for the Coating
The final step before assembly involves preparing the chocolate coating that will encase your cookie dough cups.
1. Melting the Chocolate: Use a microwave-safe bowl to melt your chocolate chips. Heat in short bursts of 20-30 seconds, stirring in between until smooth and fully melted. Alternatively, you can use a double boiler method on the stovetop to gently melt the chocolate.
2. Achieving a Smooth Texture: To ensure that your melted chocolate is silky and easy to work with, avoid overheating. If the chocolate becomes too thick, you can add a teaspoon of coconut oil to loosen it up.
Assembling the Cups
Now that you have your cookie dough cups molded and the chocolate melted, it’s time to assemble the treats.
1. Coating the Cups: Carefully spoon the melted chocolate over each cookie dough cup, making sure to cover the top completely. This creates a barrier that locks in the deliciousness of the cookie dough while adding a rich chocolate flavor.
2. Avoiding Air Bubbles: To prevent air bubbles from forming, gently tap the molds on the counter after adding the chocolate. This helps the chocolate settle evenly around the edges.
3. Cooling: Place the assembled cups in the refrigerator for about 30 minutes to allow the chocolate to harden. This will also help the cookie dough set, making it easier to remove the cups from the molds.
By following these steps, you’ll be well on your way to creating delicious no-bake cookie dough cups that are sure to impress anyone lucky enough to enjoy them. Stay tuned for the next part of this article, where we will explore additional tips and variations for customizing your no-bake cookie dough cups to suit your preferences.

Overview of the Chilling Process
Once you’ve combined all the ingredients for your no-bake cookie dough cups, the next critical step is the chilling process. This step is essential for achieving the right texture and ensuring the cookie dough cups hold their shape. When you chill the mixture, the fats from the nut butter and coconut oil solidify, resulting in a firmer texture that enhances the overall mouthfeel of the dessert.
Chilling the cups also allows the flavors to meld together, creating a more pronounced taste in every bite. Aim for at least 30 minutes in the refrigerator to allow the cups to set properly. If you’re in a hurry, you can place them in the freezer for about 15 minutes, but be cautious not to leave them in for too long, as they can become overly hard.
Creative Variations and Customizations
One of the most delightful aspects of making no-bake cookie dough cups is the endless possibilities for variations and customizations. Here are some suggestions to inspire your next batch:
Alternative Nut Flours or Sweeteners
If you’re looking to accommodate specific dietary restrictions or simply want to experiment, consider swapping out almond flour for other nut flours, such as cashew or hazelnut flour. If nut allergies are a concern, sunflower seed flour is an excellent alternative and will still provide a similar texture.
For sweeteners, while maple syrup is a fantastic option, you can also try agave nectar, honey (if not vegan), or coconut sugar for a lower glycemic index option. Each sweetener brings its unique flavor and sweetness level, so feel free to adjust the quantity to suit your taste.
Different Chocolate Types and Flavor Profiles
The chocolate layer is another area ripe for experimentation. Dark chocolate is a classic choice, but you can also use milk chocolate for a creamier flavor or white chocolate for a sweeter, more decadent treat. For a twist, consider flavored chocolates like espresso or orange-infused chocolate to add depth to your dessert.
Toppings Beyond Nuts and Sea Salt
While chopped nuts and a sprinkle of sea salt are excellent toppings, you can elevate your no-bake cookie dough cups by incorporating other toppings. Dried fruits like cranberries, apricots, or cherries can add a delightful chewiness and a pop of color. Shredded coconut, whether sweetened or unsweetened, can also provide a tropical flair.
Themed Variations
To make your cookie dough cups even more special, think about themed variations. For Halloween, add orange food coloring to the mixture and top with candy corn. In December, use peppermint extract in the dough and top with crushed candy canes for a festive touch. The possibilities are endless, allowing you to celebrate each season with a unique treat.
Health Benefits of No-Bake Dessert Ingredients
Understanding the health benefits of the ingredients used in your no-bake cookie dough cups can make enjoying them even sweeter. Here’s a breakdown of some key components:
Almond and Coconut Flour Benefits
Almond flour is rich in healthy fats, protein, and fiber, making it a nutritious choice for those looking to add more nutrients to their diet. It’s also gluten-free, making it suitable for those with gluten sensitivities. Coconut flour, on the other hand, is high in fiber and low in carbohydrates, making it a popular choice for low-carb diets. Together, they create a filling and nutrient-dense base for your dessert.
Natural Sweeteners like Maple Syrup
Using natural sweeteners like maple syrup not only adds sweetness but also provides additional nutrients compared to refined sugars. Maple syrup contains antioxidants and minerals such as manganese and zinc, which can support immune function. This makes it a better choice for those seeking a healthier dessert option.
Dark Chocolate: A Source of Antioxidants
Dark chocolate is not just a delicious indulgence; it’s also packed with antioxidants known as flavonoids, which can help improve heart health and reduce inflammation. Choosing high-quality dark chocolate with a cocoa percentage of 70% or higher can maximize these health benefits while satisfying your chocolate cravings.
Creating a Nutrient-Dense Dessert
By combining these wholesome ingredients, your no-bake cookie dough cups can be a nutrient-dense dessert that feels indulgent without sacrificing health. This approach allows you to enjoy a treat that aligns with your wellness goals without the guilt.
Serving Suggestions and Pairings
When it comes to serving your no-bake cookie dough cups, presentation and pairing can elevate the entire experience. Here are some creative ideas:
Perfect for Gatherings and Parties
These no-bake cookie dough cups are an excellent choice for gatherings, parties, or even a cozy night in. Arrange them on a decorative platter, and consider labeling them with fun names to spark conversation. For a more refined presentation, place the cups in mini muffin liners to create an appealing display.
Drink Pairings
The flavors of the cookie dough cups pair beautifully with various beverages. For a classic combination, serve them with a glass of cold milk or a warm cup of coffee to complement the richness of the chocolate. Herbal teas, such as chamomile or mint, can also provide a refreshing contrast that balances the sweetness of the dessert.
Presentation Tips
To make your no-bake cookie dough cups visually appealing, consider adding a dusting of cocoa powder or a drizzle of melted chocolate on top. Fresh fruit garnishes, such as berries or a sprig of mint, can enhance the presentation while adding a pop of color. The more inviting they look, the more likely your guests will want to indulge!
Conclusion
In summary, no-bake cookie dough cups are a simple yet delicious treat that caters to various dietary preferences and occasions. The easy preparation, combined with the flexibility to customize flavors and ingredients, makes this recipe a favorite among dessert lovers. Whether you’re enjoying them at a gathering or as a snack, these cups provide a delightful way to satisfy your sweet tooth without turning to baked goods.
The joy of creating homemade treats is not just in the eating but also in the sharing. By making these no-bake cookie dough cups, you can share a little slice of happiness with friends and family, celebrating the joy of food and togetherness. So gather your ingredients, get creative with your variations, and enjoy the process of making and indulging in these delightful treats!

