No-Bake Oreo Cookie Dough Bars Recipe
Introduction
In the world of desserts, no-bake options have gained immense popularity for their simplicity and indulgence. These treats appeal to both novice and experienced bakers, offering the satisfaction of homemade sweets without the need for an oven. Among the myriad of no-bake recipes, No-Bake Oreo Cookie Dough Bars stand out as a delightful combination of flavors and textures, making them a favorite for cookie lovers everywhere.
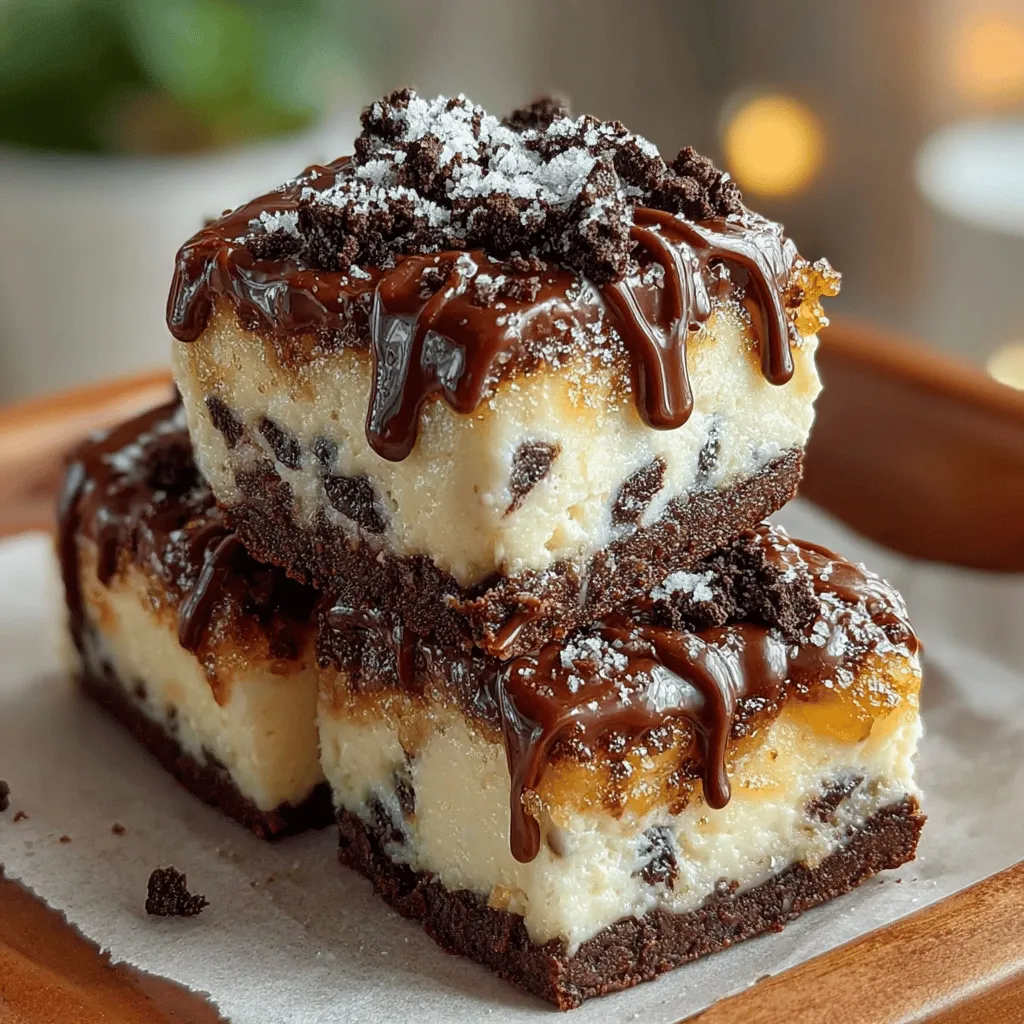
Imagine a dessert that brings together the beloved Oreo cookie and the comforting taste of cookie dough. The No-Bake Oreo Cookie Dough Bars embody this dream, featuring a rich, creamy base that is studded with crunchy Oreo pieces. Not only do they look enticing, with their layered appearance, but they also deliver a delicious taste that is hard to resist. Whether you’re preparing a sweet treat for a party, a family gathering, or simply craving something indulgent, these bars are sure to impress.
What makes this recipe particularly appealing is its convenience. With minimal preparation time and effort required, even beginners can whip up these bars without breaking a sweat. No complicated baking instructions or lengthy cooling times are involved—just a few simple steps to create a crowd-pleasing dessert that everyone will adore.
Understanding the Ingredients
Before diving into the step-by-step guide, it’s essential to understand the ingredients that make up the No-Bake Oreo Cookie Dough Bars. Each component plays a vital role in achieving the desired flavor and texture, ensuring that every bite is a delightful experience.
1. All-Purpose Flour: While often a staple in baking, all-purpose flour in this recipe requires special attention. It’s crucial to heat treat the flour to eliminate any potential bacteria, making it safe to consume raw. Heat treating flour involves spreading it out on a baking sheet and heating it in the oven for a short period. This process not only ensures food safety but also enhances the flavor of the cookie dough.
2. Unsalted Butter: Butter is a key player in the recipe, contributing to the rich flavor and smooth texture of the bars. Using unsalted butter allows for better control over the overall saltiness of the dessert, ensuring that the sweetness of the cookie dough shines through.
3. Brown Sugar vs. Granulated Sugar: The recipe calls for both brown sugar and granulated sugar, each bringing its unique characteristics to the table. Brown sugar, with its higher moisture content and caramel notes, adds depth and chewiness to the cookie dough, while granulated sugar provides that classic sweetness we all love.
4. Vanilla Extract: A splash of vanilla extract elevates the overall flavor profile of the bars. This ingredient adds warmth and complexity, enhancing the cookie dough experience.
5. Mini Chocolate Chips: These tiny morsels are essential for adding bursts of rich chocolate throughout the bars. Their small size ensures that every bite is evenly distributed with chocolate goodness.
6. Crushed Oreo Cookies: The star ingredient of this recipe, crushed Oreos, brings a delightful crunch and an unmistakable flavor. The combination of chocolate cookie and creamy filling creates a harmonious blend that pairs perfectly with the cookie dough.
7. Cream Cheese: To achieve that luscious, creamy texture, cream cheese is added to the mixture. It not only contributes richness but also balances out the sweetness, making the bars incredibly satisfying.
8. Optional Chocolate Drizzle: For those looking to elevate the presentation and indulgence factor, a chocolate drizzle can be added on top of the finished bars. It not only looks appealing but also adds an extra layer of chocolate flavor that complements the Oreos beautifully.
Step-by-Step Guide to Making No-Bake Oreo Cookie Dough Bars
Now that we have a solid understanding of the ingredients, let’s begin the process of making these delicious No-Bake Oreo Cookie Dough Bars. The first steps are crucial in ensuring that the bars have the right texture and flavor.
Preparation of the Flour: The first step involves heat treating the all-purpose flour. Begin by preheating your oven to 350°F (175°C). Spread the flour evenly on a baking sheet and place it in the oven for about 5-7 minutes. Stir the flour halfway through to ensure even heating. This process kills any bacteria and gives the flour a slightly toasted flavor that enhances the overall taste of the cookie dough. Once done, allow the flour to cool before using it in the recipe.
Mixing the Base Ingredients: In a large mixing bowl, combine the heat-treated flour, unsalted butter (softened to room temperature), brown sugar, and granulated sugar. Using a hand mixer or stand mixer, beat the ingredients together on medium speed until the mixture is smooth and creamy. This step is vital for achieving the perfect texture—make sure to scrape down the sides of the bowl to ensure everything is well incorporated.
Once the butter and sugars are well mixed, add in the vanilla extract and cream cheese. Continue to mix until the cream cheese is fully integrated, resulting in a luscious and creamy base. The combination of these ingredients will create a rich dough that serves as the foundation for your bars.
After the base is creamy and homogeneous, gently fold in the mini chocolate chips and the crushed Oreo cookies using a spatula. Be careful not to overmix—just enough to ensure that the chocolate chips and Oreos are evenly distributed throughout the dough. The result should be a thick, chunky mixture that is packed with flavor and texture, ready to be transformed into bars.
In the following sections, we will continue with additional steps to complete the No-Bake Oreo Cookie Dough Bars, but for now, you’ve laid a solid foundation for a truly indulgent treat. Stay tuned as we move forward in this delicious journey!

Incorporating Additional Ingredients
When making No-Bake Oreo Cookie Dough Bars, the right balance of ingredients is crucial for achieving a delightful texture and flavor. To ensure that your chocolate chips and crushed Oreo cookies are evenly distributed throughout the mixture, follow these best practices:
1. Mixing Technique: After combining the cream cheese and sugar, fold in the crushed Oreos gently. This method helps maintain the integrity of the cookies while ensuring they are spread evenly.
2. Layering: If you prefer a more pronounced Oreo flavor, consider layering the chocolate chips and crushed cookies. Start with half of the cookie mixture in the pan, sprinkle half of the chocolate chips, add the remaining cookie mixture, and finish with the rest of the chocolate chips on top. This not only enhances the flavor but also creates a beautiful cross-section when cut.
3. Use Quality Ingredients: Opt for high-quality chocolate chips and Oreo cookies. The taste of your bars will reflect the quality of the ingredients used, making a significant difference in the final product.
Preparing the Pan
Proper preparation of your pan is essential for a successful No-Bake Oreo Cookie Dough Bar experience. Utilizing parchment paper is recommended for several reasons:
1. Easy Removal: Lining your pan with parchment paper allows you to lift the bars out easily once they have set. This minimizes the risk of breaking the bars when attempting to remove them from the pan.
2. Clean Edges: Parchment paper helps achieve clean edges, ensuring your bars look as good as they taste. Use scissors to cut the parchment paper to fit the base and sides of the pan for a perfect fit.
3. Non-Stick Surface: Even though this recipe is low in moisture, using parchment paper prevents sticking, which is especially useful for the creamy cookie dough mixture.
Chilling Process
Chilling is a critical step in creating the perfect No-Bake Oreo Cookie Dough Bars. Here’s why it’s essential:
1. Texture Development: Allowing the bars to chill in the refrigerator for at least 2 hours helps them firm up, resulting in a more cohesive and sliceable texture. This chilling time allows the cream cheese mixture to set properly, giving the bars a smooth consistency.
2. Flavor Enhancement: Chilling the bars not only helps with texture but also allows the flavors to meld. The richness of the cream cheese and the sweetness of the chocolate chips combine beautifully over time, creating a harmonious taste experience.
3. Avoiding Melting: If you skip the chilling step, your bars may turn out too soft, making it challenging to cut them into neat squares. The chilling process solidifies the butter and cream cheese, ensuring they hold their shape.
Optional Chocolate Drizzle
For those who want to elevate their No-Bake Oreo Cookie Dough Bars, adding a chocolate drizzle can be a game-changer. Here’s how to achieve a smooth, elegant drizzle:
1. Melting Chocolate: Use high-quality chocolate for melting. You can use either chocolate chips or a chocolate bar. Melt the chocolate in a microwave-safe bowl in 30-second intervals, stirring in between until fully melted. Be cautious not to overheat the chocolate, as it can seize.
2. Achieving the Right Consistency: If the melted chocolate is too thick, add a small amount of vegetable oil or coconut oil to thin it out. This will make it easier to drizzle over the bars.
3. Drizzling Technique: Once your bars have chilled and firmed up, transfer the melted chocolate to a piping bag or a zip-top bag with a small corner snipped off. Drizzle the chocolate back and forth over the bars for a professional-looking finish.
Texture and Flavor Profile of the Bars
The final product of your No-Bake Oreo Cookie Dough Bars is a delightful combination of textures and flavors that will satisfy any sweet tooth:
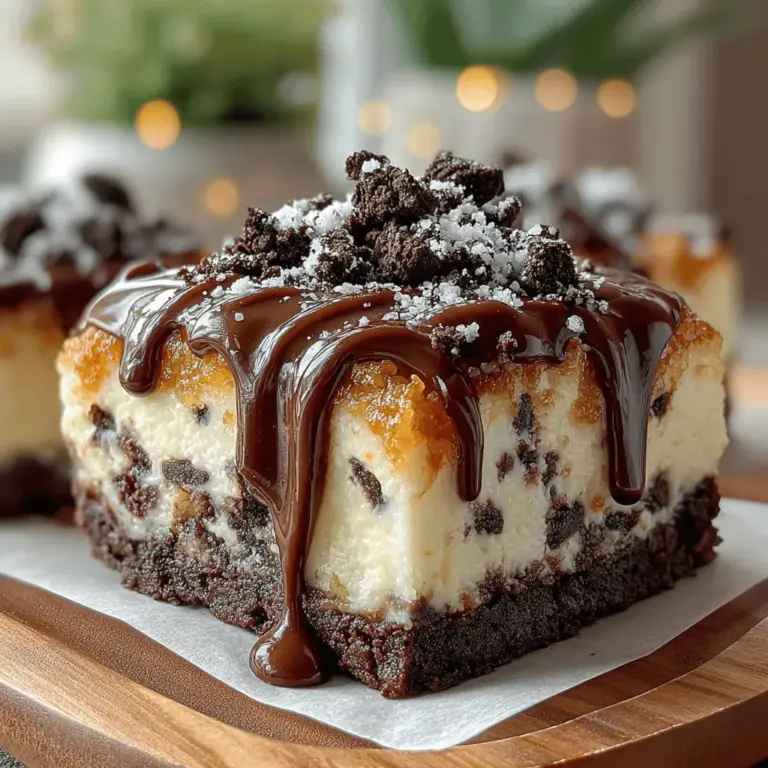
1. Description of the Final Product: These bars boast a smooth and creamy filling, thanks to the cream cheese base, with a contrast of crunchy Oreo bits and chocolate chips. The combination creates a satisfying mouthfeel that is both indulgent and enjoyable.
2. Flavor Balance: The sweetness from the sugar and chocolate chips is perfectly balanced by the slight tanginess of the cream cheese, making every bite a delightful experience. The rich flavor of the Oreo cookies adds depth, resulting in a well-rounded dessert that is hard to resist.
3. Visual Appeal: The aesthetic of your bars is equally impressive. The dark chocolate drizzle adds a touch of elegance, while the flecks of Oreo cookie provide visual interest. When cut into squares, these bars are not only delicious but also a feast for the eyes, making them perfect for any occasion.
Serving Suggestions and Variations
When it comes to serving your No-Bake Oreo Cookie Dough Bars, there are numerous options to consider:
1. Suggestions for Serving: These bars are ideal for a variety of occasions. Whether you’re hosting a birthday party, a casual gathering, or simply want a special treat for yourself, they are sure to impress. Serve them alongside coffee or tea for a delightful afternoon snack.
2. Variations on the Recipe: Feel free to get creative with your bars! Consider these variations:
– Gluten-Free Options: Use gluten-free Oreo cookies for a gluten-free version of this recipe. Additionally, ensure that any other ingredients, like chocolate chips, are also gluten-free.
– Adding Nuts: Incorporate chopped nuts like walnuts or pecans for added crunch and flavor. This will enhance the texture and add a new depth of flavor.
– Different Flavorings: Experiment with different flavored extracts, such as peppermint or almond, to give your bars a unique twist.
3. Pairing Recommendations: These bars pair wonderfully with a variety of beverages. Consider serving them with milk, coffee, or even a scoop of vanilla ice cream for a decadent dessert experience. They also complement fruit-based desserts, creating a balanced dessert platter.
Storage and Shelf Life
To maintain the freshness and quality of your No-Bake Oreo Cookie Dough Bars, proper storage is essential:
1. Best Practices for Storing: Store your bars in an airtight container to keep them from drying out. You can place a piece of parchment paper between layers to prevent sticking and maintain their shape.
2. Shelf Life: When stored in the refrigerator, these bars can last for up to one week. If you need to keep them longer, consider freezing them.
3. Tips for Thawing: If you freeze the bars, allow them to thaw in the refrigerator for a few hours before serving. This will help them regain their creamy texture without becoming overly soft.
Conclusion
In summary, making No-Bake Oreo Cookie Dough Bars is a simple and enjoyable process that results in an irresistibly delicious treat. With their creamy texture, crunchy bits of Oreo, and rich chocolate flavor, these bars are perfect for any occasion.
We encourage you to try this easy recipe and experience the delightful joy of homemade desserts. The satisfaction of creating your own No-Bake Oreo Cookie Dough Bars is unparalleled, and sharing them with friends and family will surely bring smiles all around. Embrace the pleasure of baking (or no-baking) and indulge in the delightful world of homemade treats!

