Pumpkin Waffle Dippers: A Seasonal Delight
As the leaves begin to change color and the air turns crisp, the allure of pumpkin recipes becomes irresistible. From spiced lattes to creamy pies, pumpkin has established itself as a fall favorite. Its warm, comforting flavor is not only a staple in desserts but also lends itself beautifully to breakfast dishes. One delightful way to embrace the seasonal spirit is through the creation of Pumpkin Waffle Dippers. These innovative treats offer a playful twist on traditional waffles, making them a perfect breakfast or snack option for both adults and children.
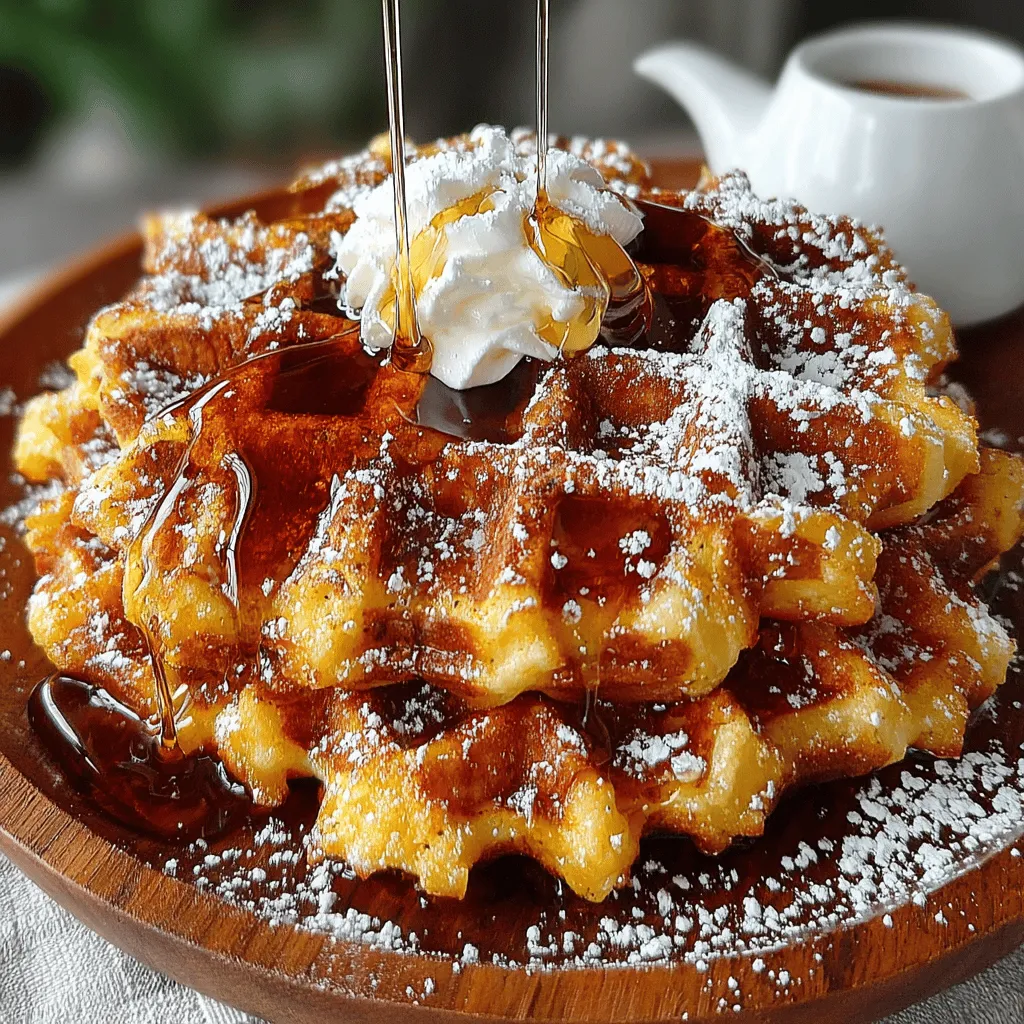
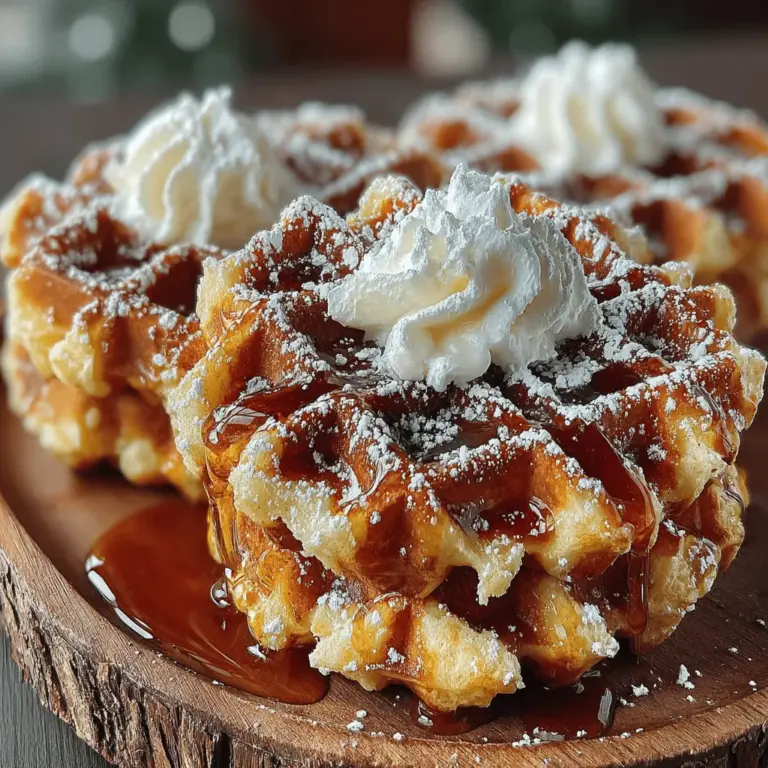
Pumpkin Waffle Dippers are not only visually appealing but also incredibly versatile. They can be served with a variety of toppings, such as maple syrup, whipped cream, or even a sprinkle of powdered sugar, allowing you to customize them to your taste. The combination of fluffy waffles with the rich flavor of pumpkin creates a satisfying bite that captures the essence of fall in every nibble. Whether enjoyed on a leisurely weekend morning or packed as a fun snack for the kids, these dippers are sure to become a seasonal staple in your household.
Understanding the Ingredients
To create the perfect Pumpkin Waffle Dippers, it’s essential to understand the role each ingredient plays in the recipe. The following key components come together to form a deliciously fluffy and flavorful treat:
– All-Purpose Flour: Serving as the base of the batter, all-purpose flour provides the necessary structure and texture to the waffles. It allows them to rise and hold their shape, resulting in a delightful crunch on the outside while remaining soft on the inside.
– Pumpkin Puree: The star of the show, pumpkin puree adds both moisture and a rich, earthy flavor to the waffles. It’s important to use pure pumpkin puree rather than pumpkin pie filling, as the latter contains added sugars and spices that could alter the recipe’s balance.
– Eggs: Acting as binding agents in the recipe, eggs contribute to the overall moisture and richness of the waffles. They help create a tender crumb and ensure that the dippers hold together perfectly.
– Spices (Cinnamon, Nutmeg, Ginger): These warm spices are essential for enhancing the fall flavor profile. Cinnamon lends a comforting sweetness, nutmeg adds depth, and ginger contributes a subtle kick that rounds out the overall taste of the waffles.
– Brown Sugar: This ingredient not only sweetens the batter but also provides a hint of caramel flavor. The moisture content in brown sugar helps keep the waffles soft and fluffy.
– Milk: To achieve the desired batter consistency, milk is added. It hydrates the dry ingredients and helps create a smooth, pourable batter that cooks evenly in the waffle iron.
– Butter or Coconut Oil: For richness and a tender texture, melted butter or coconut oil is incorporated into the batter. This fat enriches the waffles and contributes to a deliciously crisp exterior.
In addition to these core ingredients, you can also consider various optional toppings to elevate your Pumpkin Waffle Dippers. From decadent maple syrup to a dollop of whipped cream or even a sprinkle of chopped nuts, the possibilities are endless. Each topping adds its unique flavor and texture, making your pumpkin waffles even more enjoyable.
Equipment Needed
To prepare your Pumpkin Waffle Dippers, having the right equipment is crucial for achieving the best results. Here’s a list of essential tools you’ll need:
– Waffle Iron: Selecting the right waffle iron is key to making perfect dippers. Consider a model that allows for adjustable temperature settings and produces deeper pockets for holding syrup or toppings. A Belgian-style waffle iron is particularly well-suited for this recipe, as its larger squares provide ample space for dipping.
– Mixing Bowls: Having a variety of mixing bowls in different sizes is important for effectively combining your ingredients. A large bowl for the dry ingredients and a medium bowl for the wet ingredients will streamline the mixing process.
– Whisk and Spatula: A whisk is essential for blending the wet and dry ingredients together smoothly. A spatula will help you scrape down the sides of the bowl and ensure that no batter is left behind.
– Cooking Spray or Brush: To prevent your waffles from sticking to the waffle iron, using a non-stick cooking spray or brushing the iron with oil is recommended. This ensures easy removal and keeps your dippers intact.
Step-by-Step Instructions
Now that you have a clear understanding of the ingredients and equipment needed to create Pumpkin Waffle Dippers, it’s time to dive into the preparation process. Following these detailed steps will help you craft the perfect batch of delicious dippers:
1. Preheat the Waffle Iron: Begin by preheating your waffle iron according to the manufacturer’s instructions. This step is crucial for ensuring that your waffles cook evenly and develop a golden-brown exterior. A properly heated waffle iron will help create that delightful crispy texture that contrasts beautifully with the soft, pumpkin-infused interior.
2. Prepare the Dry Ingredients: In a large mixing bowl, whisk together the all-purpose flour, baking powder, spices, and brown sugar. This will help to distribute the baking powder evenly, ensuring that your waffles rise beautifully as they cook.
3. Mix the Wet Ingredients: In a separate medium bowl, combine the pumpkin puree, eggs, milk, and melted butter or coconut oil. Whisk these ingredients together until fully combined and smooth.
These initial steps set the stage for creating your Pumpkin Waffle Dippers. Stay tuned for the next part, where we will continue with the remaining instructions and tips to perfect your waffle-making technique!

Mixing Dry Ingredients: Achieving the Right Consistency
Begin by gathering your dry ingredients, which form the backbone of your Pumpkin Waffle Dippers. You will need all-purpose flour, baking powder, baking soda, salt, cinnamon, nutmeg, and ginger. The key to achieving the perfect consistency lies in accurately measuring your ingredients and sifting them together.
1. Measure Accurately: Use a kitchen scale for precision. If you’re using measuring cups, spoon the flour into the cup and level it with a knife to avoid packing it down.
2. Sifting: Sift the flour along with the baking powder, baking soda, and spices into a large mixing bowl. This step helps to aerate the flour and evenly distribute the leavening agents and spices, resulting in a lighter, fluffier waffle.
3. Whisk Together: After sifting, whisk the dry ingredients thoroughly. You should have a fine, uniform mixture without any lumps. This is crucial, as lumps can lead to uneven textures in your waffles.
Combining Wet Ingredients: Tips for Ensuring a Smooth Batter
Next, focus on the wet ingredients, which will bring moisture and flavor to your batter. You’ll need pumpkin puree, eggs, milk (or a dairy-free alternative), and melted butter (or coconut oil for a dairy-free version).
1. Mixing Technique: In a separate bowl, combine the pumpkin puree, eggs, and melted butter. Use a whisk to blend these ingredients until smooth.
2. Add Milk Gradually: Pour in the milk slowly while continuing to whisk. This gradual integration helps prevent clumps from forming and ensures that the batter is well combined.
3. Flavor Enhancements: For added depth, consider incorporating a splash of vanilla extract or a pinch of brown sugar to enhance the natural sweetness of the pumpkin.
The Folding Technique: Avoiding Over-Mixing for Fluffy Waffles
Once you have your wet and dry ingredients prepared, it’s time to combine them. The folding technique is essential for maintaining the waffles’ fluffy texture.
1. Combining the Mixtures: Pour the wet mixture into the bowl with the dry ingredients. Using a rubber spatula, gently fold the ingredients together.
2. Be Gentle: The key here is to mix just until you no longer see dry flour. Over-mixing can lead to tough waffles, as it develops the gluten in the flour. Some lumps are okay; they will disappear during cooking.
3. Resting Period: Allow the batter to rest for about 5-10 minutes. This resting period helps the leavening agents activate and can contribute to a lighter texture.
Cooking Process: Signs of Readiness and Achieving Golden Brown Waffles
Now that your batter is ready, preheat your waffle iron according to the manufacturer’s instructions. While most waffle irons have a non-stick surface, lightly greasing the plates with cooking spray or a brush of oil can help prevent sticking.
1. Portioning the Batter: Use a ladle or measuring cup to pour the batter onto the preheated waffle iron. Fill it according to your waffle maker’s capacity, but avoid overfilling, as the batter will expand.
2. Cooking Time: Close the lid and cook the waffles according to your waffle iron’s settings. Typically, they take about 4-5 minutes. Look for steam to reduce, which indicates that the waffles are nearly done.
3. Signs of Readiness: Open the waffle iron to check for golden brown color and crisp edges. If they appear light and fluffy, allow them to cook a bit longer.
4. Removing Waffles: Carefully remove the waffles using a fork or tongs to avoid burning your fingers. Place them on a wire rack to cool slightly, which helps maintain their crispness.
Cutting and Cooling: How to Create the Ideal Dippers
Once your waffles are cooked and slightly cooled, it’s time to cut them into dippers.
1. Cutting Technique: Use a sharp knife or pizza cutter to slice each waffle into strips. Aim for about 1 to 2 inches wide, which makes for easy dipping.
2. Cooling: Allow the waffle dippers to cool completely on a wire rack before serving. This helps them firm up a bit, making them easier to handle and dip.
Serving Suggestions
Presentation Ideas for Serving Pumpkin Waffle Dippers
Presentation enhances the dining experience, so consider the following ideas:
– Platter Style: Arrange the dippers on a large serving platter with a decorative touch, such as a sprinkle of powdered sugar or a drizzle of maple syrup.
– Individual Servings: Serve in small cups or bowls, allowing each guest to have their own portion. This approach can create a more personalized experience.
Suggested Toppings and Their Combinations
Elevate your pumpkin waffle dippers with these delicious toppings:
– Maple Syrup: A classic choice, the rich sweetness of maple syrup complements the spices in the waffles beautifully.
– Whipped Cream: A dollop of freshly whipped cream adds a light, airy texture that contrasts nicely with the warm dippers.
– Powdered Sugar: Dusting with powdered sugar adds a touch of sweetness and visual appeal.
– Nut Butter: For a protein boost, try drizzling with almond butter or peanut butter for a creamy addition.
Pairing Ideas: Perfect Beverages to Accompany the Dish
Consider these beverages to accompany your pumpkin waffle dippers:
– Chai Tea: The warm spices of chai will enhance the flavors in your waffles, creating a harmonious experience.
– Apple Cider: Hot apple cider, especially during the fall, offers a refreshing and seasonal pairing.
– Coffee or Latte: A warm cup of coffee or a pumpkin spice latte can complement the flavors perfectly, making it an ideal breakfast or brunch option.
Nutritional Information
Breakdown of Nutritional Values Per Serving
For a typical serving of Pumpkin Waffle Dippers (approximately 2 dippers), here’s an estimated nutritional breakdown:
– Calories: 150-180
– Protein: 4g
– Fat: 6g
– Carbohydrates: 24g
– Fiber: 2g
– Sugar: 2g
Discussion of the Health Benefits of Pumpkin and the Spices Used
Pumpkin is not only delicious but also packed with nutrients. It is high in vitamins A and C, which are essential for immune function and skin health. The spices used, such as cinnamon and nutmeg, have antioxidant properties and can help regulate blood sugar levels.
Considerations for Dietary Restrictions
– Dairy-Free: Substitute cow’s milk with almond, soy, or oat milk and use coconut oil instead of butter for a dairy-free option.
– Gluten-Free: For those with gluten sensitivities, consider using gluten-free flour blends, which can often replace all-purpose flour in a 1:1 ratio.
Exploring Variations
Creative Ways to Modify the Basic Recipe
The great thing about Pumpkin Waffle Dippers is their versatility. Here are some ideas to modify the basic recipe:
1. Adding Chocolate Chips or Nuts: Incorporate semi-sweet chocolate chips or chopped nuts (like walnuts or pecans) into the batter for added texture and flavor.
2. Incorporating Different Spices: For a unique twist, try adding cardamom or allspice in place of or alongside the cinnamon and nutmeg.
3. Making Them Gluten-Free: Use almond flour, coconut flour, or a gluten-free all-purpose flour blend to create a gluten-free version of this recipe.
4. Seasonal Variations: Adapt the recipe for other holidays by incorporating flavors like peppermint extract during Christmas or cranberries for a Thanksgiving twist.
Conclusion
Pumpkin Waffle Dippers are an irresistible fall treat that combines the warm, comforting flavors of pumpkin and spices with the fun of dippable waffles. They are not only delicious but also versatile, allowing you to customize toppings and make variations that suit your taste.
By preparing these dippers, you can embrace the joys of cooking with seasonal ingredients while creating delightful memories with family and friends. So, why not try making this recipe? Whether you enjoy them for breakfast, brunch, or a cozy snack, these Pumpkin Waffle Dippers are sure to become a cherished favorite.

