Introduction
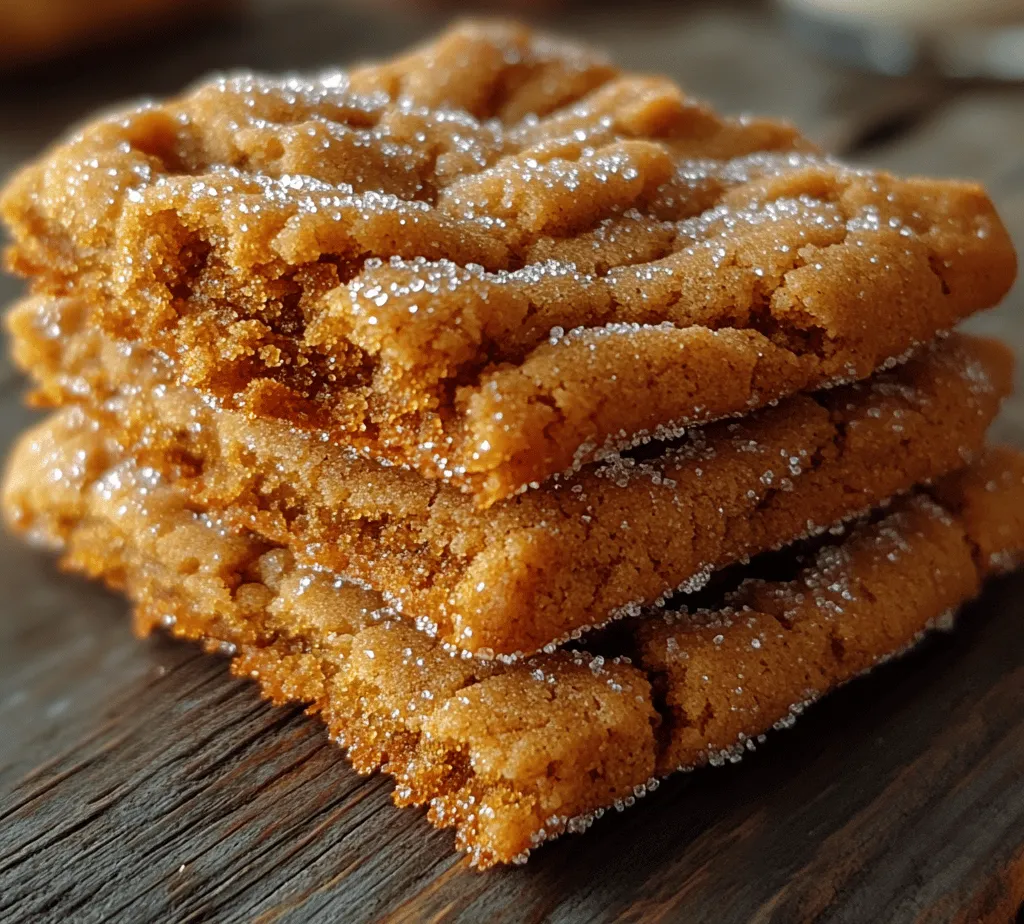
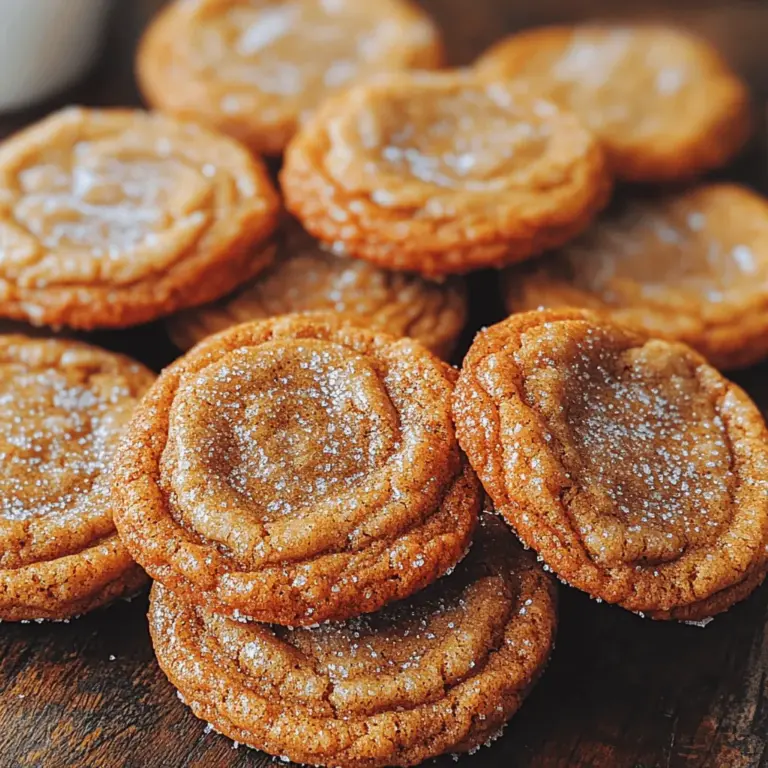
There’s something undeniably comforting about cookies. Their warm, inviting aroma wafts through the air, evoking feelings of nostalgia and joy, especially during festive seasons. Whether you’re celebrating the holidays, hosting a gathering, or simply indulging in a sweet treat after a long day, cookies are often at the center of these moments. Among the myriad of cookie recipes, the Spicy & Sweet Chewy Molasses Cookies stand out as a delightful twist on traditional favorites.
These cookies marry the rich, deep flavors of molasses with a medley of spices, creating a unique taste experience that is both comforting and exciting. The combination of sweet and spicy notes not only tantalizes your taste buds but also warms your heart. As the temperatures drop and festivities ramp up, these cookies become the perfect companion to a cozy evening spent with loved ones or an ideal gift for those you cherish.
In this article, we will explore the artistry behind these Spicy & Sweet Chewy Molasses Cookies, diving into the essential ingredients that give them their signature flavor profile and providing a comprehensive step-by-step guide to baking them to perfection. By understanding the role of each ingredient and following a meticulous approach to preparation, you’ll be able to create cookies that are not just delicious but also memorable.
Understanding the Ingredients
Before you embark on your baking journey, it’s crucial to understand the ingredients that make up the Spicy & Sweet Chewy Molasses Cookies. Each component plays a significant role in achieving the perfect texture and flavor, resulting in cookies that are both chewy and flavorful.
All-Purpose Flour: Providing Structure
All-purpose flour is the backbone of any cookie recipe. It provides the necessary structure that holds the cookies together while allowing them to rise and spread during baking. The gluten content in all-purpose flour is ideal for creating a chewy texture, which is essential for these molasses cookies. When measuring flour, it’s important to do so accurately; too much can lead to dense cookies, while too little can result in overly flat ones.
Baking Soda: The Leavening Agent
Baking soda is a vital ingredient in this recipe, acting as a leavening agent that helps the cookies rise and achieve a light, airy texture. When combined with acidic ingredients like molasses, baking soda releases carbon dioxide, creating bubbles that expand during baking. This process not only contributes to the cookies’ texture but also enhances their overall flavor by promoting browning and caramelization.
Spices: Adding Depth of Flavor
The blend of spices in these cookies is what truly sets them apart. Each spice contributes a unique flavor profile that harmonizes beautifully with the sweetness of the molasses:
– Ginger: Adds a warm, zesty kick that invigorates the palate.
– Cinnamon: Brings a comforting sweetness and aroma reminiscent of the holidays.
– Cloves: Introduces a rich, slightly sweet and earthy flavor that deepens the complexity of the cookie.
– Cayenne: Provides a subtle heat that balances the sweetness and adds an unexpected twist.
Together, these spices elevate the molasses cookies from ordinary to extraordinary, making each bite a delightful experience.
Molasses: Sweetness and Moisture
Molasses is the star ingredient in these cookies, providing not only sweetness but also moisture and a distinctive flavor. It is a byproduct of sugar production and comes in various types, but for this recipe, unsulfured molasses is preferred. Unsulfured molasses is made from mature sugarcane or sugar beets and is free from the preservatives found in its sulfured counterpart. It has a robust flavor profile that enhances the overall taste of the cookies while also offering health benefits, such as being rich in iron, calcium, and magnesium.
Butter and Sugar: Creating a Rich Base
Butter and sugar are essential for creating a rich, flavorful base for the cookies. Butter adds creaminess and a rich mouthfeel, while sugar contributes sweetness and helps with browning. The combination of these two ingredients is crucial for achieving the perfect texture. When creamed together, butter and sugar incorporate air into the mixture, leading to a light and fluffy cookie that still retains its chewy nature.
Step-by-Step Recipe Guide
Now that we’ve explored the important components that make up the Spicy & Sweet Chewy Molasses Cookies, it’s time to roll up your sleeves and get baking! Here’s your comprehensive step-by-step guide to preparing these delightful treats.
Prepping Your Kitchen for Baking
Before you begin, it’s vital to prepare your kitchen. Gather all the necessary tools and equipment to ensure a smooth baking process. Here’s what you’ll need:
– Mixing bowls (preferably one large and one medium)
– Measuring cups and spoons
– A whisk or electric mixer
– A rubber spatula
– Baking sheets lined with parchment paper
– An oven preheated to the right temperature (more on this shortly)
Necessary Tools and Equipment
Having the right tools can make all the difference in your baking experience. Here’s a detailed list of what you’ll need:
1. Mixing Bowls: At least two bowls—one for dry ingredients and another for wet ingredients.
2. Measuring Cups and Spoons: Accurate measuring tools to ensure precise ingredient quantities.
3. Whisk or Electric Mixer: For combining ingredients smoothly; a hand whisk works well for smaller batches, while an electric mixer may save time.
4. Rubber Spatula: Ideal for scraping down the sides of your mixing bowls and folding in dry ingredients.
5. Baking Sheets: Choose sturdy, non-stick baking sheets or line regular sheets with parchment paper to prevent sticking.
Importance of Measuring Ingredients Accurately
Accurate measurement of ingredients is crucial in baking. Unlike cooking, where you can often adjust flavors on the fly, baking is a science that requires precision. Here are some tips for measuring ingredients correctly:
– Flour: Spoon the flour into a measuring cup and level it off with a knife. Avoid scooping directly from the bag, as this can compact the flour and result in using too much.
– Brown Sugar: Pack the brown sugar into the measuring cup firmly, as it should hold its shape when turned out.
– Liquid Ingredients: Use a liquid measuring cup with a spout for accuracy. Check the measurement at eye level.
Detailed Instructions Broken Down by Stages
With your kitchen prepped and ingredients measured, you’re ready to start baking. Follow these detailed instructions step by step to ensure your cookies turn out perfectly every time.
Preheating the Oven and Lining Baking Sheets
The first step in any baking process is preheating your oven. Set the temperature to 350°F (175°C) and allow it to come to temperature while you prepare your cookie dough. This ensures that your cookies bake evenly and achieve the desired texture.
Once the oven is preheated, line your baking sheets with parchment paper. This will not only prevent the cookies from sticking but also make clean-up a breeze.
Mixing Dry Ingredients and Their Significance
In a medium mixing bowl, combine your dry ingredients: all-purpose flour, baking soda, and spices (ginger, cinnamon, cloves, and cayenne). Whisk them together until they are evenly blended. This step is crucial as it ensures that the leavening agent and spices are distributed uniformly throughout the flour, leading to consistent flavor and texture in your cookies.
Creaming Butter and Sugar: Tips for Achieving the Perfect Texture
In your large mixing bowl, combine the softened butter and granulated sugar. Using an electric mixer or a whisk, beat the mixture until it is light and fluffy. This process typically takes about 2-3 minutes with an electric mixer. The goal is to incorporate air into the mixture, which will help the cookies rise and create a tender texture.
Once the butter and sugar are well combined, add in the unsulfured molasses and an egg (if the recipe calls for it). Beat the mixture until well blended, ensuring that the molasses is fully incorporated and that you achieve a smooth consistency.
Next Steps
(Continue with detailed instructions for incorporating dry ingredients into the wet mixture, chilling the dough if necessary, and baking the cookies until golden brown. You can also include tips for adjusting the baking time based on cookie size and oven variations.)
This detailed guide will help you create Spicy & Sweet Chewy Molasses Cookies that are sure to impress family and friends alike. Enjoy the process and the delightful results!

Incorporating Wet Ingredients and the Importance of Mixing Techniques
To create the perfect batch of Spicy & Sweet Chewy Molasses Cookies, it’s crucial to understand how to properly incorporate your wet ingredients. Begin by combining the molasses, melted butter, and brown sugar in a mixing bowl. Using a hand mixer or a whisk, blend these ingredients until they are smooth and well-combined. The key here is to ensure that the sugar is fully dissolved, which helps create a uniform texture in the final cookie.
When adding eggs, it’s best to introduce them one at a time. This gradual integration allows each egg to fully incorporate before adding the next, ensuring that the mixture remains airy and light. After mixing in the eggs, add the vanilla extract. This not only enhances the flavor profile but also keeps the dough moist.
Mixing techniques play a significant role in the final result. Over-mixing can lead to tough cookies due to the gluten development in the flour. Therefore, mix just until you no longer see dry flour. A few lumps are perfectly fine as they will bake out and contribute to the chewy texture that you desire.
Chilling the Dough: Why It Matters for Cookie Texture
Once you’ve achieved the perfect dough consistency, it’s time to chill it. This step is often overlooked, but chilling is vital for several reasons. Firstly, it allows the fats in the dough to solidify, leading to a firmer texture when baked. Chilled dough spreads less, helping to maintain the chewy center while the edges set perfectly.
Refrigerate the dough for at least one hour, but if time permits, consider chilling it overnight. This longer resting period not only enhances the flavors as the spices meld together but also improves the overall texture of the cookies. The result will be a cookie that has a delightful chewiness coupled with a crisp exterior.
The Art of Cookie Formation
Techniques for Forming and Rolling Cookie Dough
Now that your dough is chilled and ready, it’s time to form the cookies. Use a cookie scoop or tablespoon to portion out the dough. Roll each portion into a ball between your palms. This technique ensures that the cookies will bake evenly. If you prefer a flatter cookie, gently press down on each ball with your fingers or the bottom of a glass before baking.
The Role of Rolling in Granulated Sugar for Texture and Sweetness
After forming the dough balls, roll them in granulated sugar before placing them on the baking sheet. This not only adds an extra layer of sweetness but also contributes to a delightful crunch on the exterior. The sugar helps create a beautiful crackled top as the cookies bake, enhancing their visual appeal.
Spacing Cookies on the Baking Sheet: Ensuring Even Baking
When placing your cookie dough balls on the baking sheet, ensure there is enough space between each cookie. A good rule of thumb is to leave about 2 inches of space between them. This spacing allows for even spreading and baking, preventing them from merging into one large cookie. Additionally, using parchment paper or a silicone baking mat can help prevent sticking and promote even baking.
Baking to Perfection
Understanding Cookie Baking Times and What to Look For
As you preheat your oven to 350°F (175°C), keep an eye on the timer. Generally, these Spicy & Sweet Chewy Molasses Cookies will need about 10 to 12 minutes to bake. However, every oven is different, so it’s important to watch for visual cues. The cookies should look set at the edges but still slightly soft in the center when you take them out of the oven.
The Science Behind Achieving a Chewy Center with Set Edges
The key to a chewy center lies in the balance of baking time and temperature. By pulling the cookies out of the oven while they still have a slight jiggle in the center, you allow them to continue cooking on the baking sheet from residual heat. This method creates that perfect chewy texture while ensuring the edges are set and slightly crisp.
Tips for Cooling Cookies for Optimal Texture
After baking, allow the cookies to cool on the baking sheet for about 5 minutes. This resting time enables the cookies to firm up slightly, making them easier to transfer to a wire rack. Once on the rack, let them cool completely. This step is crucial for achieving the desired texture, as warm cookies can often be too soft.
Serving Suggestions and Pairings
Ideal Beverages to Serve with Spicy & Sweet Chewy Molasses Cookies
These cookies are incredibly versatile and can be enjoyed with a variety of beverages. For a classic pairing, serve them alongside a steaming cup of chai or spiced tea, which complements their warm spices beautifully. If you prefer something chilled, a glass of milk or a creamy vanilla latte makes for a delightful contrast to the spices.
Creative Ways to Present Cookies for Gatherings or as Gifts
When it comes to presentations, consider stacking the cookies in a decorative tin or gift box for a thoughtful homemade gift. You could also place them on a beautiful serving platter, garnished with a sprinkle of cinnamon or alongside festive decorations for a holiday gathering. Arranging them in a clear bag tied with a ribbon can also add a personal touch.
Suggestions for Storing Cookies to Maintain Freshness
To keep your Spicy & Sweet Chewy Molasses Cookies fresh, store them in an airtight container at room temperature. They can last up to a week, though they are likely to be devoured much sooner! If you’d like to keep some for later, consider freezing the cookie dough before baking. Simply scoop the dough balls, freeze them on a baking sheet, and once frozen, transfer them to a zip-top bag. When ready to bake, you can bake them straight from the freezer, adding an extra minute or two to the baking time.
Nutritional Insights
Breakdown of Key Nutritional Components in the Cookies
These cookies not only provide a delightful taste experience but also come with nutritional benefits. Key ingredients like molasses bring a wealth of minerals, including iron, calcium, and potassium. The oats, if included, add fiber, which helps in digestion and provides a feeling of fullness.
Discussion on Potential Modifications for Dietary Preferences
For those looking to modify the recipe to meet dietary needs, consider using gluten-free all-purpose flour as a substitute for traditional flour. This simple swap maintains the delicious flavor while catering to gluten-sensitive individuals. Additionally, if you want to reduce sugar, natural sweeteners like maple syrup or agave can be used, but adjustments to the liquid ratios may be necessary.
The Balance of Indulgence and Nutrition in Homemade Cookies
While these cookies are indulgent treats, making them at home allows you to control the quality of the ingredients. By using organic sugars, whole grain flours, or even adding nuts and dried fruits, you can enhance the nutritional profile while still indulging in the rich, spicy flavors.
Conclusion
In summary, the Spicy & Sweet Chewy Molasses Cookies represent a harmonious blend of flavors and textures that are sure to delight anyone who takes a bite. The combination of warm spices with the sweetness of molasses creates a unique experience that is perfect for any occasion. Whether you enjoy them with a warm beverage, present them as gifts, or savor them on your own, these cookies bring joy and warmth.
We encourage you to try this recipe in your own kitchen and experience the delightful combination of spicy and sweet. Remember, the joy of baking extends beyond the final product; it’s about the love and care you put into every step, making these cookies a wonderful treat to share with family and friends. Happy baking!

