Strawberry Dream Bars: A Delightful No-Bake Summer Dessert
As the days grow warmer and the sun shines brighter, our cravings for light and refreshing desserts come to the forefront. Among the many delightful options, Strawberry Dream Bars stand out as a quintessential summer treat. This no-bake dessert captures the essence of the season with its vibrant flavors and creamy textures, making it an irresistible choice for gatherings, picnics, or simply enjoying at home.
No-bake recipes like Strawberry Dream Bars are particularly appealing during the hot months, as they save time and energy while still delivering a decadent result. They allow us to indulge in sweet flavors without the need for turning on the oven, making them perfect for those sweltering afternoons. The combination of creamy filling, fresh strawberries, and a crunchy crust creates a perfect harmony of flavors and textures that leaves a lasting impression with every bite.
Understanding Strawberry Dream Bars
Strawberry Dream Bars are a delightful variation of classic cheesecake, showcasing the rich, creamy filling and a buttery, crumbly crust that many have come to love. These bars originated from traditional cheesecake recipes, which have evolved over time to include various flavors and presentations. The addition of strawberries not only enhances the visual appeal but also infuses the dessert with a refreshing sweetness that perfectly complements the richness of the cream cheese filling.
Strawberries are a popular choice for desserts for several reasons. Their natural sweetness, vibrant color, and juicy texture make them an ideal fruit for enhancing a variety of recipes. Not only do they add a burst of flavor, but they also provide a nutritional boost, being rich in vitamins, antioxidants, and fiber. When made with fresh, in-season strawberries, Strawberry Dream Bars truly shine, as the fruit’s peak flavor elevates the entire dish.
Emphasizing the use of seasonal ingredients is vital when creating this dessert. Fresh strawberries, in particular, can significantly enhance the taste and texture of Strawberry Dream Bars. When strawberries are at their prime, they deliver an unparalleled flavor that frozen or out-of-season berries simply cannot replicate. This not only makes the dessert more enjoyable but also supports local farmers and promotes sustainability.
Ingredients Breakdown
To create the perfect Strawberry Dream Bars, it is essential to understand the role of each ingredient. Starting with the crust, the foundation of this dessert consists primarily of graham crackers, which provide a flavorful and textural base. The slight sweetness and crunch of the graham crackers contribute to the overall experience, making them an ideal choice for the crust.
Butter plays a crucial role in achieving the right texture for the crust. It binds the graham cracker crumbs together, ensuring that the crust holds its shape while adding richness. Using unsalted butter allows you to control the saltiness of the dessert, ensuring a balanced flavor profile.
Moving on to the filling ingredients, cream cheese is the star of the show. It provides the creamy texture that is characteristic of cheesecake, creating a smooth and luscious filling that pairs beautifully with the strawberries. To achieve the right level of sweetness without any grittiness, powdered sugar is incorporated into the mixture. Unlike granulated sugar, powdered sugar dissolves easily, ensuring a velvety texture.
Heavy whipping cream is another essential ingredient that contributes to the lightness and fluffiness of the filling. When whipped, it adds volume and airiness, making the bars feel indulgent yet not overly dense. This combination of cream cheese and whipped cream results in a filling that is both rich and airy, making each bite a delightful experience.
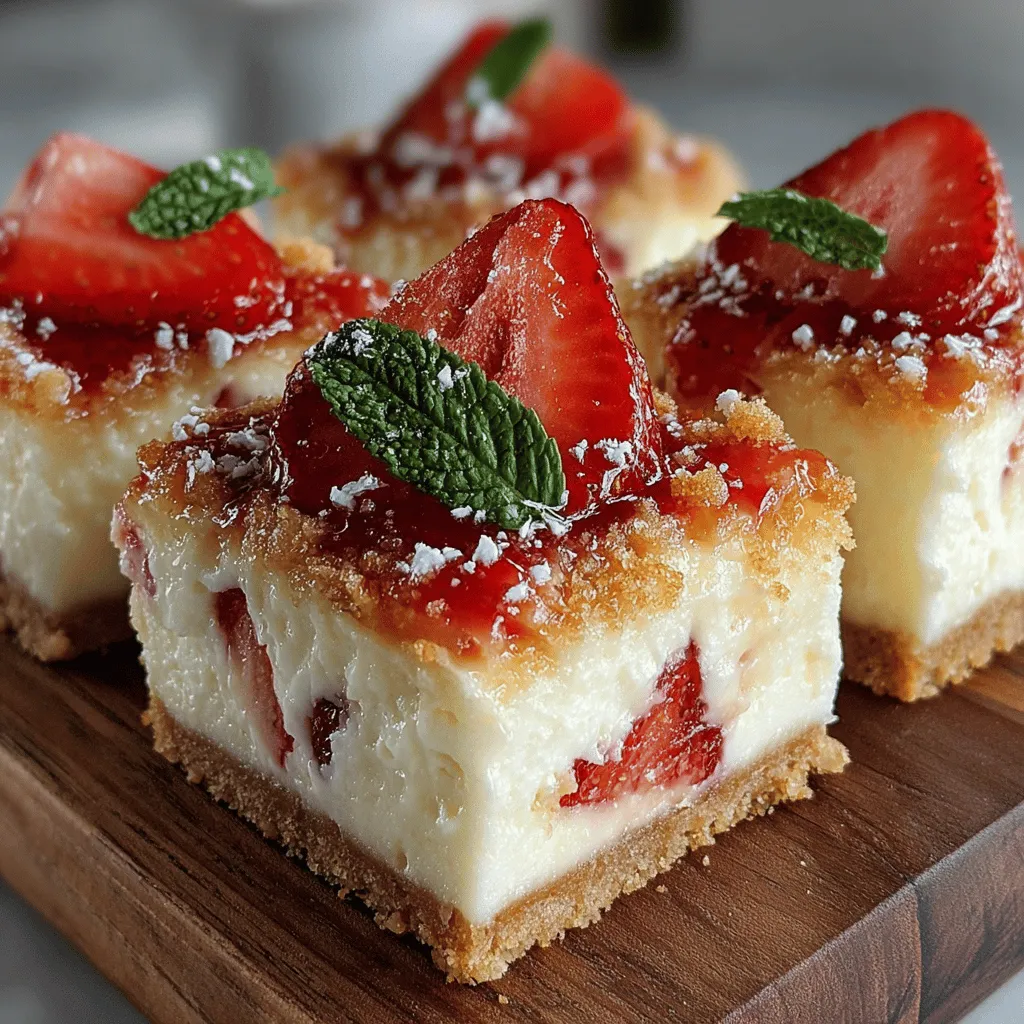
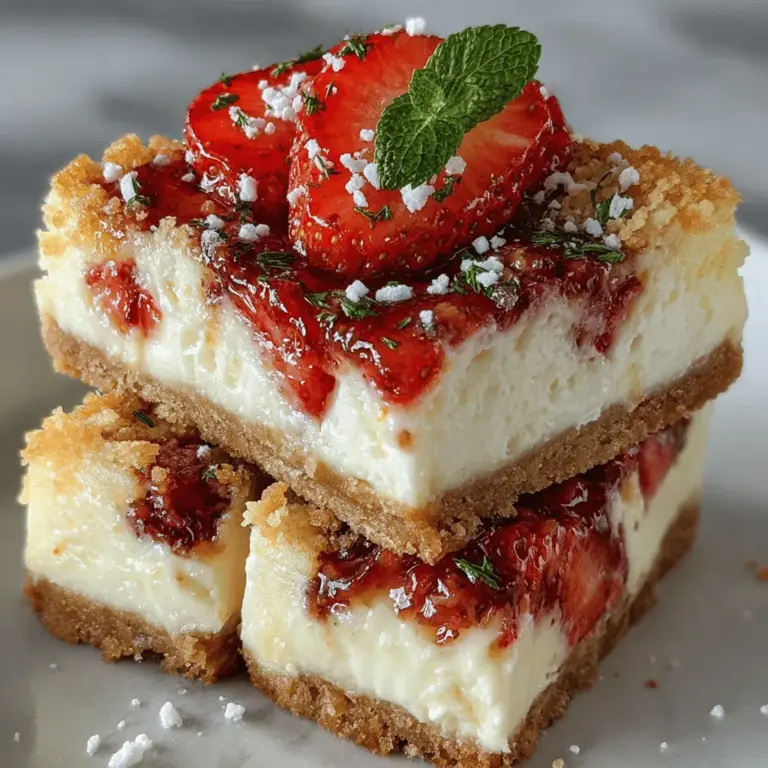
As for the topping, fresh sliced strawberries not only enhance the visual appeal of the dessert but also add a burst of flavor that complements the creamy filling. Their bright red color contrasts beautifully with the pale filling, creating an eye-catching presentation. For those looking to elevate their Strawberry Dream Bars even further, garnishing with mint leaves adds an extra touch of color and freshness.
Step-by-Step Instructions
Preparing the Crust:
1. Gather Your Ingredients: Start by assembling your graham crackers, unsalted butter, and a pinch of salt. For best results, use a food processor to crush the graham crackers into fine crumbs.
2. Combine Ingredients: In a mixing bowl, combine the graham cracker crumbs with melted butter and a pinch of salt. Mix until the crumbs are evenly coated and resemble wet sand.
3. Press into the Pan: Transfer the crumb mixture into a 9×9-inch square baking pan lined with parchment paper. Use the back of a measuring cup or your fingers to firmly press the mixture into an even layer across the bottom of the pan. This will form a solid base for your Strawberry Dream Bars.
4. Chill the Crust: Place the pan in the refrigerator to set the crust while you prepare the filling. This step is crucial for ensuring that the crust holds together when sliced.
Stay tuned for the next part of our Strawberry Dream Bars recipe, where we’ll delve into creating the creamy filling and assembling this delightful dessert. With each layer, you’ll see how simple ingredients come together to create a summer treat that is sure to impress.

Creating a delightful dessert can be a rewarding experience, and Strawberry Dream Bars are the perfect treat for any occasion. With their luscious layers of strawberry and creamy filling atop a buttery crust, these bars are not only visually stunning but also surprisingly easy to make. Let’s dive into the steps for crafting these mouth-watering bars, including essential tips to ensure your dessert turns out perfectly every time.
Importance of Mixing Ingredients Thoroughly for an Even Texture
When it comes to baking, the texture of your dessert is paramount. For the Strawberry Dream Bars, it’s crucial to mix your ingredients thoroughly at every stage. This ensures that each ingredient is evenly distributed, leading to a consistent flavor and texture throughout the bars. Whether you’re combining the crust ingredients or the creamy filling, aim for a smooth and uniform mixture.
Tips on Pressing the Crust Firmly
The crust serves as the foundation of your Strawberry Dream Bars, so it’s essential to press it firmly into the pan. Here are a few tips to achieve the perfect crust:
– Use a flat-bottomed glass or measuring cup: After mixing the crust ingredients, use a flat-bottomed object to press the mixture evenly into the bottom of your baking dish. This helps compact the crumbs tightly, ensuring they hold together after baking.
– Even pressure: Apply even pressure across the entire surface to avoid any weak spots. This will help the crust remain intact when you cut the bars later.
– Pre-bake for best results: Remember to bake the crust until it is golden brown, as this will not only enhance the flavor but also provide a sturdier base for the creamy filling.
Making the Filling
The filling is where the magic happens, transforming simple ingredients into a rich and creamy layer that complements the fresh strawberries beautifully.
Emphasizing the Need for Softened Cream Cheese
To achieve a smooth and creamy filling, it’s crucial that your cream cheese is adequately softened. Cold cream cheese can lead to lumps in your filling, resulting in an unsatisfactory texture. Here’s how to prepare it:
– Time it right: Take the cream cheese out of the refrigerator about 30 minutes before you start your recipe. This allows it to reach room temperature, making it easier to blend.
– Microwave method: If you’re short on time, you can cut the cream cheese into small cubes and microwave it in 10-second increments until softened, but be careful not to melt it.
Techniques for Achieving the Perfect Creaminess
Once your cream cheese is softened, it’s time to mix in the powdered sugar and vanilla. Here are some tips for creating the perfect filling:
– Start slow: Begin mixing at a low speed to avoid a sugar cloud. Gradually increase the speed until fully combined.
– Scrape the bowl: Stop the mixer periodically to scrape down the sides of the bowl. This ensures that all ingredients are fully incorporated and prevents lumps.
– Taste test: After mixing, always taste your filling. Adjust the sweetness by adding more powdered sugar if desired.
Whipping the Cream
Whipping cream is a vital step in creating the fluffy texture of your filling. Here’s how to do it perfectly:
Detailed Explanation of How to Whip Cream to Stiff Peaks
To whip cream effectively:
– Chill your tools: Start with a cold bowl and whisk or beaters. Chill them in the freezer for about 10 minutes before whipping.
– Use heavy cream: Make sure to use heavy whipping cream for the best results. It contains a higher fat content, allowing for better volume and stability.
– Whip to stiff peaks: Begin beating the cream on medium speed, gradually increasing to high speed. Stop when stiff peaks form—this means the cream holds its shape and is not runny.
Tips for Folding in the Whipped Cream
Folding in the whipped cream requires a gentle touch to maintain its airy texture. Here’s how to do it properly:
– Use a spatula: A rubber spatula is ideal for folding. It allows you to scrape the sides of the bowl and gently combine without deflating the whipped cream.
– Cut and fold method: Gently cut through the mixture and lift it over itself. Rotate the bowl and repeat until no streaks remain, being careful not to overmix.
Incorporating Strawberries
The strawberries are the star of the show in these bars, providing freshness and sweetness. Here’s how to incorporate them properly:
Importance of Gently Folding in the Strawberries
When adding the strawberries to your creamy filling:
– Use fresh strawberries: Choose ripe, firm strawberries for the best flavor and texture. Wash and hull them, then slice or chop them to your preferred size.
– Folding technique: Just like with the whipped cream, gently fold the strawberries into the filling. This helps maintain their shape and prevents them from breaking down too much during the mixing process.
Assembling the Bars
Now that both the crust and filling are prepared, it’s time to assemble your Strawberry Dream Bars.
How to Properly Layer the Filling Over the Crust
– Spread evenly: After the crust has cooled completely, pour the filling over it. Use a spatula to spread it evenly across the crust for a uniform layer.
– Smooth it out: Make sure to smooth out the top of the filling so that it looks appealing and professional.
Importance of Chilling Time
Once assembled, the bars need to chill in the refrigerator for at least 4 hours, or ideally overnight. This step is crucial for:
– Setting: Chilling allows the filling to firm up, making it easier to cut into bars.
– Flavor melding: The flavors have a chance to meld together, creating a more delicious final product.
Serving Suggestions
Strawberry Dream Bars are perfect for various occasions, whether it’s a summer picnic, a birthday celebration, or just a sweet treat to enjoy at home. Here are some creative serving suggestions:
Ideas for Serving Strawberry Dream Bars
– Beverage pairings: These bars pair wonderfully with refreshing beverages. Consider serving them alongside iced tea, lemonade, or a sparkling water with a hint of mint for a delightful complement.
– Presentation tips: For a visually appealing dessert display, cut the bars into neat squares or rectangles and arrange them on a platter. Garnish with fresh mint leaves or additional sliced strawberries for a pop of color.
Discussing Storage Options
To ensure your Strawberry Dream Bars stay fresh:
– Refrigeration: Store the bars in the refrigerator, covered with plastic wrap or in an airtight container. They can last for up to a week.
– Freezing: If you want to prepare them in advance, these bars freeze well. Cut them into squares and wrap each piece in plastic wrap, then place them in a freezer-safe container. They can last for up to three months in the freezer. Thaw in the refrigerator before serving.
Conclusion
Strawberry Dream Bars are an ideal dessert for gatherings and summer events, combining the fresh flavor of strawberries with a creamy filling and a buttery crust. This dessert is not only delightful to eat but also visually stunning, making it a showstopper at any occasion.
Creating these bars is a joyous experience, and the steps are straightforward, allowing both novice and experienced bakers to achieve impressive results. As you become comfortable with the recipe, consider experimenting with variations—try different fruits like blueberries or raspberries, or explore different crust options, such as chocolate or graham cracker.
The joy of baking lies in creativity and personal expression, so don’t hesitate to make this recipe your own. Enjoy the process and the delightful results!

