Introduction
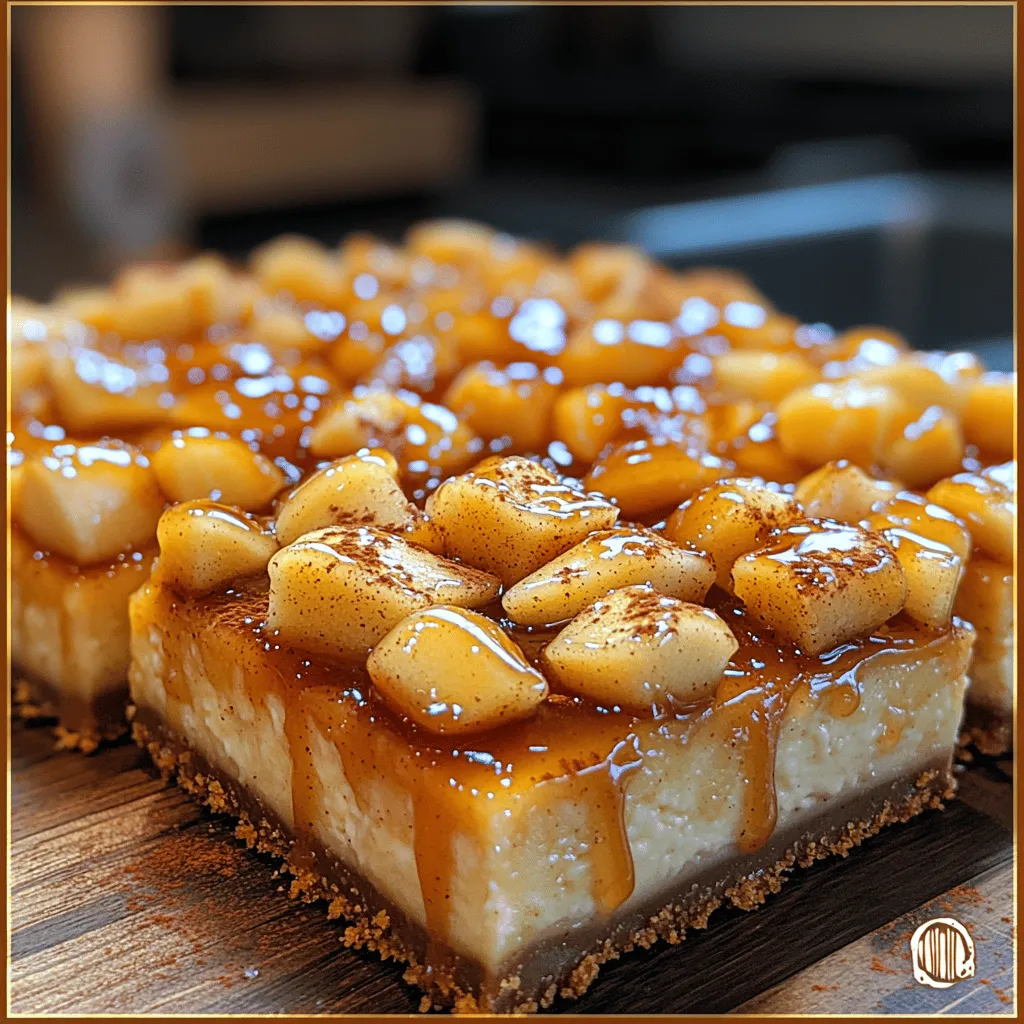
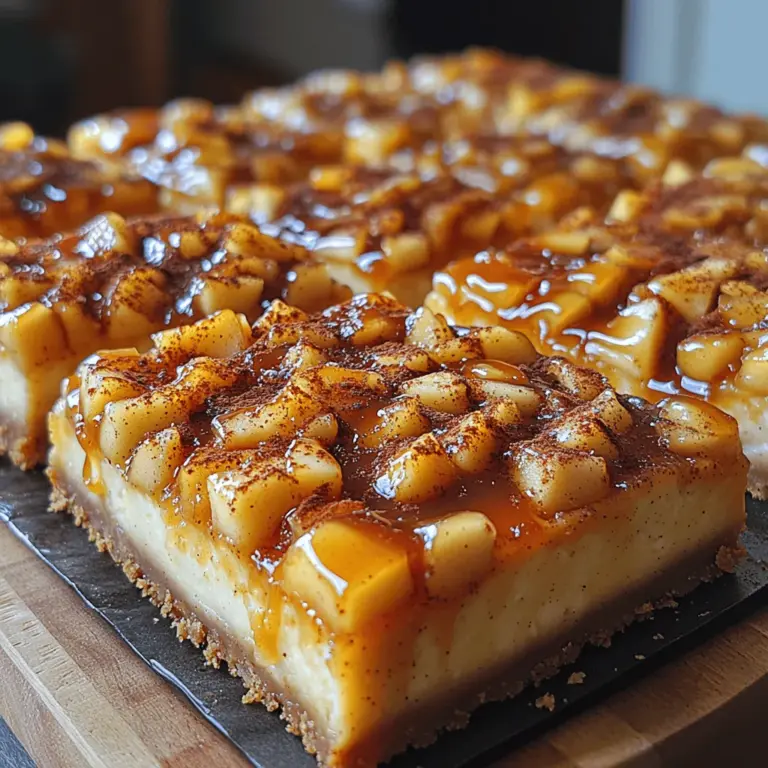
Caramel Apple Cheesecake Bars are the ultimate dessert that combines the creamy richness of cheesecake with the delightful crunch of fresh apples and the gooey sweetness of caramel. This dessert is not just a treat; it is a celebration of flavors and textures that will surely impress your family and friends. Imagine a buttery graham cracker crust supporting a luscious cream cheese filling, studded with tart apples and topped with a decadent layer of caramel. Whether it’s for a holiday gathering, a potluck, or simply a sweet indulgence at home, these cheesecake bars are sure to be a hit.
The origin of cheesecake dates back to ancient Greece, where it was considered a form of nourishment for athletes. Over the centuries, the recipe has evolved, with various cultures adding their unique spins. In the United States, cheesecake became popular in the 19th century, and since then, it has inspired countless variations. Our Caramel Apple Cheesecake Bars take this classic dessert and elevate it with seasonal flavors, making it perfect for fall or any time you crave a sweet treat.
As we delve into the details of crafting this delicious treat, we will explore the ingredients that make this dessert special, step-by-step instructions for each stage of the process, and tips for presentation that will have your guests raving. Whether you’re a seasoned baker or a novice in the kitchen, this recipe will guide you through creating a memorable dessert that everyone will love.
Understanding the Ingredients
To create the perfect Caramel Apple Cheesecake Bars, it’s essential to understand the role of each ingredient in the recipe. We will break down the components into three main categories: the crust, the creamy filling, and the caramel topping.
The Crust: A Delicious Foundation
The crust is the foundation of any cheesecake, providing a satisfying crunch that perfectly complements the creamy filling. For our Caramel Apple Cheesecake Bars, we start with graham cracker crumbs as the base. These crumbs are not just a convenient option; they offer a subtle sweetness and a hint of honey flavor that pairs beautifully with apples and caramel.
– Graham Cracker Crumbs: The key to a great cheesecake crust. You can find pre-packaged crumbs at most grocery stores, or you can make your own by crushing whole graham crackers in a food processor.
– Unsalted Butter: This ingredient helps bind the crumbs together and adds richness. It’s essential to use unsalted butter so you can control the overall saltiness of the dessert.
– Sugar: A little bit of sugar is added to enhance the sweetness of the crust and balance the flavors.
– Ground Cinnamon: This warm spice adds depth and a hint of warmth to the crust, making it especially inviting. The cinnamon’s aroma will fill your kitchen as the bars bake, creating a cozy atmosphere.
The Creamy Filling: The Heart of the Cheesecake
The filling is where the magic happens. A well-made cheesecake filling should be smooth, creamy, and flavorful. For our recipe, we’ll be using a combination of ingredients that work together to create the ultimate cheesecake experience.
– Cream Cheese: The star of the filling, cream cheese provides the characteristic tang and richness of cheesecake. It’s crucial to use softened cream cheese to achieve a smooth texture without lumps.
– Sugar: This ingredient sweetens the filling and balances the tartness of the cream cheese.
– Eggs: Eggs are essential for binding the filling together and giving it structure. Beating the eggs properly ensures a light and airy texture.
– Sour Cream: Adding sour cream contributes to the creaminess and imparts a subtle tanginess that elevates the flavor of the cheesecake. It also helps achieve a velvety texture.
– Apples: The choice of apples can make a significant difference in the overall flavor. Tart apples like Granny Smith add a refreshing contrast to the sweet filling, while sweeter options like Honeycrisp offer a more balanced flavor. Feel free to mix both varieties for depth and complexity.
The Caramel Topping: The Finishing Touch
No caramel apple dessert would be complete without a luscious caramel topping. The caramel adds a rich, sweet layer that ties all the flavors together. You have the option to use store-bought caramel sauce for convenience or make your own for a homemade touch.
– Homemade vs. Store-Bought Caramel Sauce: While store-bought caramel sauce is a quick and easy option, making your own allows you to control the flavor and sweetness. A simple caramel sauce can be made by melting sugar and butter together, resulting in a rich and buttery topping.
– Sea Salt and Ground Cinnamon: To enhance the caramel flavor, consider adding a sprinkle of sea salt for a sweet-salty contrast. A hint of ground cinnamon can also be added to tie back to the flavors in the crust and filling.
Step-by-Step Instructions
Now that we understand the ingredients and what they contribute to our Caramel Apple Cheesecake Bars, let’s move on to the step-by-step instructions for bringing this dessert to life.
Prepping Your Kitchen
Before diving into the recipe, it’s important to prepare your kitchen and gather your tools. This will make the process smoother and more enjoyable.
1. Preheat the Oven: Start by preheating your oven to 325°F (163°C). This temperature is ideal for baking cheesecake, allowing it to set evenly without cracking.
2. Prepare the Baking Pan: Line a 9×9-inch baking pan with parchment paper, leaving some overhang on the sides. This will make it easier to lift the cheesecake bars out of the pan once they are baked and cooled. Greasing the pan lightly with cooking spray or butter can also help ensure the parchment paper sticks and the bars come out easily.
Crafting the Crust
Creating the graham cracker crust is a straightforward process, but there are a few tips to ensure you achieve the right texture and firmness.
1. Combine Ingredients: In a medium mixing bowl, combine 1 ½ cups of graham cracker crumbs, ½ cup of sugar, and 1 teaspoon of ground cinnamon. Mix these dry ingredients well to ensure the cinnamon is evenly distributed.
2. Add Butter: Melt ½ cup of unsalted butter and pour it into the crumb mixture. Stir until all the crumbs are moistened and the mixture resembles wet sand.
3. Press the Mixture: Transfer the crust mixture into the prepared baking pan. Using the back of a measuring cup or your fingers, press the crumbs firmly into an even layer at the bottom of the pan. You want the crust to be compact enough to hold together when sliced.
4. Bake the Crust: Place the pan in the preheated oven and bake for about 10 minutes, or until the crust is lightly golden. This step helps set the crust before adding the filling, preventing it from becoming soggy.
Creating the Cheesecake Filling
Now that the crust is ready, it’s time to make the creamy filling that will elevate our cheesecake bars.
1. Beat the Cream Cheese: In a large mixing bowl, beat 16 ounces of softened cream cheese using an electric mixer on medium speed until smooth and creamy. This step is crucial – you want to ensure there are no lumps in your filling.
2. Add Sugar: Gradually add ½ cup of sugar while continuing to beat the mixture. This will sweeten the filling and help create a silky texture.
3. Incorporate Eggs: Add 2 large eggs, one at a time, mixing well after each addition. Beating the eggs too much can introduce air bubbles, leading to cracks in your cheesecake, so mix just until incorporated.
4. Mix in Sour Cream: Add ½ cup of sour cream and mix until fully incorporated. This ingredient contributes to the creaminess and tang of the cheesecake.
5. Fold in Apples: Finally, peel, core, and dice your chosen apples. Gently fold these into the cheesecake filling, distributing them evenly throughout the mixture.
With the filling ready, you are well on your way to creating a delicious dessert that combines the flavors of caramel, apple, and cream cheese in every bite.
As we move forward in the next part of the article, we will cover the final steps, including baking, topping with caramel, and tips for serving and storing your Caramel Apple Cheesecake Bars. Stay tuned for more delectable insights into this irresistible dessert!

Combining Ingredients for a Smooth Consistency
To achieve the perfect texture for your Caramel Apple Cheesecake Bars, begin by combining the cream cheese, sugar, and vanilla extract in a mixing bowl. It’s crucial that your cream cheese is at room temperature for easier blending. Use an electric mixer on medium speed to beat the ingredients together until the mixture is creamy and smooth, typically around 2-3 minutes. This step is vital as it ensures there are no lumps in your filling, contributing to a velvety texture once baked.
Once the cream cheese mixture is smooth, gradually add sour cream and eggs. Incorporate the sour cream, which adds a tangy flavor and creaminess, followed by the eggs, one at a time. Mix just until combined; overmixing can introduce too much air into the batter, leading to cracks during baking. The result should be a rich, smooth batter that will cradle the apple pieces beautifully.
Folding in Apples: Best Practices to Maintain Chunks
Next, it’s time to fold in the star of the show: the apples. For this recipe, you’ll want to use crisp apples like Granny Smith or Honeycrisp, as they hold their shape well during baking. After peeling, coring, and dicing the apples into small chunks, measure out about two cups.
To maintain the integrity of the apple chunks while mixing, use a rubber spatula for folding. Gently incorporate the diced apples into the cheesecake batter, taking care not to break them down. The goal is to evenly distribute the apple pieces throughout the filling without mashing them. This method will ensure that you get delightful bites of apple in every slice of your caramel apple cheesecake bars.
Assembling and Baking the Bars
Pouring and Spreading the Filling Over the Crust
Once your apple-filled cheesecake batter is ready, it’s time to assemble your bars. Carefully pour the cheesecake mixture over the pre-baked crust, ensuring an even distribution across the surface. Use a spatula to spread the filling out evenly, making sure to reach the edges of the crust. This ensures that every bite contains both crust and luscious filling.
Tips on Removing Air Bubbles for a Smooth Surface
Air bubbles in your cheesecake can lead to an uneven surface and cracks. To mitigate this, gently tap your baking dish on the countertop a few times. This action allows any trapped air bubbles to rise to the surface and pop. For an extra precaution, consider running a toothpick or skewer through the batter in a swirling motion, which can help release any remaining air pockets.
Baking Time and What to Look for to Ensure Perfect Doneness
Preheat your oven to 325°F (163°C) before placing the assembled bars inside. Bake the cheesecake for about 40-45 minutes, but keep a close eye on them as ovens may vary. You’ll know it’s done when the edges are set, but the center still has a slight jiggle. The residual heat will continue to cook the center as it cools. Avoid overbaking, as this can lead to a dry texture.
Cooling and Chilling
Importance of Cooling on a Wire Rack
Once your cheesecake bars are baked to perfection, remove them from the oven and let them cool in the pan on a wire rack for approximately 30 minutes. This step is essential as it allows the bars to cool gradually, preventing them from cracking due to rapid temperature changes. Cooling on a wire rack also promotes even cooling, ensuring a consistent texture throughout.
Chilling Time: Why It Matters for the Texture and Flavor
After the initial cooling period, transfer the bars to the refrigerator to chill for at least 4 hours, but overnight is ideal. Chilling allows the flavors to meld together and helps the cheesecake set properly, resulting in a firmer, sliceable texture. This patience will reward you with a decadent dessert that holds its shape beautifully when cut.
Preparing the Caramel Topping
Step-by-Step for Making or Warming Caramel Sauce
While the cheesecake bars are chilling, you can prepare your caramel sauce. If you’re using store-bought caramel, simply warm it gently in a saucepan over low heat until it’s pourable. If you prefer homemade, you’ll need sugar, butter, and cream. Begin by melting one cup of granulated sugar in a heavy-bottomed saucepan over medium heat, stirring constantly until it becomes a deep amber color. Remove from heat and add half a cup of butter, stirring until melted.
Next, slowly pour in half a cup of heavy cream while stirring, as the mixture will bubble vigorously. Return to low heat until fully combined. Allow the caramel to cool slightly before drizzling over your cheesecake bars.
Tips on Drizzling and Garnishing for Presentation
Once your bars are fully chilled, cut them into squares or rectangles. Drizzle the warm caramel sauce over the top in a zigzag pattern for a beautiful presentation. For an added touch, consider sprinkling a pinch of sea salt over the caramel, which will enhance the flavors and create a delightful contrast with the sweetness. You can also garnish with additional diced apples or a sprinkle of cinnamon to elevate the visual appeal.
Serving Suggestions
Cutting the Bars
To achieve clean cuts, use a sharp knife dipped in hot water, wiping it clean between slices. This technique ensures that you get neat, uniform pieces without dragging the filling or crust. Aim for squares that are about 2 inches in size; this portion is perfect for enjoying the rich flavors without overwhelming your palate.
Ideal Serving Sizes and Plating Ideas
When plating your Caramel Apple Cheesecake Bars, consider serving them on a rustic wooden board or elegant dessert plates. Pair each slice with a dollop of whipped cream or a scoop of vanilla ice cream for an indulgent treat. Adding a sprig of mint or a slice of apple on the side can enhance the presentation and add freshness.
Flavor Pairings
Recommended Beverages to Serve Alongside
These decadent bars pair beautifully with a variety of beverages. For a warm option, consider serving them with a spiced apple cider or a rich coffee drink, such as cappuccino or latte. If you prefer a cold drink, a crisp hard apple cider or even a dessert wine can complement the flavors of the cheesecake perfectly.
Seasonal Garnishes or Accompaniments to Enhance the Experience
During fall, you can elevate the presentation by adding seasonal garnishes like candied pecans or walnuts. Drizzling with additional caramel and sprinkling some nutmeg or cinnamon on top can also enhance the flavors and bring that cozy autumn vibe to your dessert table.
Nutritional Information
Breakdown of Ingredients
Each Caramel Apple Cheesecake Bar contains a delightful mix of ingredients that provide both flavor and nutrition. On average, one bar contains approximately 250-300 calories, depending on the size and the amount of caramel used. Key ingredients like apples provide dietary fiber, while cream cheese and sour cream contribute calcium and protein.
Considerations for Dietary Restrictions or Modifications
If you’re looking to make these bars more suitable for dietary restrictions, consider using a gluten-free graham cracker crust to cater to gluten sensitivities. Additionally, substituting the sugar with a natural sweetener like maple syrup or coconut sugar can make it a healthier option. For a dairy-free version, use vegan cream cheese and coconut cream in place of regular cream cheese and sour cream.
Conclusion
Caramel Apple Cheesecake Bars are not just a dessert; they are an experience that brings together the comforting flavors of fall and the indulgence of a classic cheesecake. By following this detailed recipe and understanding the nuances of each ingredient, you will create a dessert that is both impressive and delicious. Whether you are serving them at a gathering or enjoying them at home, these bars are sure to delight your taste buds and leave a lasting impression. Enjoy your culinary adventure!

