Korean BBQ Meatballs with Spicy Mayo Dip: A Flavorful Fusion Delight
 Save
Save
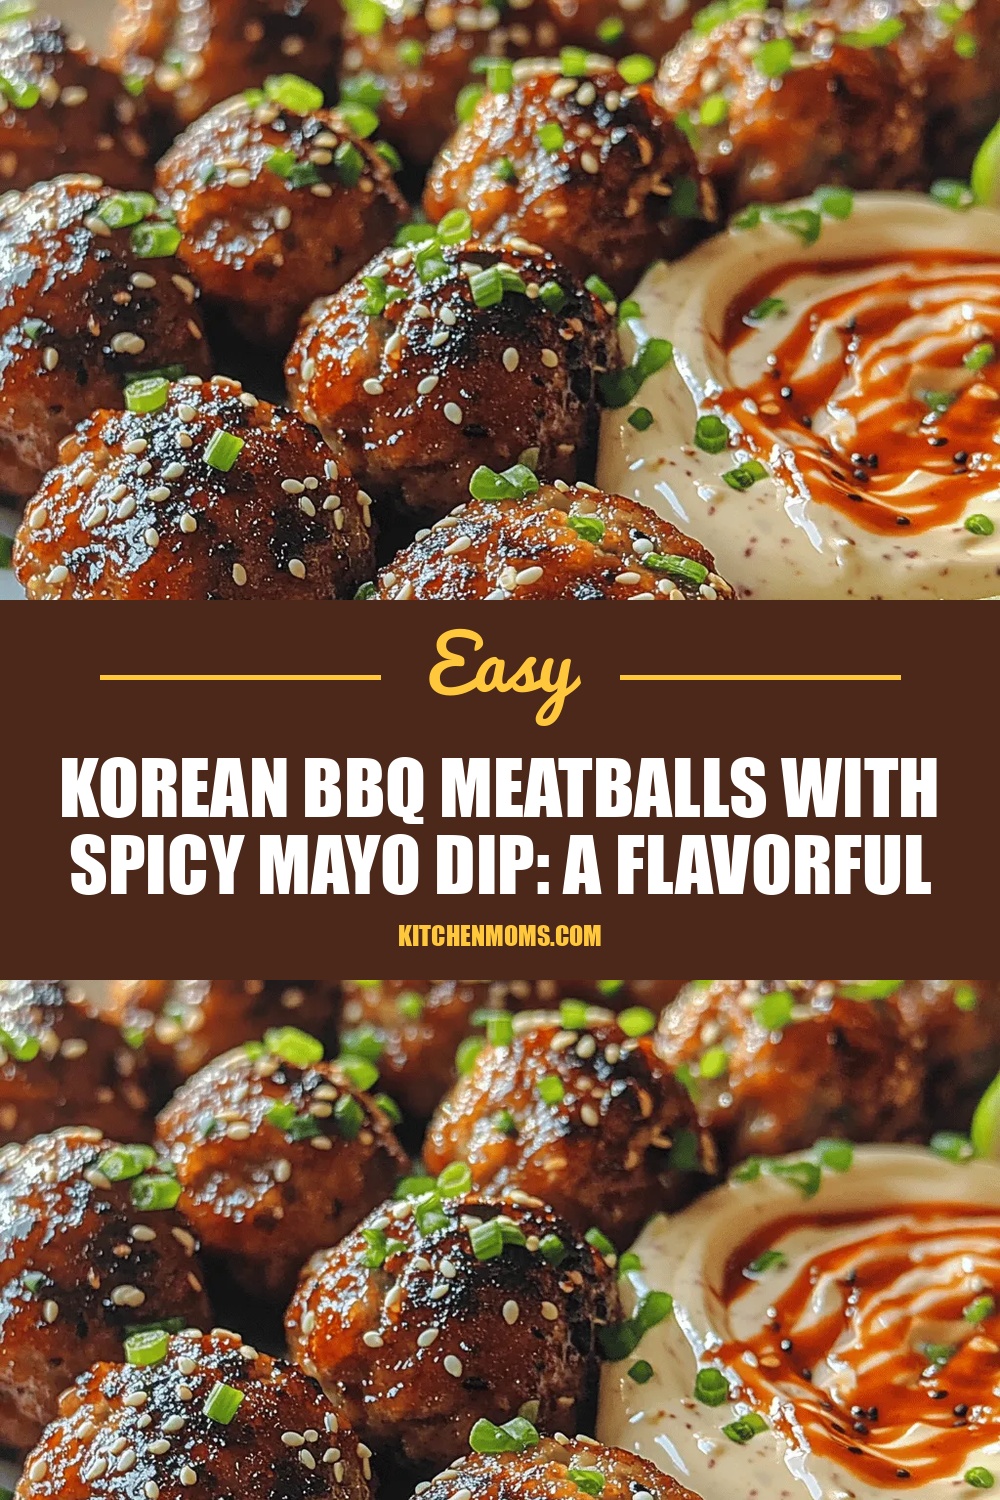
Imagine bite‑size meatballs that capture the smoky, sweet‑spicy magic of Korean barbecue, then dip them into a creamy, tangy mayo that makes every mouthful unforgettable. This Korean BBQ Meatballs with Spicy Mayo Dip brings that restaurant‑level excitement straight to your kitchen.
What sets this dish apart is the perfect marriage of a marinated pork‑beef blend, a glossy gochujang‑infused glaze, and a mayo dip that balances heat with silky richness. The result is a flavor‑packed appetizer that’s both familiar and daring.
Fans of Korean flavors, grill‑lovers, and anyone hunting a crowd‑pleasing snack will adore it. Serve it at game nights, pot‑luck parties, or as a lively starter for a dinner party—any occasion that calls for bold, shareable bites.
The process is straightforward: mix, shape, pan‑sear, finish in the oven, and whisk together a quick dip. In under an hour you’ll have a platter that looks as good as it tastes.
Why You'll Love This Recipe
Bold Korean Flavor: Gochujang, sesame oil, and a touch of honey create a sweet‑heat glaze that transports your palate straight to Seoul’s bustling street stalls.
Hand‑Friendly Bite Size: Small meatballs are perfect for snacking, dipping, and sharing, making them ideal for parties where guests love to graze.
Fast & Simple: The recipe requires just a few minutes of prep and a single pan‑to‑oven finish, so you can serve up impressive bites without a marathon kitchen session.
Customizable Dip: The spicy mayo can be tweaked for extra heat or creaminess, allowing you to match the dip to your personal spice tolerance.
Tips & Tricks
Perfecting the Recipe
Keep meat cold. Chill the meatball mixture for 10‑15 minutes before shaping; cold meat holds its shape better and yields juicier results.
Don’t overcrowd the pan. Cook in batches if necessary; crowding creates steam, preventing the crust from forming.
Use a meat thermometer. Check for 160°F (71°C) to guarantee safety without overcooking.
Flavor Enhancements
Add a splash of toasted rice vinegar to the glaze for bright acidity, or stir in a teaspoon of toasted sesame oil right before serving for extra nutty depth. For a citrus pop, grate a little fresh lime zest over the finished meatballs.
Common Mistakes to Avoid
Skipping the resting time after baking can cause juices to spill out, leaving the meatballs dry. Also, avoid using low‑heat searing; the crust won’t develop, and the glaze may slide off the surface.
Pro Tips
Finish with butter. A pat of butter melted into the glaze right before the oven step adds silkiness and rounds out the heat.
Use a silicone spatula. It helps coat each meatball evenly without breaking the delicate crust.
Prep the dip early. The mayo dip thickens as it chills, giving a richer texture for dipping.
Variations
Ingredient Swaps
Swap the pork‑beef blend for ground turkey or chicken for a lighter profile, or use firm tofu crumbled with a bit of cornstarch for a vegetarian version. Replace panko with gluten‑free breadcrumbs if needed, and experiment with maple syrup instead of brown sugar for a richer caramel note.
Dietary Adjustments
For gluten‑free diners, ensure the breadcrumbs are certified gluten‑free and use tamari in place of soy sauce. To make it dairy‑free, keep the recipe as is—no dairy is required. Keto lovers can replace the breadcrumbs with almond flour and use a sugar‑free sweetener in the glaze.
Serving Suggestions
Serve the meatballs on a bed of steamed jasmine rice, alongside pickled cucumber ribbons, or as a topping for crisp lettuce cups. For a party platter, add toasted seaweed strips and a side of kimchi for extra tang.
Storage Info
Leftover Storage
Allow the meatballs and dip to cool to room temperature, then transfer the meatballs to an airtight container and the dip to a small lidded jar. Store both in the refrigerator for up to 4 days. For longer keeping, portion the meatballs into freezer‑safe bags, lay flat to freeze, and use within 3 months.
Reheating Instructions
Reheat meatballs in a 350°F (175°C) oven for 10‑12 minutes, covered with foil to retain moisture, or pan‑fry briefly over medium heat with a splash of water. Warm the mayo dip gently in a microwave (15‑20 seconds) or let it sit at room temperature; do not overheat, as the mayo can separate.
Frequently Asked Questions
Can I make this recipe ahead of time?
How spicy is the dish, and can I adjust the heat?
What sides pair best with these meatballs?
This Korean BBQ Meatballs with Spicy Mayo Dip recipe delivers bold, authentic flavors with a quick, approachable technique. From the juicy, glaze‑clad meatballs to the cooling, creamy dip, every element is designed for maximum impact and minimal fuss. Feel free to swap proteins, tweak the heat, or pair with your favorite sides—cooking is your playground. Gather the ingredients, follow the steps, and enjoy a snack that’s as exciting as it is satisfying.
Korean BBQ Meatballs with Spicy Mayo Dip: A Flavorful Fusion Delight
Delicious Korean BBQ Meatballs with Spicy Mayo Dip: A Flavorful Fusion Delight
Ingredients
Meatball Mixture
- 1 lb ground pork
- ½ lb ground beef (80 % lean)
- ½ cup panko breadcrumbs
- 1 large egg, lightly beaten
- 2 green onions, finely sliced (green parts only)
Marinade & Glaze
- 3 cloves garlic, minced
- 1 tsp fresh ginger, grated
- 2 Tbsp gochujang (Korean chili paste)
- 2 Tbsp soy sauce (or tamari for gluten‑free)
- 1 Tbsp sesame oil
- 1 Tbsp brown sugar
- ½ tsp freshly ground black pepper
Spicy Mayo Dip
- ½ cup mayonnaise
- 1 Tbsp gochujang
- 1 tsp sriracha (adjust for heat)
- 1 tsp rice vinegar
- 1 tsp honey
- 1 tsp toasted sesame seeds (optional garnish)
Instructions
Forming & Browning
- Shape the meatballs. Scoop about 1‑inch portions (roughly 20 g each) and roll them between your palms into smooth spheres. This uniform size guarantees even cooking.
- Preheat the skillet. Heat a large cast‑iron or stainless‑steel skillet over medium‑high heat for 2‑3 minutes. Add 1 Tbsp of vegetable oil and swirl to coat. The oil should shimmer but not smoke.
- Sear the meatballs. Place the meatballs in a single layer, leaving a little space between each. Cook without moving them for 3‑4 minutes until the undersides develop a deep golden crust. Flip and brown the opposite side for another 3‑4 minutes. This step creates a flavorful Maillard layer that locks in juices.
Similar Recipes
 Appetizers
batch cook hearty chicken stew with sweet potatoes and kale
Learn how to make delicious batch cook hearty chicken stew with sweet potatoes and kale. Easy…
 Appetizers
Mini Chicken Alfredo Flatbread Pizzas: A Culinary Delight
Delicious Mini Chicken Alfredo Flatbread Pizzas: A Culinary Delight
 Appetizers
Baked Parmesan Crusted Chicken for Low Carb Dinner Ideas
Learn how to make delicious Baked Parmesan Crusted Chicken for Low Carb Dinner Ideas. Easy recipe…
 Appetizers
Mini Chicken Ranch Wonton Bites Recipe
Delicious Mini Chicken Ranch Wonton Bites Recipe
 Appetizers
Zesty Baked Turkey Meatballs with Lemon Yogurt Dip
Delicious Zesty Baked Turkey Meatballs with Lemon Yogurt Dip
 Appetizers
Creamy Ranch Bacon Macaroni Salad Recipe
Delicious Creamy Ranch Bacon Macaroni Salad Recipe
 Appetizers
Zesty Crunch Lemon Pepper Wings: Your Ultimate Guide to Flavorful Bites
Delicious Zesty Crunch Lemon Pepper Wings: Your Ultimate Guide to Flavorful Bites
 Appetizers
healthy spinach and lemon soup with garlic for winter immune support
Boost your immune system with our healthy spinach and lemon soup with garlic, perfect for winter.…

Lucy
I cook these recipes at home before they ever land here — simple ingredients, clear steps.