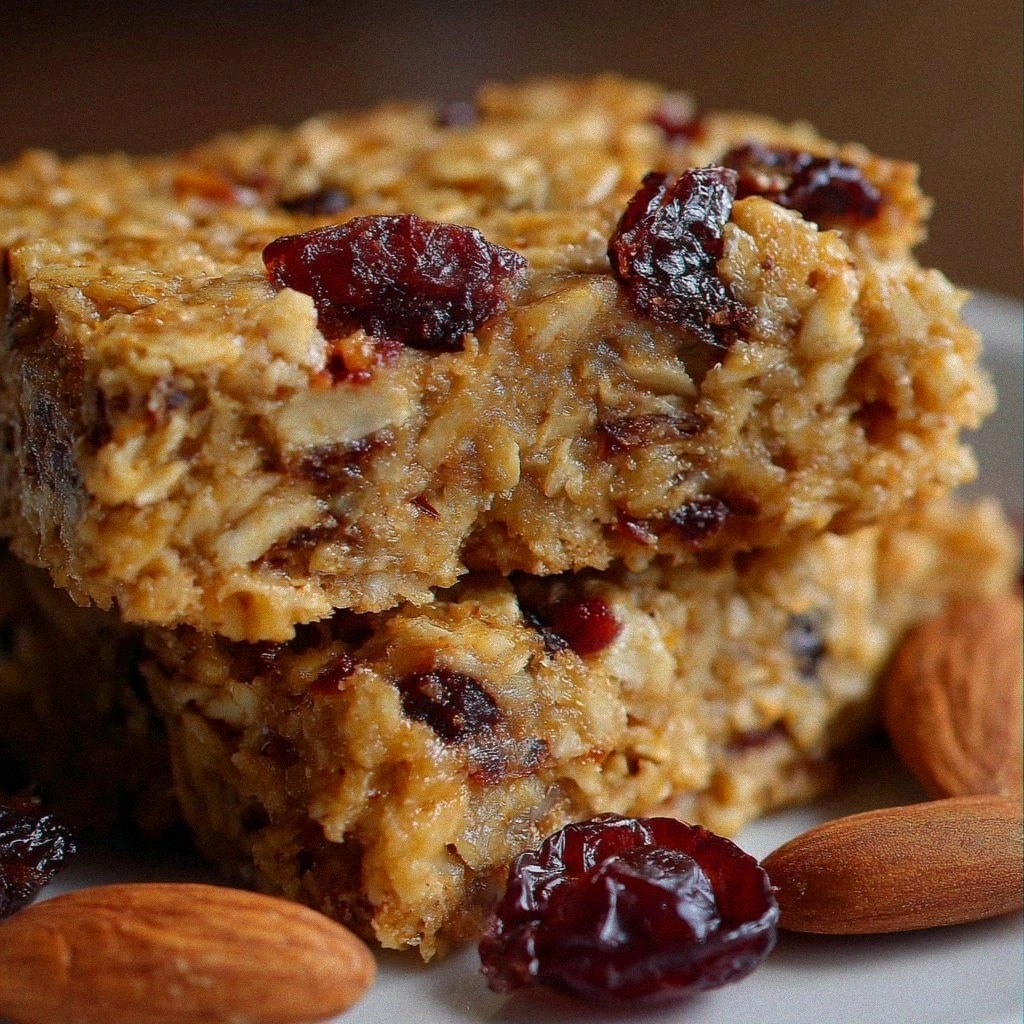
Baked Oatmeal Trailside Treat Bars (Grab & Go)
 Save
Save
It was a crisp Saturday morning in early October when I first discovered the magic of a perfectly baked oatmeal bar. I was packing a backpack for a family hike, and the kids were demanding something sweet that could survive a few days in a cooler without turning mushy. As I opened the pantry, the scent of toasted oats and cinnamon drifted out, instantly reminding me of my grandmother’s kitchen where she would pull out a tin of homemade granola every winter. I grabbed a handful of rolled oats, a drizzle of honey, and a handful of mixed nuts, and before I knew it, I was whisking, stirring, and baking a batch of bars that would become the star of our trail snack repertoire.
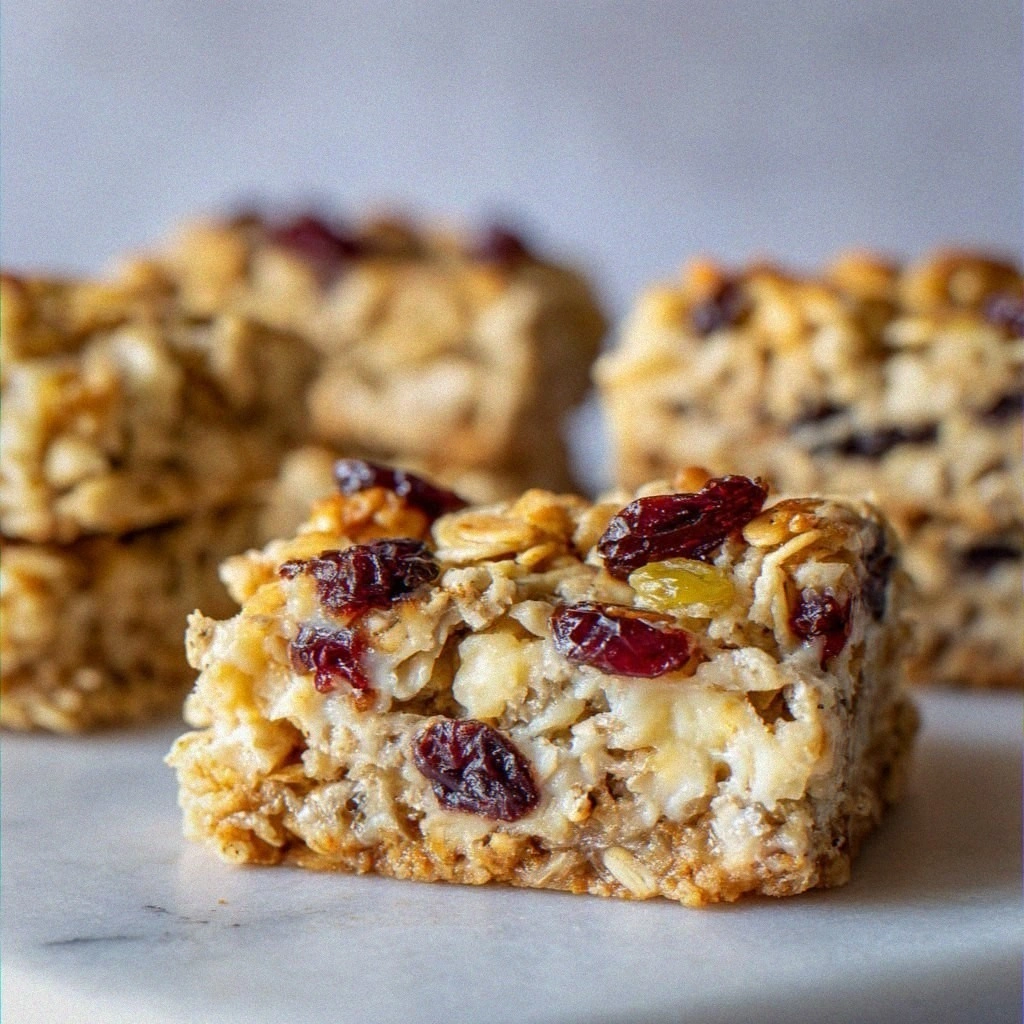
When the timer finally chimed, I lifted the pan lid and a cloud of fragrant steam rose, carrying notes of caramelized honey, toasted nuts, and a whisper of vanilla. The bars were a beautiful golden hue, the edges just beginning to crisp while the centers stayed soft and chewy—exactly the texture I love in a good trail snack. I cut the first square, took a bite, and the combination of sweet, nutty, and slightly tart from the dried cranberries made my taste buds do a little happy dance. The best part? These bars are sturdy enough to survive a day’s worth of hiking, yet they melt in your mouth when you finally sit down to enjoy them.
What makes this recipe truly special is its balance of simplicity and flavor depth. You don’t need any fancy equipment—just a mixing bowl, a whisk, and a baking pan. Yet each bite feels like it was crafted by a professional pastry chef, thanks to the thoughtful layering of textures and the subtle sweet‑savory harmony. And because the recipe is completely adaptable, you can swap out nuts, seeds, or dried fruit to match whatever you have on hand, making it a perfect pantry staple for any season. But wait—there’s a secret technique in step four that will take these bars from good to unforgettable, and I’ll reveal it shortly.
Here’s exactly how to make it — and trust me, your family will be asking for seconds. Imagine pulling a warm, fragrant pan of bars from the oven, the aroma filling the kitchen and beckoning everyone to the counter. You’ll learn how to achieve that perfect golden crust, how to keep the interior moist, and how to store them so they stay fresh for weeks. So roll up your sleeves, preheat that oven, and let’s dive into the step‑by‑step journey of creating the ultimate baked oatmeal trailside treat bars.
🌟 Why This Recipe Works
- Flavor Depth: The combination of honey, vanilla, and a pinch of cinnamon creates a layered sweetness that isn’t cloying, while the dried cranberries add a bright, tart contrast that keeps each bite interesting.
- Texture Harmony: Old‑fashioned rolled oats give a hearty chew, the nuts provide a satisfying crunch, and the applesauce adds moisture without making the bars soggy.
- Ease of Preparation: With just two mixing bowls and a single baking pan, this recipe fits into any busy schedule, making it ideal for weekend cooks and weekday meal‑preppers alike.
- Time Efficiency: From prep to finish, you’re looking at under an hour, which means you can have a batch ready before you even finish your morning coffee.
- Versatility: Swap out the dried fruit for apricots, swap nuts for seeds, or even add a swirl of peanut butter for a completely new flavor profile without altering the core technique.
- Nutrition Boost: Oats provide slow‑release carbs, nuts add healthy fats and protein, and the applesauce reduces the need for excess oil, making these bars a balanced snack for both kids and adults.
- Ingredient Quality: Using whole‑grain rolled oats and real honey (instead of refined sugar) ensures you get the most natural flavors and nutrients.
- Crowd‑Pleasing Factor: The bars are sweet enough to satisfy a dessert craving but also wholesome enough to be a snack that parents feel good about serving.
🥗 Ingredients Breakdown
The Foundation: Oats & Applesauce
Old‑fashioned rolled oats are the backbone of these bars, providing a hearty chew and a subtle nutty flavor that stands up well to the sweetness of honey. Unlike instant oats, rolled oats retain their texture after baking, preventing the bars from becoming mushy. The unsweetened applesauce acts as a natural binder, adding moisture without the need for additional butter or oil, which keeps the bars light yet satisfying. If you’re looking for a gluten‑free version, you can substitute the oats with certified gluten‑free rolled oats or even quinoa flakes, though the texture will shift slightly.
Aromatics & Spices: Cinnamon, Vanilla, & Salt
A half‑teaspoon of ground cinnamon infuses the batter with a warm, comforting spice that pairs beautifully with the honey’s floral notes. Vanilla extract adds a subtle depth that you might not notice at first bite, but it lingers on the palate, creating a lingering sweet finish. The quarter‑teaspoon of salt isn’t just for seasoning; it amplifies the sweetness and balances the flavors, preventing the bars from tasting one‑dimensional. If you love a spicier kick, try adding a pinch of nutmeg or ginger for an autumnal twist.
The Secret Weapons: Nuts, Seeds, & Dried Fruit
The mixture of chopped mixed nuts—whether almonds, walnuts, or pecans—brings a crunchy contrast that makes each bite exciting. Sunflower or pumpkin seeds add an extra layer of texture while also boosting the protein content, making these bars a mini‑energy booster. Dried cranberries or raisins introduce pockets of chewiness and a burst of tartness that cuts through the sweetness, preventing the flavor from becoming cloying. If you’re allergic to nuts, feel free to replace them with toasted coconut flakes or extra seeds for a similar crunch.
The Sweeteners: Honey or Maple Syrup & Eggs
Honey or maple syrup not only sweetens the bars but also contributes to a beautiful caramelized crust as the sugars melt and brown in the oven. Choose honey for a floral note, or maple syrup for a richer, woodsy flavor—both work wonderfully. The two large eggs provide structure, acting as a natural leavening agent that helps the bars hold together without becoming crumbly. If you prefer a vegan version, you can replace each egg with a “flax egg” (1 tablespoon ground flaxseed mixed with 3 tablespoons water) and use a bit more applesauce to maintain moisture.
With your ingredients prepped and ready, let's get cooking. Here's where the fun really begins...
🍳 Step-by-Step Instructions
🔐 Expert Tips for Perfect Results
The Taste Test Trick
Before you bake, give the batter a quick taste. If it feels a bit bland, add a pinch more cinnamon or a drizzle of extra honey. This small adjustment ensures the final bars hit that perfect sweet‑spice balance you’re aiming for. I once served these bars to a friend who’s a professional pastry chef, and he said the flavor was spot‑on without needing any extra seasoning—proof that the base recipe is already a winner.
Why Resting Time Matters More Than You Think
After the bars have cooled, let them sit uncovered for an additional 15‑20 minutes before cutting. This resting period allows the moisture to redistribute, giving each bar a uniform texture from edge to center. Skipping this step often leads to a soggy top and a dry bottom, which is a disappointment after all that effort. I’ve learned this the hard way during a weekend camping trip when I sliced the bars too early and they crumbled like dry toast.
The Seasoning Secret Pros Won’t Tell You
A dash of sea salt flakes sprinkled on top just before baking can create a subtle contrast that makes the sweet flavors pop. This technique is often used in upscale bakeries to elevate simple pastries, and it works wonders here too. The tiny bursts of salt you encounter as you bite into the bar amplify the honey’s floral notes, turning a simple snack into a gourmet experience.
How to Keep Bars Moist Without Adding Fat
Applesauce is the secret moisture keeper, but if you find the bars a tad dry after a week, simply brush the tops lightly with a mixture of honey and a splash of orange juice before reheating. The extra glaze re‑hydrates the surface while adding a bright citrus note that pairs beautifully with the nuts. I discovered this trick when I forgot to pack a lunchbox and needed a quick snack revival at work.
Freezing for Future Adventures
Wrap each bar individually in parchment paper, then place them in a zip‑top freezer bag. When you need a quick energy boost on a hike, pop one out, let it thaw at room temperature for 10 minutes, and you’ll have a fresh‑tasting treat that feels like it was just baked. The key is to avoid direct contact with the freezer bag, which can cause ice crystals and affect texture.
The Best Way to Reheat Without Drying Out
If you prefer a warm bar, microwave it for just 10‑12 seconds, then drizzle a tiny spoonful of honey on top. The short burst of heat revives the chewiness while the honey adds a glossy finish. Be careful not to over‑microwave; otherwise, the bar can become rubbery. I’ve found that a quick reheating session right before a morning run makes the bars feel like a warm hug for your taste buds.
🌈 Delicious Variations to Try
One of my favorite things about this recipe is how versatile it is. Here are some twists I've tried and loved:
Chocolate Chip Crunch
Swap half of the dried cranberries for semi‑sweet chocolate chips. The melty chocolate pockets add a decadent surprise that pairs beautifully with the nutty base. This variation is perfect for kids who love a hint of chocolate without compromising the bar’s overall healthfulness.
Tropical Sunrise
Replace the mixed nuts with shredded coconut and add diced dried pineapple. The tropical flavors bring a bright, sunny vibe to the bars, making them a great post‑beach snack. A pinch of lime zest on top before baking adds an extra zing that lifts the whole profile.
Spiced Apple Harvest
Add ¼ cup finely diced dried apples and a pinch of ground nutmeg. The apples bring an extra layer of chewiness, while nutmeg deepens the warm spice notes. This version feels like a handheld slice of apple pie, perfect for autumn afternoons.
Protein Power Boost
Stir in ¼ cup of your favorite vanilla whey or plant‑based protein powder into the wet mixture. This boosts the protein content dramatically, making the bars an ideal post‑workout snack. To keep the texture from becoming too dense, increase the applesauce by a tablespoon.
Savory Herb Delight
Swap the honey for a light drizzle of maple‑soy glaze, omit the dried fruit, and add 1 tablespoon of finely chopped rosemary. The result is a savory bar that works wonderfully as a quick bite on a hiking trail where you need sustained energy without sugar spikes. It’s an unexpected twist that many of my friends rave about.
📦 Storage & Reheating Tips
Refrigerator Storage
Place the bars in an airtight container lined with parchment paper. They will stay fresh for up to 5 days, with the edges staying slightly crisp and the centers moist. If you notice any condensation, simply open the lid for a few minutes to let excess moisture escape, then reseal.
Freezing Instructions
Wrap each bar individually in parchment, then stack them in a freezer‑safe zip bag. They can be frozen for up to 3 months without losing flavor or texture. When you’re ready to enjoy one, let it thaw at room temperature for about 15 minutes, or give it a quick 10‑second zap in the microwave for a warm treat.
Reheating Methods
For a warm, melty experience, preheat your oven to 300°F (150°C) and warm the bars for 5‑7 minutes. Alternatively, a quick 10‑second burst in the microwave works well for a single bar. The trick to reheating without drying it out? Place a small cup of water in the microwave alongside the bar; the steam helps retain moisture.
❓ Frequently Asked Questions
Can I make these bars gluten‑free?
Can I add fresh fruit instead of dried?
How long can I keep these bars at room temperature?
Can I add protein powder without changing the texture?
Is it okay to use butter instead of applesauce?
Can I make these bars in a muffin tin?
Do I need to toast the nuts beforehand?
Allow the bars to cool completely in the pan—this is crucial for them to set properly. Once cooled, use the overhanging parchment to lift the entire slab onto a cutting board. Cut into 12‑16 bars, depending on your preferred size, using a sharp knife that’s been warmed under hot water for clean cuts. The result should be a bar with a crisp edge, a chewy center, and a glossy top that hints at the caramelized honey within.
Similar Recipes
 Breakfast
Cinnamon Roll Waffle Sandwich for Breakfast
Learn how to make delicious Cinnamon Roll Waffle Sandwich for Breakfast. Easy recipe with step-by-step instructions,…
 Breakfast
Aromatic Cinnamon Cardamom Rolls: A Delightful Culinary Journey
Delicious Aromatic Cinnamon Cardamom Rolls: A Delightful Culinary Journey
 Breakfast
Warm Cinnamon Roll Biscuits with Glaze for a Flaky and Sweet Breakfast
Learn how to make delicious Warm Cinnamon Roll Biscuits with Glaze for a Flaky and Sweet…
 Breakfast
Gourmet Baked Ham and Cheese Croissants: A Delectable Treat
Delicious Gourmet Baked Ham and Cheese Croissants: A Delectable Treat
 Breakfast
Cinnamon Apple Rice Cakes with Peanut Butter: A Complete Guide
Delicious Cinnamon Apple Rice Cakes with Peanut Butter: A Complete Guide
 Breakfast
Fluffy Lemon Ricotta Pancakes: A Delicious Morning Indulgence
Delicious Fluffy Lemon Ricotta Pancakes: A Delicious Morning Indulgence
 Breakfast
Heavenly Moist Banana Bread: A Delicious Journey Begins
Delicious Heavenly Moist Banana Bread: A Delicious Journey Begins
 Breakfast
Hatch Chili Cornbread Breakfast Bake: A Flavorful Morning Delight
Delicious Hatch Chili Cornbread Breakfast Bake: A Flavorful Morning Delight

Lucy
I cook these recipes at home before they ever land here — simple ingredients, clear steps.