Fruity Frozen Yogurt Granola Ice Cream Cups: A Healthy Dessert Delight
In a world increasingly focused on healthy eating, desserts often find themselves at the back of the line, overshadowed by savory meals. However, the concept of healthy desserts is gaining traction, with creative recipes that satisfy sweet cravings without compromising nutritional value. One such delightful creation is the Fruity Frozen Yogurt Granola Ice Cream Cups. This refreshing treat is not only a guilt-free alternative to traditional ice cream but also a vibrant and colorful dessert that appeals to both the eye and the palate.
These Fruity Frozen Yogurt Granola Ice Cream Cups are incredibly versatile, making them suitable for various occasions—from casual summer gatherings and birthday parties to a simple afternoon snack. They can be customized to fit any dietary preferences and are perfect for children and adults alike. By layering creamy yogurt, fresh berries, and crunchy granola, you create a dessert that is both nutritious and satisfying.
Understanding the Ingredients
Before diving into the preparation of these delightful ice cream cups, it’s essential to understand the key ingredients that make this recipe a standout. Each component not only contributes to the flavor and texture but also offers numerous health benefits.
Greek Yogurt
At the heart of this recipe is Greek yogurt, which plays a crucial role in achieving the creamy texture that mimics traditional ice cream. Unlike regular yogurt, Greek yogurt is strained, resulting in a thicker consistency and higher protein content. This makes it a fantastic choice for those looking to boost their protein intake while enjoying a sweet treat. Additionally, Greek yogurt is rich in probiotics, which promote gut health and enhance digestion.
Natural Sweeteners: Honey vs. Maple Syrup
To sweeten the yogurt mixture, you have the option of using natural sweeteners like honey or maple syrup. Honey has a distinct floral flavor that pairs beautifully with yogurt and berries, while maple syrup offers a unique earthy sweetness that can enhance the overall flavor profile of the dessert. Both options are healthier alternatives to refined sugar, providing a natural source of energy along with essential nutrients.
Mixed Berries
The addition of mixed berries is what truly elevates these ice cream cups. Packed with antioxidants, vitamins, and minerals, berries such as strawberries, blueberries, raspberries, and blackberries not only add vibrant color but also a burst of flavor. Their natural sweetness complements the tangy yogurt, while their high fiber content helps promote a feeling of fullness. Furthermore, the variety of berries allows for endless customization based on seasonal availability or personal preference.
Granola
Granola serves as the crunchy layer that balances the creamy yogurt and juicy berries. With various types of granola available—ranging from nut-based to oat-based varieties—you can choose one that aligns with your taste and nutritional goals. Granola is generally high in fiber and healthy fats, making it an excellent addition to any meal or snack. It provides a satisfying crunch that contrasts beautifully with the smooth yogurt and soft berries, creating a delightful textural experience.
Nuts and Dried Fruits
Finally, incorporating nuts and dried fruits into your granola layer adds an extra dimension of flavor and texture. Nuts like almonds, walnuts, or pecans contribute healthy fats and protein, while dried fruits such as raisins or cranberries provide a natural sweetness. This combination not only enhances the nutritional profile but also adds a rustic touch to your dessert, making each bite a medley of tastes and sensations.
Preparing the Frozen Yogurt Layer
Now that we’ve explored the ingredients, it’s time to delve into the preparation of the frozen yogurt layer. Achieving the perfect yogurt mixture is crucial for creating a smooth and creamy dessert that holds up well in the freezer.
Step 1: Choosing Your Yogurt
Start by selecting a high-quality Greek yogurt. You can opt for plain yogurt to keep it simple or flavored varieties like vanilla or berry for added taste. If you prefer a dairy-free option, coconut yogurt is a fantastic alternative that brings a delightful creaminess to the recipe.
Step 2: Mixing the Yogurt and Sweetener
In a mixing bowl, combine your chosen Greek yogurt with your natural sweetener of choice. For a standard serving, about 2 cups of yogurt with 2-4 tablespoons of honey or maple syrup should suffice, but feel free to adjust the sweetness to your liking. Whisk the mixture thoroughly until well combined, ensuring that the sweetener is evenly distributed throughout the yogurt.
Step 3: Achieving the Right Consistency
To achieve the perfect consistency, consider adding a splash of milk—dairy or non-dairy—if the mixture feels too thick. This will help create a smoother texture that freezes nicely. Aim for a creamy, pourable consistency that still holds its shape.
Step 4: Gently Folding in Mixed Berries
Once your yogurt mixture is ready, it’s time to fold in the mixed berries. Use about 1 to 1.5 cups of fresh berries, and gently incorporate them into the yogurt using a spatula. Be careful not to overmix, as you want to maintain the integrity of the berries and create a visually appealing dessert with vibrant specks of fruit throughout.
This step is crucial for presentation; the colors of the berries will contrast beautifully against the white yogurt, creating an eye-catching dessert that is sure to impress.
Assembling the Ice Cream Cups
With your yogurt layer prepared, it’s time to assemble the Fruity Frozen Yogurt Granola Ice Cream Cups. This stage is where you can get creative with the layering, ensuring each component is well-distributed for maximum flavor.
Step 1: Choosing Your Cups
Select small cups or ramekins for serving. Clear cups are particularly effective for showcasing the beautiful layers of yogurt, berries, and granola. Consider portion sizes to ensure your dessert is satisfying without being overwhelming.
Step 2: Layering the Ingredients
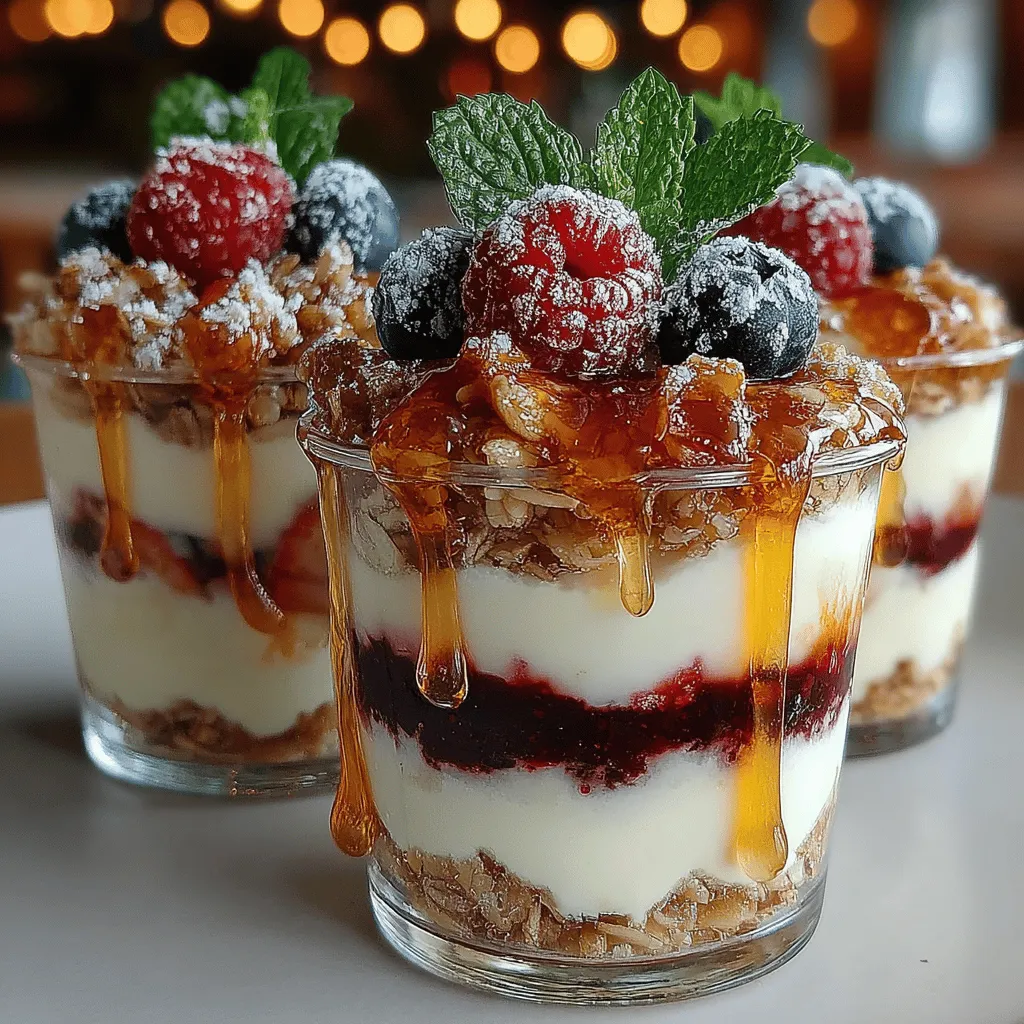
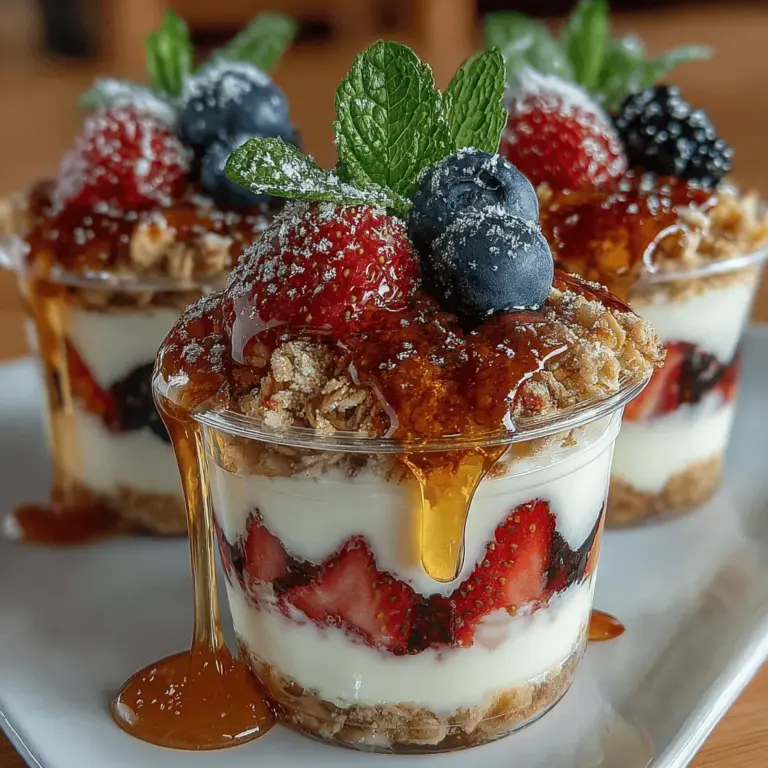
Begin by spooning a layer of the yogurt mixture into the bottom of each cup, filling them about one-third full. Follow this with a layer of granola, pressing it down slightly to create a stable base. Add another layer of yogurt on top, ensuring that the layers are distinct and visible. Repeat this process until the cups are filled to just below the rim.
Step 3: Reducing Air Bubbles
To achieve even layering and a polished look, tap the cups gently on the counter to release any trapped air bubbles. This will help your layers stay intact and create a more refined appearance.
Step 4: Creative Presentation
For a finishing touch, consider adding a few extra berries and a sprinkle of granola on top of each cup. This not only enhances the visual appeal but also provides a delightful crunch when served. If you’re feeling adventurous, drizzle a bit of honey or maple syrup over the top for an added flavor boost.
As you prepare to enjoy these Fruity Frozen Yogurt Granola Ice Cream Cups, remember that the joy of this recipe lies not only in its delicious taste but also in its adaptability. Whether you’re preparing them for a special occasion or simply indulging in a healthy dessert at home, these ice cream cups are sure to become a favorite in your culinary repertoire.

Creating the Granola Layer
When it comes to crafting the granola layer for your Fruity Frozen Yogurt Granola Ice Cream Cups, the right choice of granola can elevate the entire dessert. You have two options: you can either purchase a pre-made granola or create a custom blend at home. If you’re opting for store-bought, look for granola that is low in added sugars and made with whole grains. On the other hand, making your own granola allows you to control the ingredients and tailor it to your taste.
Benefits of Incorporating Nuts and Dried Fruits
Granola is not just a source of texture; it’s also a powerhouse of nutrition. Incorporating nuts such as almonds, walnuts, or pecans adds healthy fats, protein, and a satisfying crunch. Dried fruits like cranberries, apricots, or raisins introduce natural sweetness and additional vitamins. These ingredients not only enhance the flavor profile but also contribute to a more balanced dessert.
Instructions for Mixing and Pressing the Granola
To prepare the granola layer, follow these simple steps:
1. Choose Your Base: If you are making homemade granola, combine rolled oats, nuts, seeds, and a natural sweetener like honey or maple syrup in a large bowl.
2. Add Dried Fruits: Mix in your choice of dried fruits to the mixture. This could be cranberries for a tart flavor or coconut flakes for a tropical twist.
3. Bake (If Homemade): Spread the mixture on a baking sheet and bake at 350°F (175°C) for about 15-20 minutes, stirring halfway through until golden brown. Allow it to cool completely.
4. Combine Ingredients: If using store-bought granola, simply combine it with your selected nuts and dried fruits in a mixing bowl.
5. Press into the Cups: Once your granola mix is ready, take your serving cups and evenly distribute the mixture into the bottom. Use the back of a spoon or your fingers to press the mixture down firmly to create a solid base. This helps achieve that satisfying crunch when you bite into the dessert.
Suggestions for Alternative Mix-ins or Flavor Variations
Feel free to get creative with your granola layer! You can add spices like cinnamon or nutmeg for warmth or incorporate chocolate chips for a decadent twist. If you’re aiming for an even healthier version, consider using puffed rice or quinoa for a lighter texture. The beauty of this dessert is that it allows you to tailor the flavors to suit your preferences.
Final Layering and Freezing Process
With your granola layer firmly in place, it’s time to top off your cups with the yogurt layer.
Instructions for Topping Off the Cups with Yogurt
1. Prepare the Yogurt: In a mixing bowl, stir your chosen yogurt until smooth. If you want to add extra flavor, consider mixing in a bit of vanilla extract or a splash of fruit puree.
2. Fill the Cups: Using a spoon or a piping bag, carefully fill each cup over the granola layer with yogurt. Leave a little space at the top to allow for expansion during freezing.
3. Smooth the Surface: Use a spatula or the back of a spoon to smooth out the yogurt layer, ensuring a beautiful finish. This not only looks appealing but also ensures a more uniform texture when served.
Importance of Freezing Time for Achieving the Right Texture
After layering, place the cups in the freezer for at least 4-6 hours, or until the yogurt is completely frozen. This step is crucial, as it allows the yogurt to firm up, giving you that delightful ice cream-like texture.
Tips for Covering and Storing the Cups in the Freezer
To ensure your Frozen Yogurt Granola Ice Cream Cups maintain their freshness, cover them with plastic wrap or aluminum foil. This prevents freezer burn and keeps unwanted odors from affecting the flavor. If you’re planning to store them for longer than a week, consider placing them in an airtight container.
Serving Suggestions
When it’s time to enjoy your Frozen Yogurt Granola Ice Cream Cups, the presentation can enhance the overall experience.
Ideal Serving Conditions
These cups are best served directly from the freezer, but allow them to sit at room temperature for about 5-10 minutes before serving. This slight thawing will help soften the yogurt, making it easier to scoop and enhancing the overall mouthfeel.
Ideas for Garnishing
To elevate the visual appeal and flavor, consider garnishing your cups with:
– Fresh Berries: Strawberries, blueberries, or raspberries provide a burst of freshness and color.
– Honey Drizzle: A drizzle of honey adds sweetness and gloss.
– Mint Leaves: A sprig of mint not only adds a pop of color but also a refreshing taste.
Tips on How to Soften the Cups Before Serving
If your cups are too hard to scoop, simply run the sides of the cups under warm water for a few seconds. This will help loosen the frozen yogurt from the sides, making it easier to serve.
Discussion of Pairing Ideas
For a delightful dessert experience, consider pairing your Fruity Frozen Yogurt Granola Ice Cream Cups with a chilled glass of almond milk, herbal tea, or a light sparkling beverage. These drinks complement the flavors without overpowering the dessert.
Nutritional Benefits of Fruity Frozen Yogurt Granola Ice Cream Cups
The health benefits associated with the key ingredients in your Fruity Frozen Yogurt Granola Ice Cream Cups make them a guilt-free indulgence.
Breakdown of Health Benefits
– Yogurt: Packed with probiotics, yogurt promotes gut health and is a good source of calcium and protein.
– Granola: The oats and nuts provide fiber, which aids digestion, while the antioxidants from dried fruits help combat oxidative stress.
– Fruits: Fresh fruits add vitamins, minerals, and natural sweetness without the need for added sugars.
Comparison to Traditional Ice Cream
When compared to traditional ice cream, these cups offer a significantly lower calorie count and a better nutritional profile. While a serving of regular ice cream can contain upwards of 200 calories and a hefty dose of added sugars and saturated fats, these yogurt cups can be as low as 100 calories per serving, depending on the ingredients used. This makes them a much healthier alternative for those watching their calorie intake or seeking a more nutritious dessert option.
Highlighting the Importance of Moderation and Balance
While these cups are healthier than conventional ice cream, it’s essential to enjoy them in moderation. Including a variety of foods in your diet ensures you receive all the nutrients your body needs.
Conclusion
Preparing and enjoying Fruity Frozen Yogurt Granola Ice Cream Cups brings joy and satisfaction, whether you’re indulging solo or sharing with friends and family. The process of layering the granola and yogurt allows for creativity, making it a fun kitchen activity that can be tailored to various tastes and dietary preferences.
I encourage you to experiment with different flavors, mix-ins, and garnishes to make this dessert truly your own. Whether you’re celebrating a special occasion or simply treating yourself, these cups are a versatile option that fits seamlessly into any dietary lifestyle. Enjoy the sweet rewards of your efforts and share this delightful treat with those you love!

